Contact Us

Use the form on the right to contact us.

You can edit the text in this area, and change where the contact form on the right submits to, by entering edit mode using the modes on the bottom right. 


123 Street Avenue, City Town, 99999

(123) 555-6789

email@address.com


You can set your address, phone number, email and site description in the settings tab.
Link to read me page with more information.

Blog

Filtering by Tag: breakfast

torta di mele | apple tart

Andrea

My goodness...I should not have underestimated the powers of a beautiful salad! Thank you all for your sweet comments and enthusiasm. I won't lie, I fully expected to receive a whopping 2 comments on yesterday's post, so I appreciate all 10 of you proving me wrong. :)

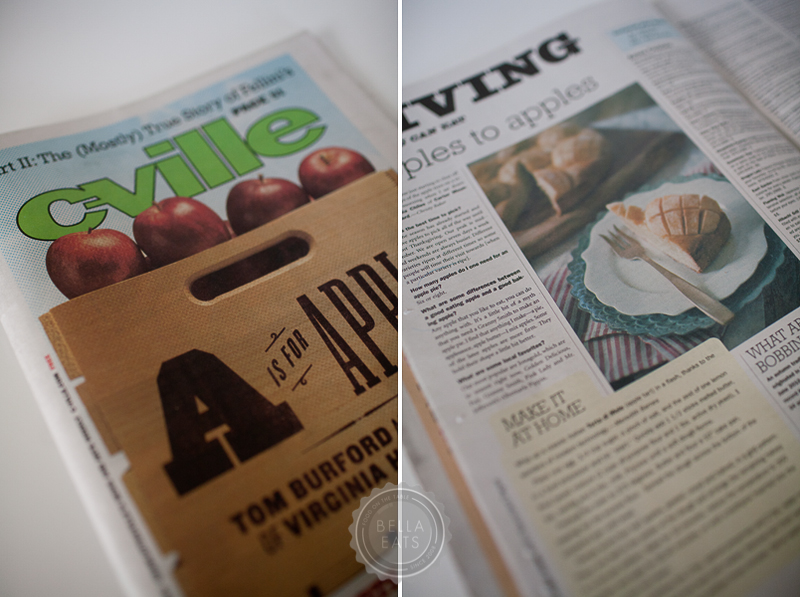
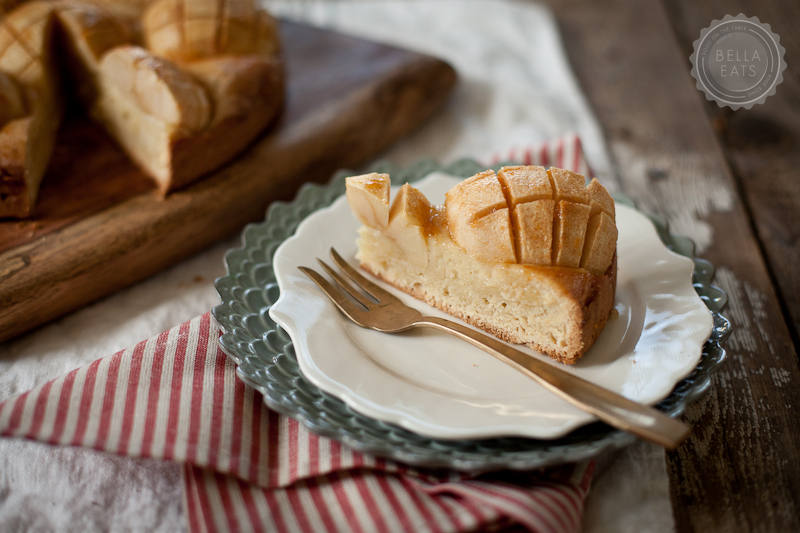
As promised, here is an apple tart to kick off your weekend. It is your reward for yesterday's salad love, friends. This here tart is one of those pesky editorial assignments that I was telling you about, the completely fun and delicious and right-up-my-ally projects that cause me to eat more sweets/sushi/potato chips/wedding cake than maybe I should. This particular recipe was made and photographed for C-Ville Weekly and published in last week's issue. I'm just a little behind in getting it up here on Bella Eats. But, for all of you Charlottesville folks, Relay Foods has all of the ingredients ready to add to your cart in one click should you choose to make this apple tart this Fall. And you really should, as it is simple and lovely and delicious...three qualities I strive for in most food coming out of my kitchen.

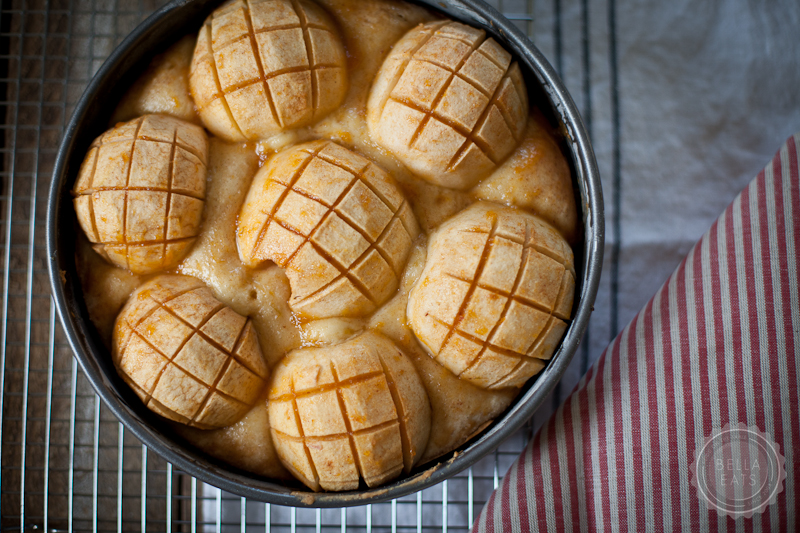
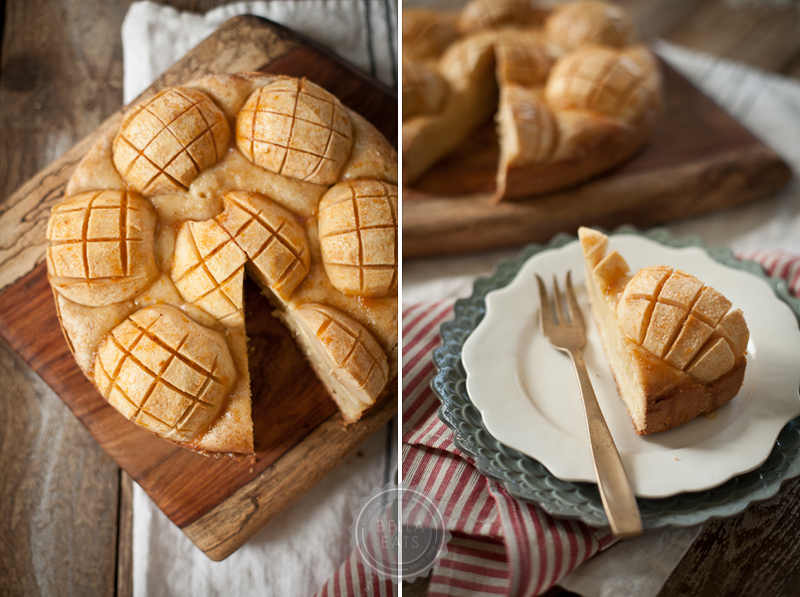
Your tart will most likely look just a little bit different than mine because, well, I messed with the recipe a little bit. And wrongly, I might add. Your apples probably won't sit so high on the base, and the base itself won't be quite as dense. Even though I added a tad too much flour we still loved this treat.  I can't wait to make it again, sticking to the recipe below.

The pattern cut into the apples is, other than pretty, very helpful to slicing the tart in any way you might wish.

Torta di Mele (Apple Tart)

serves 8

from Meredith Barnes, C-Ville Weekly October 4-10, 2011

Ingredients

  • 1 egg
  • 3/4 cup sugar
  • pinch of salt
  • zest from 1 lemon
  • 1-1/2 sticks (3/4 cup) unsalted butter, melted
  • 2 cups all purpose flour
  • 1 tbsp active dry yeast
  • 1 tsp vanilla extract
  • 6 tbsp milk
  • 4 tart apples, peeled, cored, and halved
  • 2 tbsp apricot preserves
  • 2 tbsp water
Method:
  1. Preheat the oven to 375°.  Butter and flour a 9" or 10" cake pan, tapping to remove excess flour.
  2. Place the egg, sugar, salt, and lemon zest in the large bowl of a food processor.  Pulse until mixture is starting to combine and then add the melted butter, continuing to pulse until smooth.
  3. Combine the flour and yeast, and add to the mixture in the processor. Pulse until evenly distributed, add the milk and vanilla, and then process until a soft batter forms.  
  4. Pour the batter into the prepared pan and spread across the pan until it is level.
  5. Deeply score the 8 apple halves in a grid pattern.  Place one half in the center of the cake pan and arrange the remaining halves in a circular pattern. Bake for 10 minutes, the reduce the oven temperature to 350° and bake for 35-40 minutes more, until a toothpick inserted into the center comes out clean.
  6. Meanwhile, combine the 2 tbsp apricot preserves with the 2 tbsp water in a small saucepan and stir over low heat until melted.  When the tart comes out of the oven, brush it with the preserves and bake for an additional 3 minutes.  Serve warm.

apple dapple cake, and some food photography tips

Andrea

I mentioned last week that I'd be giving a little chat about food photography underneath the Relay Foods tent at the Heritage Harvest Festival last Saturday. Since so many of my readers are not local and would not have had the opportunity to stop by, I thought I'd post a summary of that presentation here on Bella Eats. And, for those of you who just want the recipe for the apple dapple cakes pictured throughout, it's at the end. :)

I get questions quite often about my photography and how I capture the images that I present here. The most important piece of advice that I ever give inquiring minds is this: PRACTICE. If you reach waaayyy back in the Bella Eats archives you'll see that my photography has changed immensely in the nearly 3 years since I've been sharing recipes from my kitchen. In fact, I give this little weblog 100% credit for renewing my passion for photography after architecture stole it away for 10 years. When I began Bella Eats I relied mostly on my little Canon Powershot point-n-shoot camera, and quickly switched over to my DSLR once the focus of the site moved from a daily food diary to a more focused recipe + photography portfolio. With that change, the amount of time I spent capturing images for each recipe increased. With each post my eye strengthened and developed until I'd created a style all my own, certainly influenced by but never outright imitating other food photographers that I admire. The reason that my photography looks and feels as it does today is because I keep picking up my camera, keep following the blogs and magazines and artists that inspire me, keep challenging myself in new ways with each project I tackle. And I promise you, 3 years from now my photography will be different than it is today because of the life I will live during that time. Everything experienced in life is an influence on one's art. So...PRACTICE. It is the ONLY way to become the photographer you wish to be. Everything else is just details.

And now, on to those details. This is by no means a comprehensive guide or the 'right/only' way to photograph food. I mostly hope to give some insight into how I work, and the decisions I make while capturing images for Bella Eats. I don't go into the technical aspects of working your camera, but simply challenge you to look at your photography from another point of view. If you have any specific questions, please feel free to ask them in the comments section!

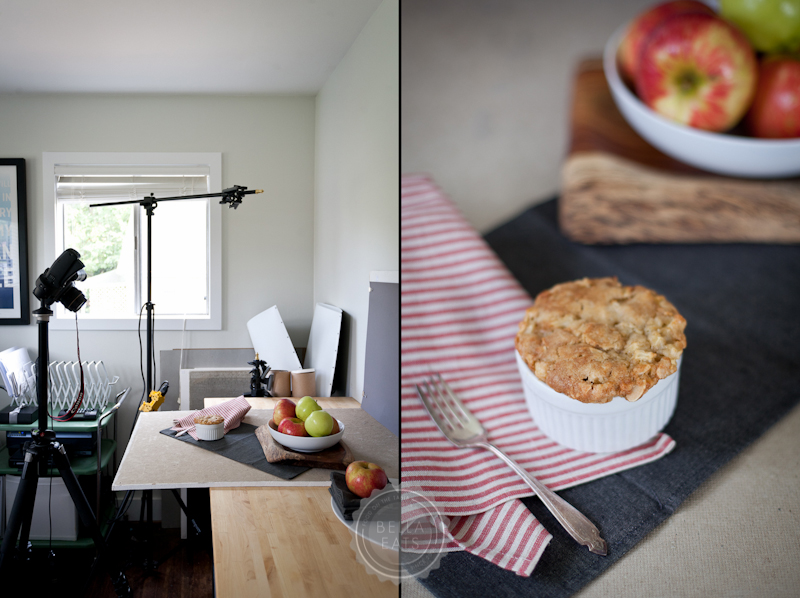
I first want to show you that I don't have a big fancy studio with a beautiful gourmet kitchen directly adjacent to it. Boy, do I wish I did! Someday... Right now Brian and I share a 10'x10' home office space, one side dedicated to our desks and computers and the other dedicated to my work table, some prop storage, and camera equipment. The end of that table is where most of my photography happens, unless I'm feeling like a different sort of lighting or need a bit more space, and then I'll move out to our dining room. (I'll show you the difference in light quality between those spaces a little later.) It is very helpful to have this dedicated space for photos, so that our dining room isn't constantly taken over with my equipment as it was for the first 2 years of writing Bella Eats. If you can manage to clear off a 2'x3' space to keep set up, I highly recommend it.

LIGHT

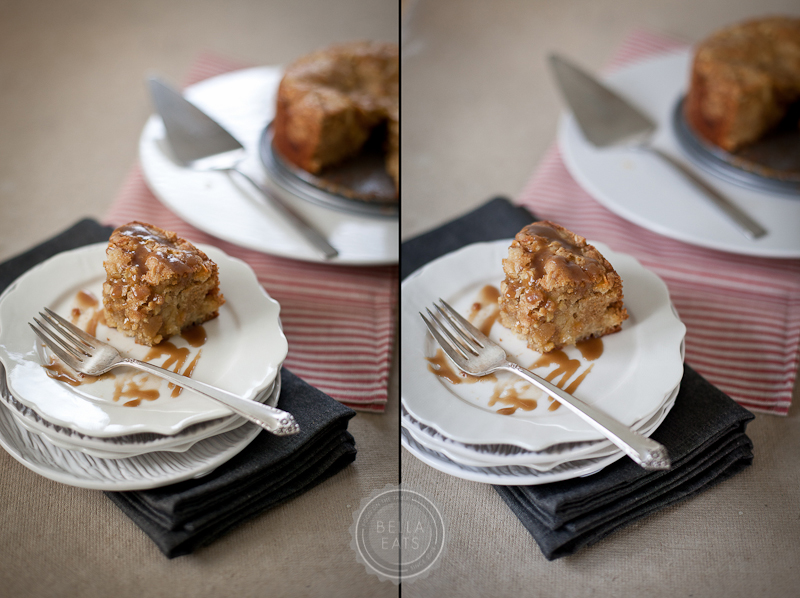
All recipes on Bella Eats are photographed using natural light. I did dabble with artificial lighting momentarily, and occasionally break out my Lowel Egos if I will be shooting on location in a restaurant, but 95% of the time the images captured are lit using indirect or diffused sunlight. So, the first thing that I do when I am planning to photograph a recipe is I think about the quality of light that I am looking for in my images. The pair of shots below demonstrates the difference in lighting in my dining room (left) versus my studio (right). Both images are perfectly fine, but there are subtle differences that I'd like to point out:

1. Temperature. My dining room windows face west and north, and these images were captured in the late afternoon, so the color cast in that space was much warmer than the cast in my office/studio, which faces east and north. 

2. Direction of light. In the image on the left, the windows are to the left and in front of the camera, which highlights the cake stand nicely but casts more shadow on the right side of the cut piece. In the image on the right, the windows are to the left and behind the camera, which provides nice, even lighting on the cut piece but leaves the depth of the image more flat. The difference is especially apparent if you look at the folded end of the gray towel.

Again, neither of these images represents the 'right' way to light a subject, just two different perspectives. And there are many, many more options!
CLEAN + STAGE

This is pretty self explanatory. Do as much set-up as you can before you step foot in the kitchen. Analyze the recipe, pick your backdrops, linens, dishes, and extra props. Set up the camera and stage the first shot while thinking about how you plan to capture the others. For something like these mini cakes, this step isn't as big of a deal. But if you have a cast iron pan of fajitas coming off the stovetop and you want to photograph the steam rising from those sizzling veggies, you better have your studio space ready to go!
RECIPE ANALYSIS

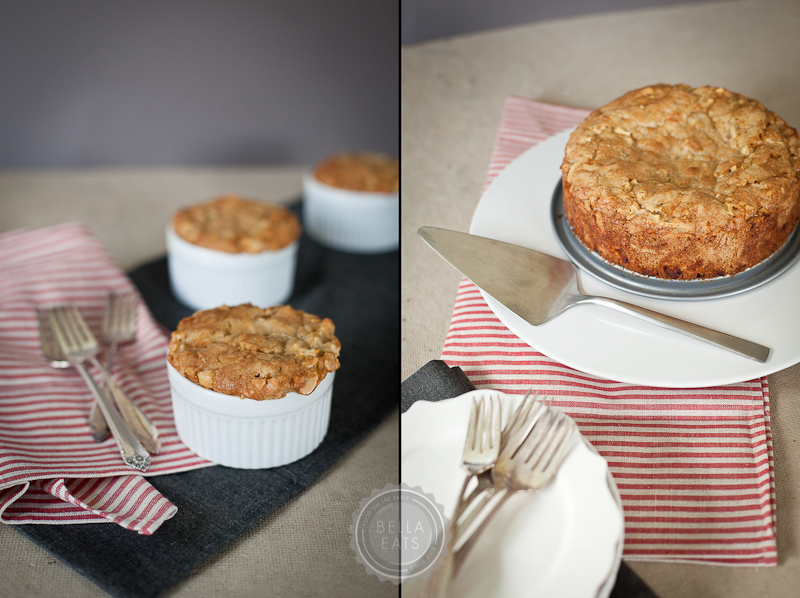
Just because a recipe for cake says that it should be baked in an 8-inch round cake pan, doesn't mean it has to be! Read through the recipe thoroughly and think about how you'd like to present the food. Individual cakes are fun to photograph, but a whole cake provides a slew of cutting/serving options. Will the food be photographed in the dish that it is prepared in? Or can you ignore the cooking dish because the food will be removed and plated? Do you want to capture multiple stages of the cooking process and, if yes, which of those stages should be documented and where? 
PROPS

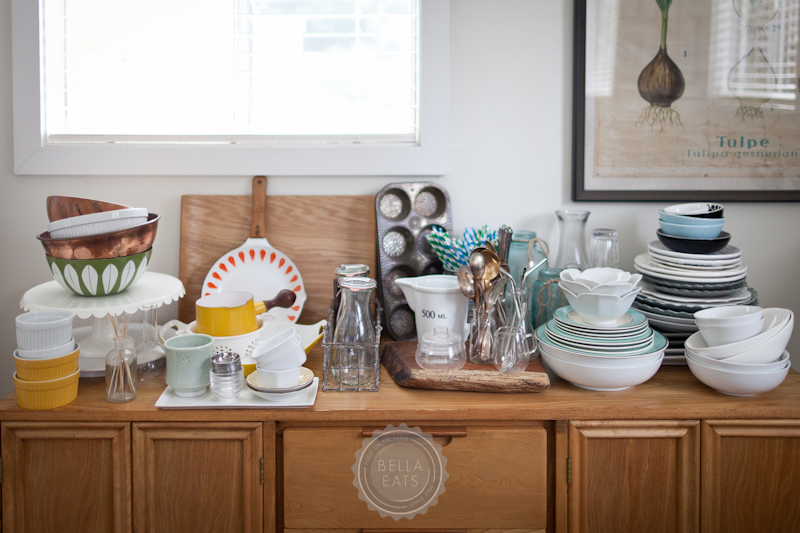
Analyzing the recipe will give clues as to what vessels should be used to present the food. Most often you can't go wrong with a white dish, but sometimes a colorful serving piece can really help to set off the colors in a recipe, such as these strawberry tarts on the teal plates shown below.
BACKDROPS

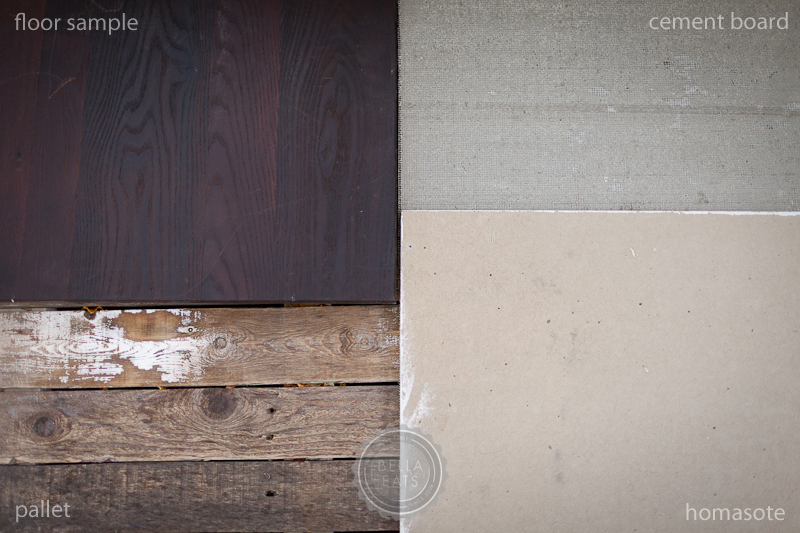
Once I've analyzed the recipe and chosen the dishes I'll use, I pick the backdrop for the photographs. The backdrop has a huge influence on the overall feel of the images, taking it from rustic to refined with a switch from the pallet to the ebony floor sample. As you can see, Lowe's and Home Depot can be a great place to pick up photo backdrops.
TEXTURES + COLOR

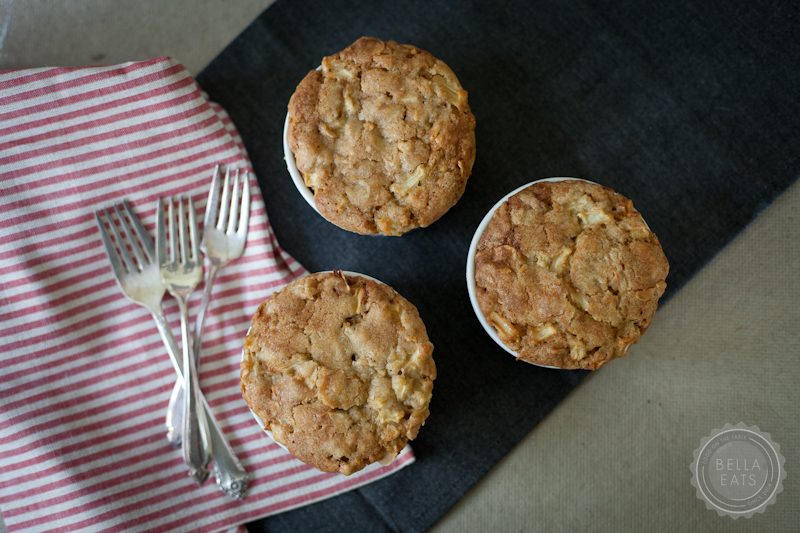
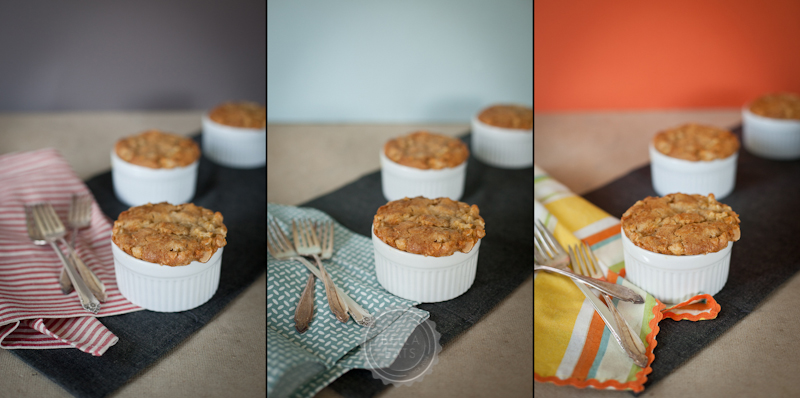
Once I've chosen the dishes and the backdrop, I move on to the styling of the images. Again, colors + textures can have a huge influence on the overall feel of the scene. Below I've shown examples of those little apple cakes styled in three simple ways, from neutral to pastel to festive. This recipe was pretty much a blank slate, given its neutral tone and white ramekin. But, imagine this beet risotto in that orange scene...blech!

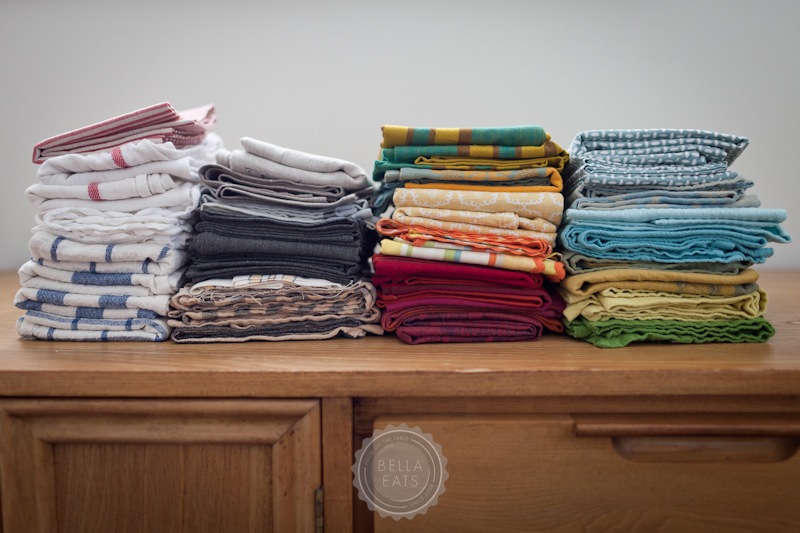
I have a slew of colored and patterned papers and linens that I sort through all the time. The key is to have a good variety so you never get bored. Sometimes, though, I will realize that I've really had a thing for the pallet paired with natural linen and antique silverware (who doesn't?) and have to force myself to think outside of the neutral box, which is typically my preference. Again, challenge yourself! Find a fun linen or paper and work to style your entire scene around it.
VIEWPOINT

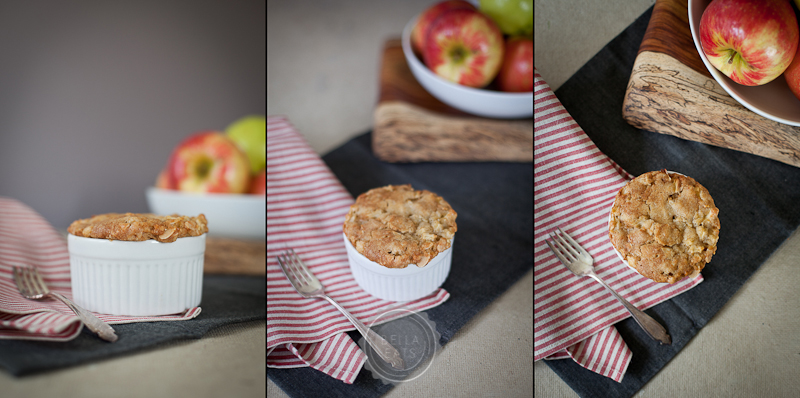
There are three viewpoints typically used in food photography: front, angled, top. I use them all, typically in each post. If you find yourself always shooting from one direction be sure to switch things up and challenge yourself to a new point of view. 
DEPTH OF FIELD

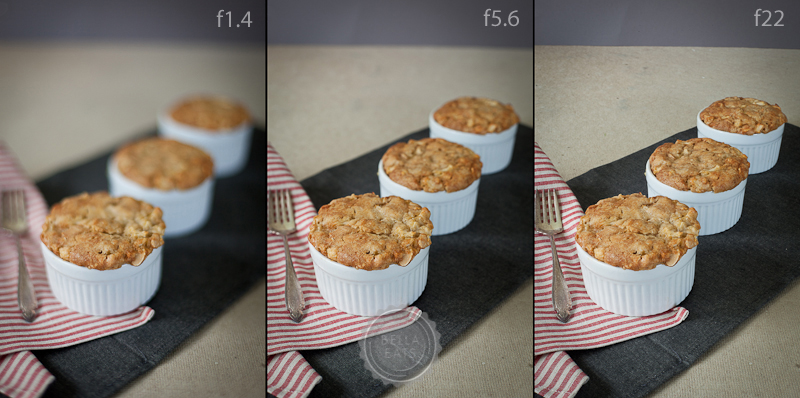
The depth of field in an image refers to the depth of the image that is in focus, and is controlled by the camera's aperture. This is a subtle nudge to explore the settings on your camera beyond 'auto'. Again, none of these is the 'right' aperture to set your camera to, but is simply a demonstration of how the story you tell with your art can be influenced by the depth of field.
FOCAL POINT

Similar to the depth of field, the point of focus in the image can alter the story told. Below I've focused on the first, the middle, and then the last cake. In the image below that I've focused first on the forks and then on the cake. Quite literally, the focal point will draw attention to the point of the image that you wish to be the focus, and it doesn't always fall right in the middle of the frame.

CROP

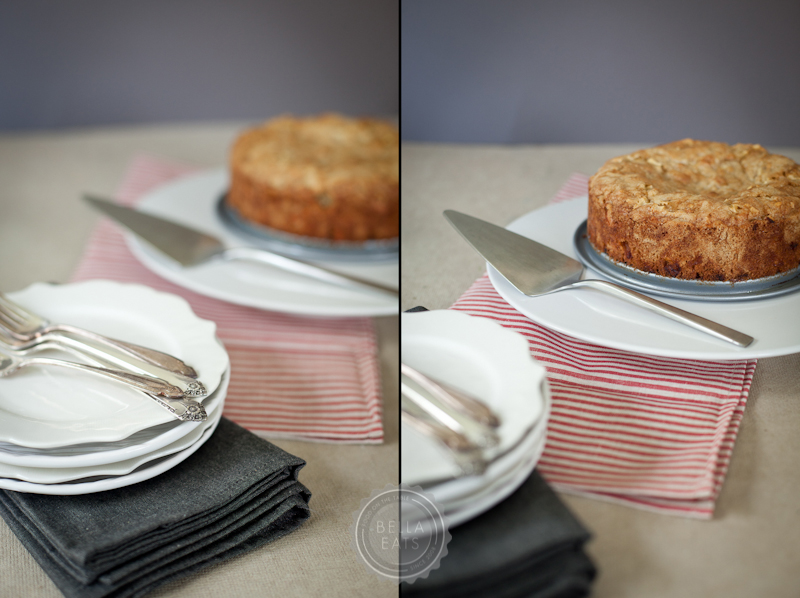
Does the whole dish need to be present in the frame for you to convey its qualities?
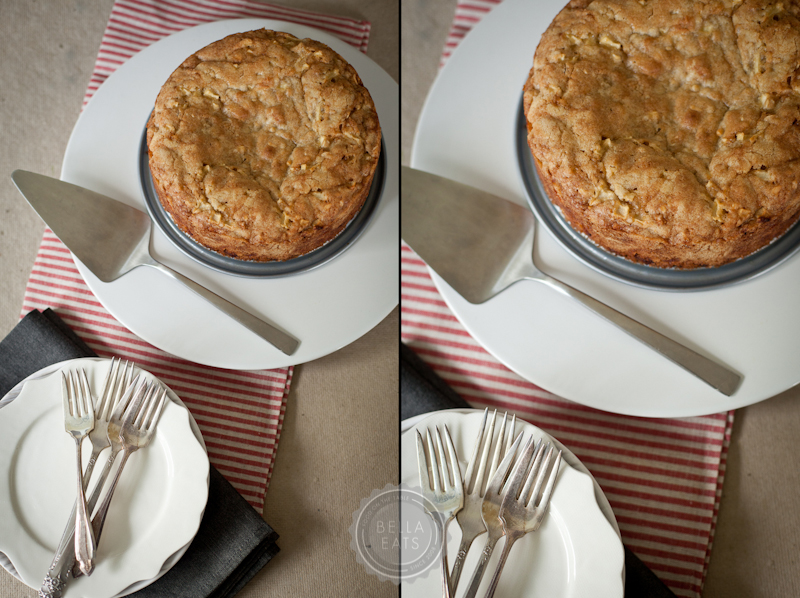
CLUTTER

I often find that less is more. In the case of the two images below, I really wanted to show the sauce I made to accompany the cake. However, the image on the left felt a bit too cluttered, and I was much happier with the shot once I removed the little bowl.
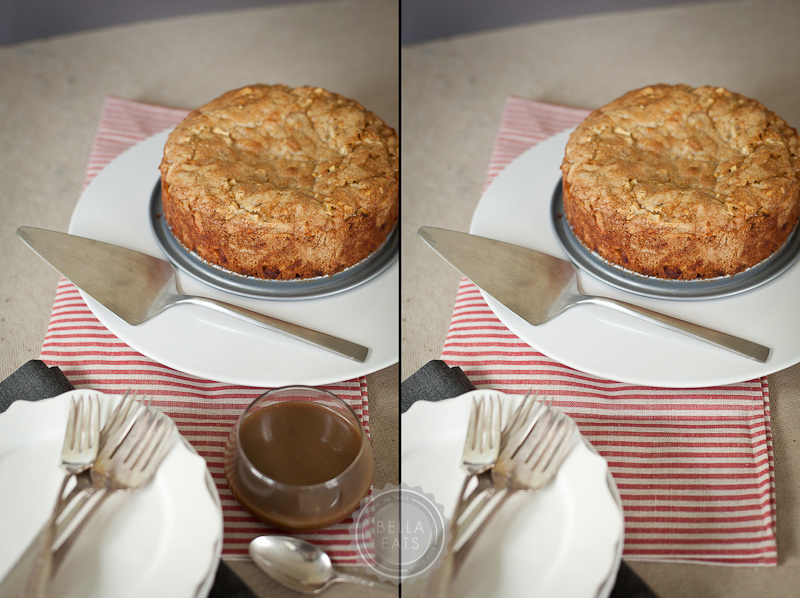
Instead, I found two different ways to set up and style additional images with the sauce as the focus. I would probably pair one of these with the image on the right, above, in a blog post.
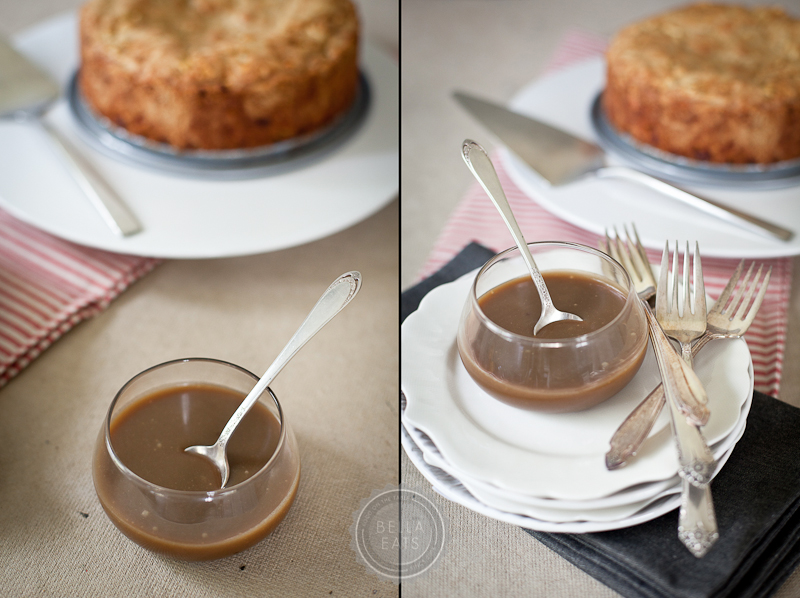
SHOW MORE OF THE STORY

Don't lose sight of the fact that food is meant to be eaten, and showing only the final, pristine cake is not the whole story. Slice it, dish it, eat some of it, and photograph each of those stages. Some of my favorite images show a half-eaten piece of cake or an empty plate, typically found at the end of a post.

POST-PROCESSING

It is my goal to do as little post-processing as possible, always. My love for photography falls in the styling and capturing of images, not in sitting behind my computer tweaking settings until the image looks nothing like what I caught in-camera. I adore Adobe Lightroom 3, and do most of my editing there. It is a powerful editing program and fantastic for organizing my images, of which I take a lot. For an average Bella Eats post I'll take between 60-100 images, and typically whittle them down to 10 that actually go in the post. Lightroom is great for that process. I rarely take images into Photoshop, and when I do it is usually only to remove a stain from a backdrop paper I've used one too many times, or to collage multiple images together (I am still not happy with doing this in Lightroom, for some reason). I even add my watermark as I export images at web-resolution from Lightroom.

The image on the left is straight from the camera, and on the right after a little brightening, a little warming, and a little clarity.....and that's about it.
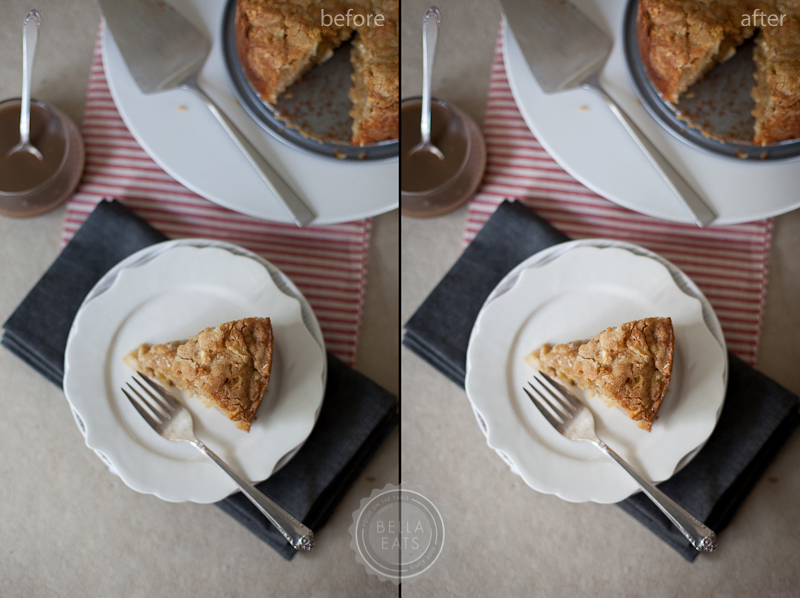
Same for the images below, except I also removed that little paint spot from the homosote, also in Lightroom. I can be picky.

And...that's it! My process for capturing photographs of food. Again, if there are any specific questions, please ask in the comments section below! I'll go ahead and answer one right now, because I know I'll get it:

Q: What camera equipment do you use for food photography?

A: Canon 5D MkII, Canon 50mm f1.4, Canon 100mm f2.8, Canon 35mm f1.4L
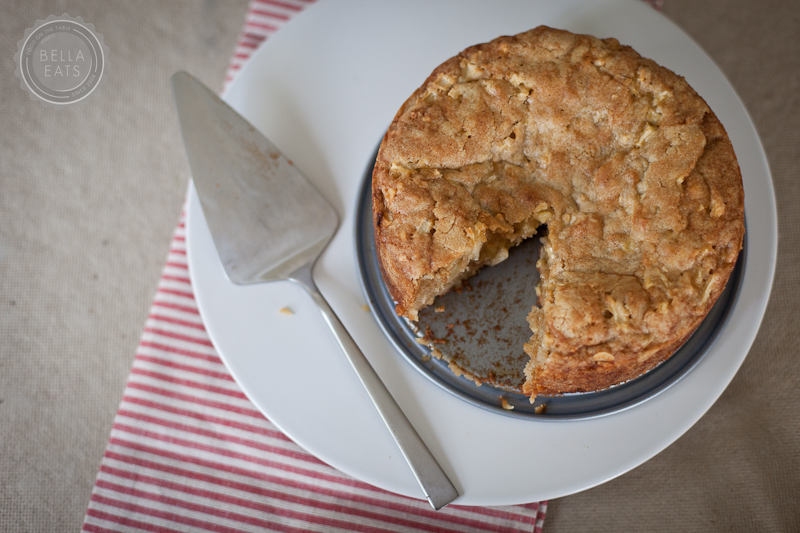
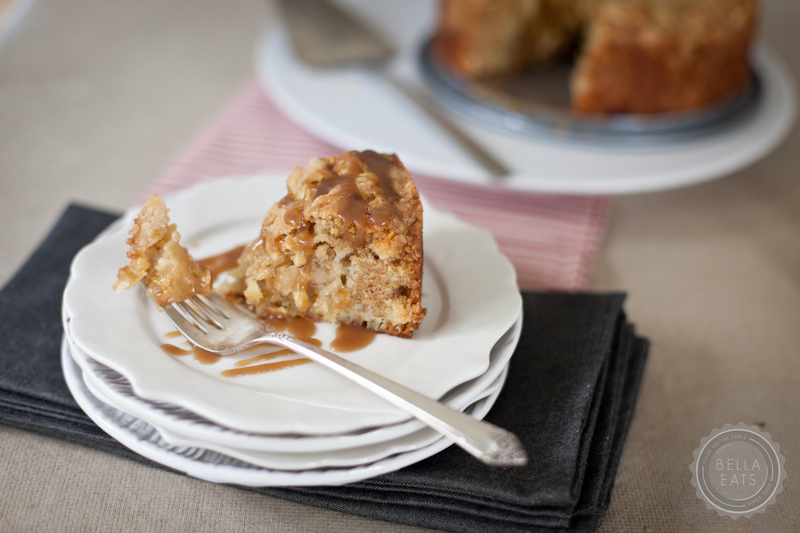
On to cake. Seriously, this recipe is one of our new favorites. I seem to say that a lot, but I really, really mean it with this one. So simple, so delicious, easy to travel with (I lugged the full cake and the mini cakes to the festival for my demonstration last night, and they fared perfectly). It has a consistency similar to coffee cake - soft and spongey and laced with fruit and nuts. Meaning...it is great for breakfast. And you know I LOVE a cake that I can eat for breakfast. :)

Apple-Dapple Cake

from Mollie Cox Bryan's Mrs. Rowe's Little Book of Southern Pies (the original recipe is for pie)

makes (8) 4-inch cakes, or (2) 8-inch cakes

Ingredients

  • 3 eggs
  • 2 cups sugar
  • 1-1/2 cups light vegetable oil
  • 1 tsp vanilla extract
  • 3 cups all-purpose flour
  • 1 tsp baking soda
  • 1 tsp ground cinnamon
  • 1 tsp salt
  • 3 cups diced apples
  • 1 cup chopped raw or toasted nuts (I used sliced almonds)

Method

  1. Preheat oven to 350°F. Butter (8) 4-inch ramekins or (2) 8-inch cake pans.
  2. Beat the eggs, sugar, oil, and vanilla in a large bowl until thoroughly combined. Add the flour, baking soda, cinnamon, and salt and mix thoroughly. Stir in the apples and nuts until evenly distributed, then spoon the mixture into the prepared baking dishes.
  3. Bake for 40-50 minutes, until a toothpick inserted in the center comes out almost clean, then transfer cakes to wire racks to cool. (The small cakes took about 40 minutes, the larger the full 50 minutes.)

We enjoyed ours served with this rum caramel sauce.
cornmeal pancake breakfast

Andrea

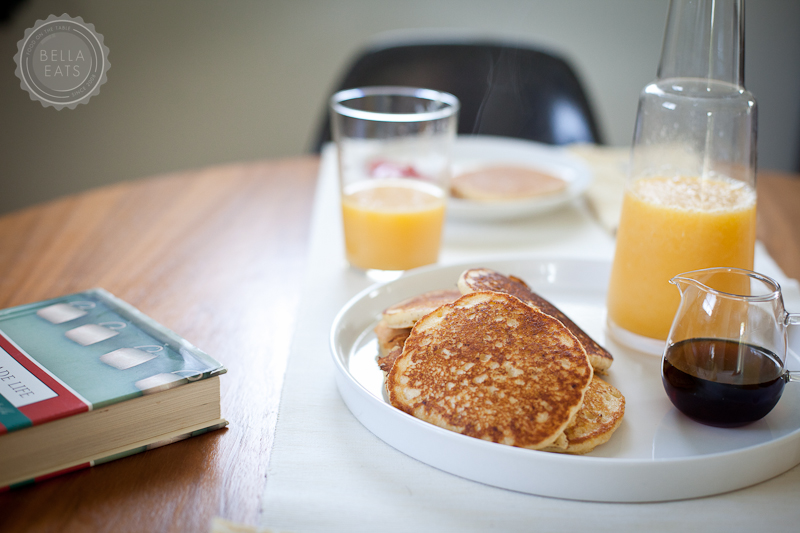
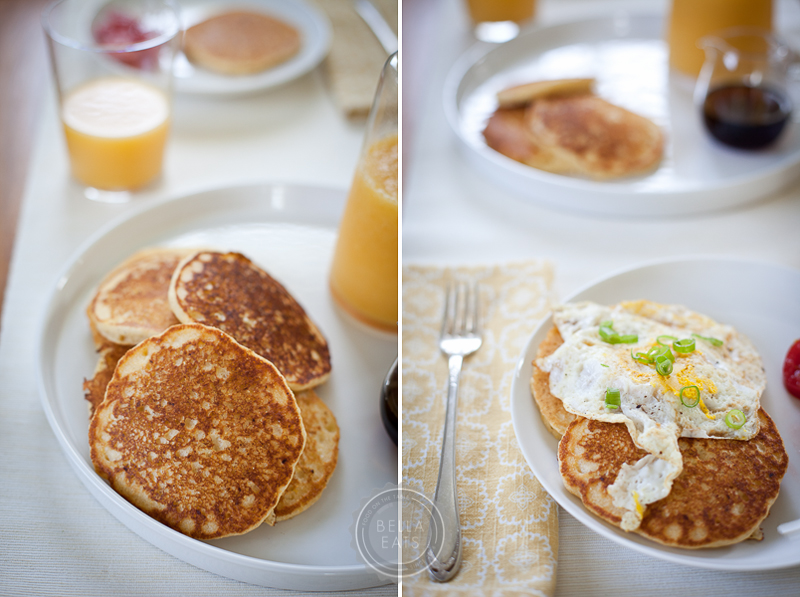
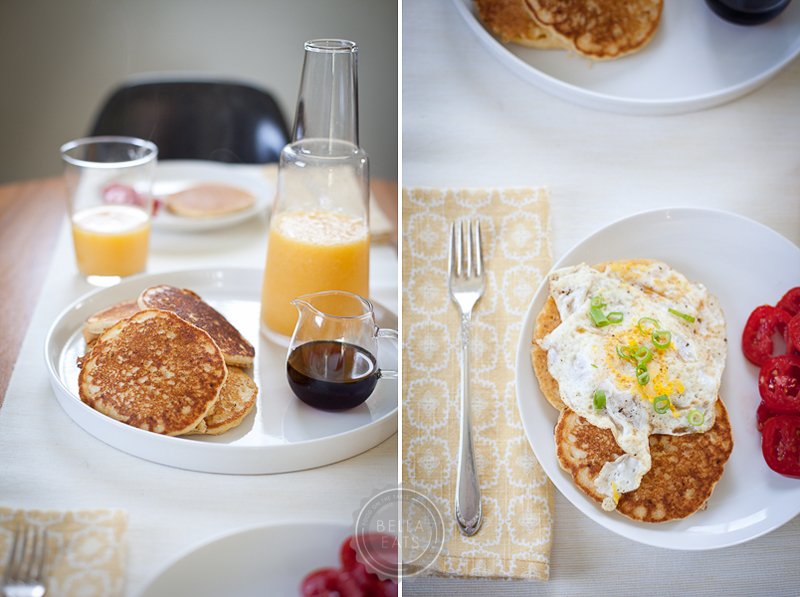
Last weekend, Brian and I may have discovered our new favorite breakfast.  In fact, had there been bacon crumbled across the short stacks occupying our plates I feel certain that I could have written, with 100% truth, that this was the Best [Homemade] Breakfast Ever.  And yes, those words deserve to be capitalized.  It is no surprise that the inspiration and recipe for said breakfast came from Molly Wizenburg's A Homemade Life, a book that I thought was still loaned out to a friend and so had not cracked open in quite some time.  Imagine my delight when I noticed its friendly seafoam spine peeking out from between Ad Hoc at Home and NOMA...a lovely surprise, indeed.

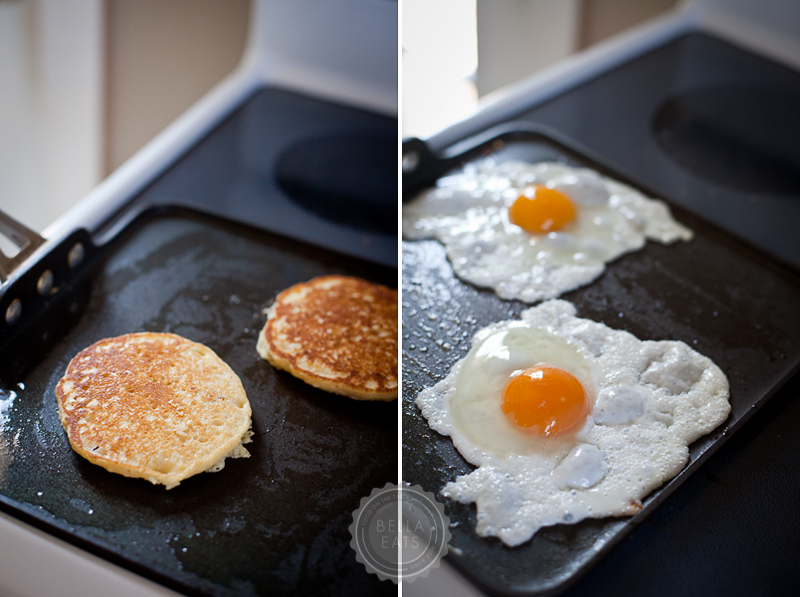
This recipe for cornmeal pancakes is actually meant to be an appetizer; the cakes 1/4 the size pictured here, topped with a confetti of fabulous flavors. We made them their intended way, just a week ago, to bring as an hors d'oeuvres to a dinner party.  They were delicious, for sure, but I kept thinking as I popped them one-by-one into my mouth that there was a whole lot of effort invested in those bite-size cakes and that really, made bigger and topped with a fried egg, they would make for quite the weekend breakfast without all of the fuss. I was right. The combination of slightly-sweet corn cakes with fried egg, fresh tomatoes, and a hint of green onion was the perfect start to our Sunday, a morning I would like to repeat very soon.

The batter for these cakes comes together easily and cooks up into the most perfect pancake shape, texture, and color. They would be lovely to serve to guests for weekend brunch, or to whip up and freeze for weekday breakfasts.

Cornmeal Pancakes

from a homemade life, by molly wizenberg

serves 3

Ingredients

  • 1 medium ear of corn
  • 1/2 cup fine cornmeal
  • 1/2 cup cake flour
  • 2 tsp baking powder
  • 1/4 tsp baking soda
  • 1/2 tsp kosher salt
  • 1/2 cup whole milk (don't skimp here...)
  • 1/4 cup water
  • 1 tbsp canola oil, plus more for brushing the pan
  • 1 tbsp pure maple syrup
  • 1-1/4 tsp apple cider vinegar

For Serving

  • really good eggs, however you like them cooked
  • really ripe tomatoes
  • chopped green onions
  • coarse salt and ground pepper

Method

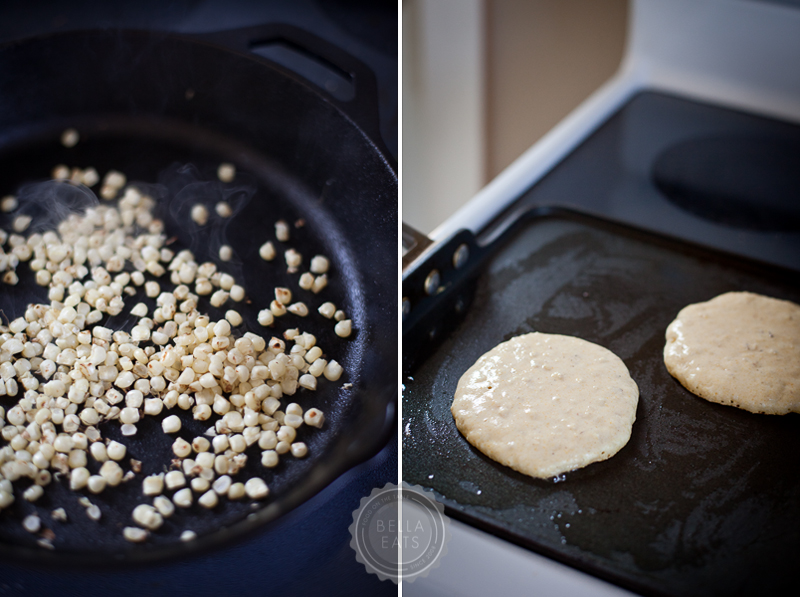
  1. Remove the kernels from the cob using a sharp knife (this method works very well). Put a small, heavy skillet (cast iron if you have it) over medium-high heat on the stove top. When hot, add the kernels and cook, shaking the pan occasionally, until the corn is browned in spots and fragrant, about 1 minute.  Remove the pan from the heat and scrape the kernels into the bowl of a food processor.  Allow to cool.
  2. Next, prepare the batter.  In a medium bowl, whisk together the cornmeal, cake flour, baking powder, baking soda, and salt.  In another small bowl, combine the milk, water, canola oil, and maple syrup (leave out the vinegar for now). 
  3. When the corn is cool, process it briefly in the food processor, until it is finely chopped.  Add the corn to the dry ingredients, along with the wet ingredients and the vinegar, and whisk just to combine.  The batter will be foamy and will thicken.  Allow it to rest for 5 minutes.
  4. Meanwhile, heat a nonstick pan or griddle over medium heat. When the pan is hot, brush it lightly with oil.  Scoop the batter by the 1/4 cup onto the griddle, forming round cakes about 5 inches in diameter. Cook until the edges of the cakes look dry and the underside is golden, about 3 minutes, then carefully flip to brown the other side. You should have 6-8 cakes when finished.
  5. Serve topped with egg, tomatoes, and green onions.

blueberry scones with lime glaze

Andrea

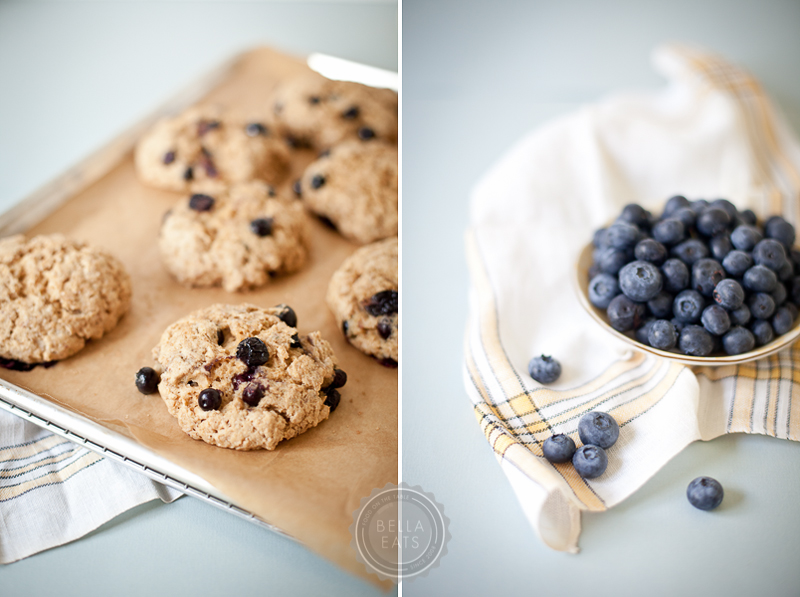
I hold a firm belief that berries + citrus are one of the best combinations ever. Right up there with caramel + sea salt, peanut butter + banana, tomatoes + pasta. It's a shame that their seasons are opposite each other, with citrus at its height mid-winter and berries abundant mid-summer. That won't stop me, though. Be it berry jam, cobbler, tart, or muffin...it will involve lemons, limes, or oranges.

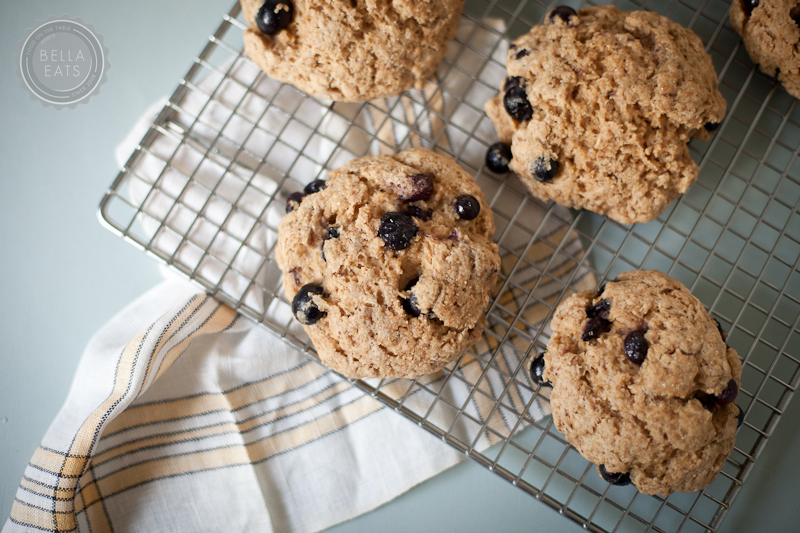
Also, I am a big fan of scones. If they are the right scones, that is. No dry, crumbly, lumps that turn to paste in the mouth for me. I like them softer; closer to the product of a marriage between scone and muffin. Easy to grab and eat in the car on the way to work, without the spray of crumbs across the lap when you arrive. 

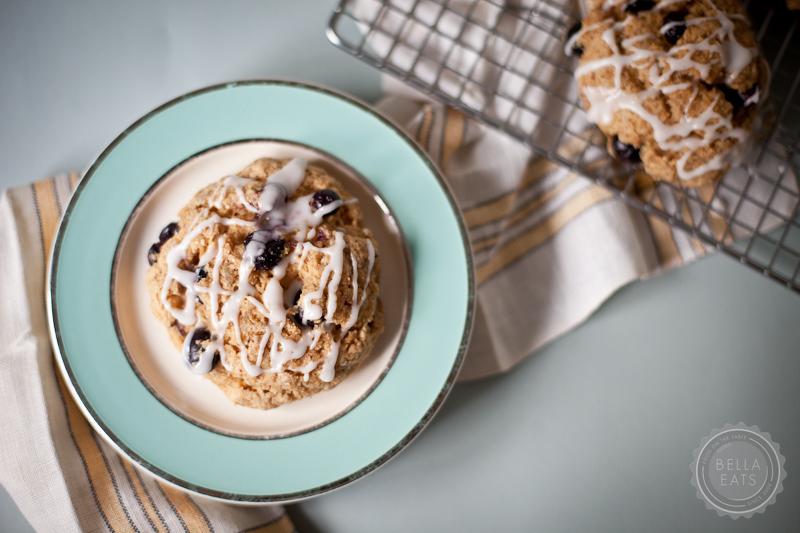
These particular scones, made moist with buttermilk and bright bursts of blueberry, still hold a hearty texture thanks to the white whole wheat flour. I like to think that makes them a healthy breakfast treat, even if all that whole grain goodness does is cancel out the sugary glaze drizzled over top (shhh...just let me have that...please?). If you'd like an even fluffier texture, substitute all-purpose flour for the white whole wheat. And be careful not to overmix your dough, keeping in mind the same principles applied in biscuit-making...work fast and keep your ingredients cold. 

Happy Monday, friends! Have a lovely week.

Although they are best day-of, these scones can be stored in an airtight container for up to three days.

Blueberry Scones with Lime Glaze

makes 8 scones

Scone Ingredients

  • 3/4 cup buttermilk
  • 1 large egg
  • 1/2 tsp vanilla extract
  • 3 cups white whole wheat flour, or all-purpose flour for a fluffier texture
  • 4 tsp baking powder
  • 1/4 tsp salt
  • 1 tbsp lime zest
  • 8 tbsp cold, unsalted butter, cut into 8 pieces
  • 1/2 cup sugar (I used turbinado), plus extra for sprinkling
  • 1 cup fresh blueberries

Glaze Ingredients

  • 1 cup confectioner's sugar
  • 2-3 tsp lime juice

Method

  1. Preheat oven to 375*.  Spray a baking sheet with oil or cover with parchment paper.
  2. Mix buttermilk with egg and extract in a large bowl.
  3. Add flour, baking powder, lime zest and salt to a large food processor. Pulse until blended.  Add butter and pulse until mixture resembles course bread crumbs.  Add sugar and pulse again until blended.
  4. Add flour mixture to egg mixture and stir with a wooden spoon until a soft dough forms. Do not overmix. Add blueberries and carefully fold them into dough.
  5. Turn out dough on a floured board and give 5-6 careful kneads, just until well mixed and cohesive, trying not to crush too many of the berries.  Divide dough into 8 equal pieces and roll into balls before flattening into disks about 4 inches wide.
  6. Bake on prepared baking sheet for 20-25 minutes until medium brown.  Let cool on sheet for 5 minutes before moving to wire rack to cool completely.
  7. To make the glaze, mix the confectioner's sugar with 2 tsp of lime juice. Use a spoon to blend together into a paste, adding more lime juice a bit at a time until the glaze is spreadable.
cornmeal cake with peaches + rosemary

Andrea

I find it appropriate that I am following up a post about summer tomatoes with a post about summer peaches. Brian and I have long had the argument over which is our favorite summer fruit, with him typically landing on the tomato side of the line and me on the peach. It is a close race, for sure. Both are delicious only during their season, each overlapping the other during July and August in Virginia. We rarely eat tomatoes outside of summer, and never peaches, unless we've put some away in jars and freezer bags. The limited window of availability makes peaches and tomatoes all the more special, precious even, and we indulge ourselves in both when they are available. Right now, as I write this, there are roughly 20 pounds of peaches and 30 pounds of tomatoes spread across my dining room. 50 pounds of fruit, friends. I think we have a problem...
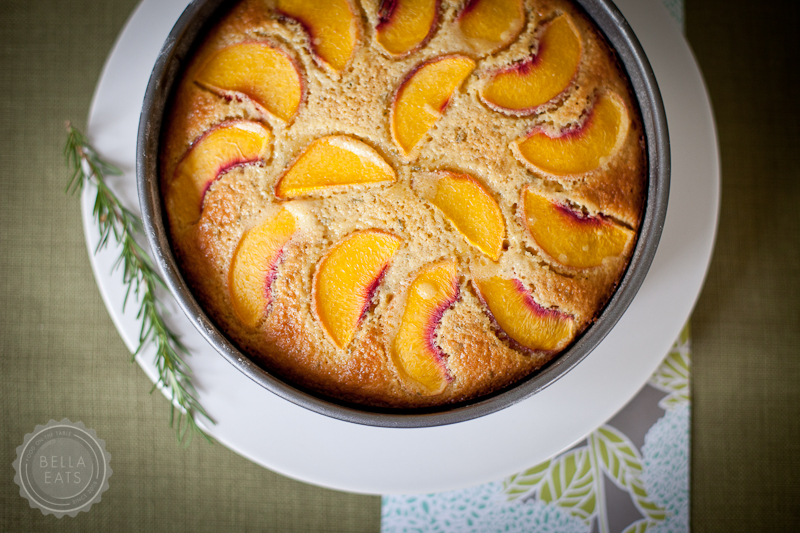
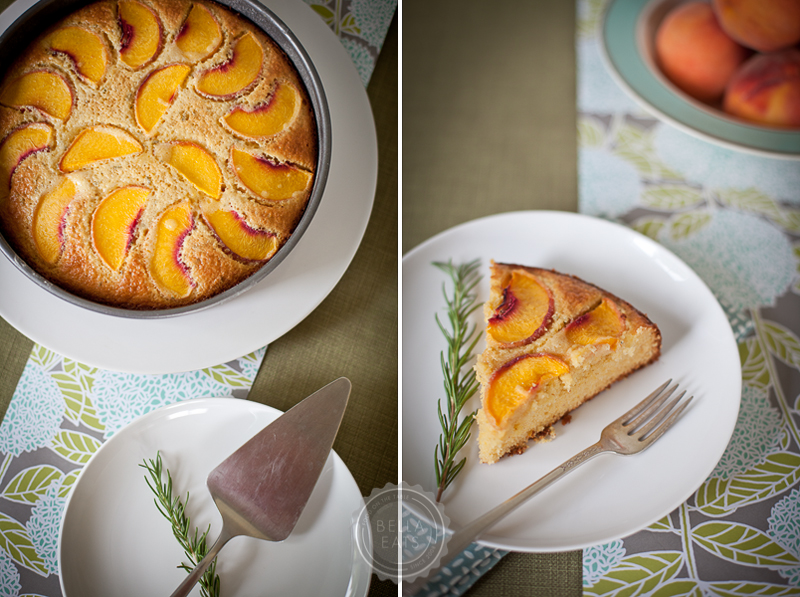
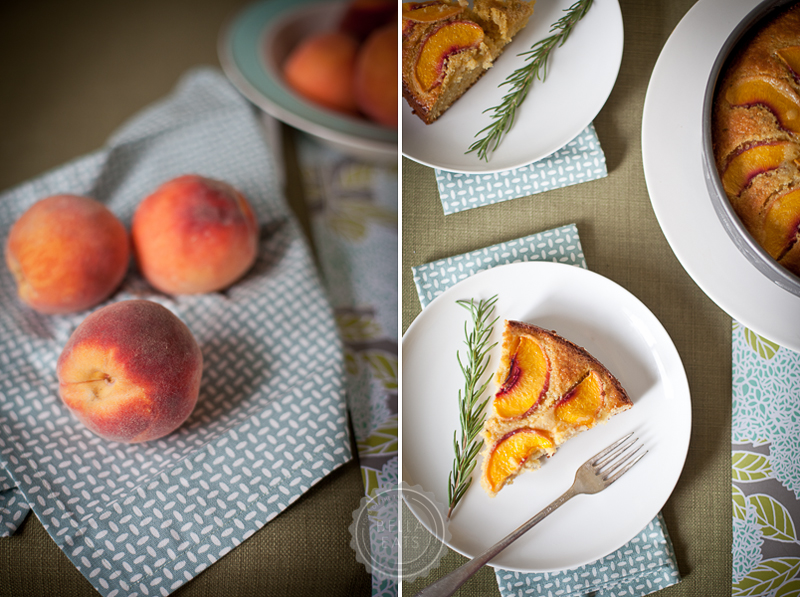
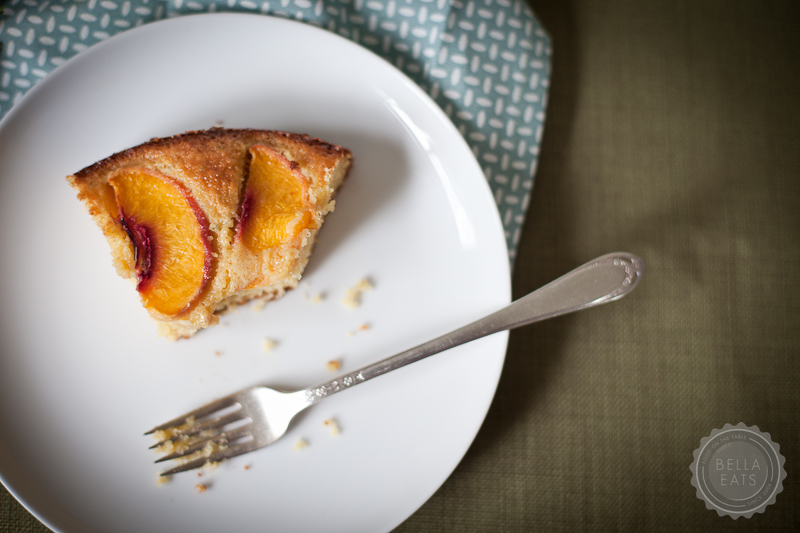
After venturing out to Chiles Peach Orchard with a girlfriend a few days ago, I found the first thought swirling through my head involved a dense, peach-topped, breakfast-y cake. A cake with some heft; a good base to start the morning off just right. After some searching I came across Emeril's Cornmeal Olive Oil Cake with Poached Peaches...(the name goes on...), and modified it to suit my own desire for a simple, one-component breakfast cake. I am so very, very pleased with the result. The rosemary-scented cornmeal crumb is dense and savory with moments of crunch and highlights of salt. It sounds strange, I know, but there really are occasional bites that taste salty, while the majority offer a mild sweetness courtesy of the honey and fruit. It is a cake full of wonderful contrasts; sweet paired with salty, the crunch of cornmeal with the softness of peaches.

I wouldn't pigeonhole this cake into the dessert category; it really could pass as a cornbread side dish at a backyard barbecue. But I think the perfect place for it would be brunch...where savory sweets are wanted and expected. It is a new favorite in our house, for sure, and even further muddies the race between the tomato and the peach...

Cornmeal Cake with Peaches + Rosemary

adapted from Emeril Lagasse via Food Network

serves 8

Ingredients

  • 3/4 cup all-purpose flour
  • 1 tsp baking powder
  • 3/4 tsp salt
  • 1 cup yellow cornmeal
  • 1/2 tsp minced, fresh rosemary
  • 2 large eggs
  • 1 large egg yolk
  • 2/3 cup milk
  • 1/2 cup olive oil
  • 1 tbsp finely grated lemon zest
  • 3/4 cup sugar
  • 1/4 cup honey
  • 1 ripe peach, sliced thinly (1/8-inch thick)

Method

  1. Preheat oven to 350°. Lightly grease and flour a 9 by 2-inch round cake pan. (next time I will use a springform pan so that I can remove the cake whole)
  2. Into a medium bowl, sift together the flour, baking powder and salt.  Stir in the cornmeal and the rosemary. 
  3. In a large bowl, beat the eggs, egg yolk, milk, olive oil, and lemon zest with an electric mixer until frothy. Add the sugar and honey, and mix to combine. Add the dry ingredients and beat until the batter is smooth. Pour into the prepared pan and top with the peach slices.
  4. Bake in the middle of the oven for 35 minutes, or until a tester comes out with a few crumbs attached. Let the cake cool in the pan on a wire rack. If using a springform pan you can remove the cake whole, otherwise you can slice it in the pan and remove individual slices to serve.

breathless

Andrea

Hi, friends. How are you? Goodness...well, it has been awhile, hasn’t it? We’ve missed a lot these last few months...such as apples. A trip to Boston and Halloween. Pumpkins and cranberries. The second anniversary of Bella Eats. And then there was Thanksgiving, and the first snow, and a trip to Florida and, finally, Christmas and the end of another year. Wow. So many opportunities to share food and photos and life with you all and I missed them, each one. I don’t want to start this first post back after three months gone with an apology, so, I won’t. Instead I’ll just say “Hi!” And, “I’m back!” And finally, “If you’re still here...thank you!”

What I do have to say about these last three months is this...they were full. So very full. The full you feel after an extraordinary meal; one that involves ten-too-many bites, an unbuckling of pants, and a slouching down in one’s chair followed by a long, low groan. So satisfying, but when you look down at your plate there are still ten more bites waiting, and you think to yourself “Can I do it?”. Somehow, you do, and at the end of it all you’re left with no choice but to lie down someplace dark and quiet. 

The thing about those big meals is that they are typically surrounded by a tableful of loved ones, conversing and laughing and drinking and eating right alongside you. They are so jovial and supportive that you don’t even notice the fullness until it is too late, and then they are there to moan and groan with you, and to reminisce about the wonderfulness that was the meal consumed. Been there? I thought so. And that is precisely what the last three months has felt like.

I am typically a very stick-to-the-path kind of girl. I follow directions well, read books and watch shows in sequence, knew what I wanted to be when I grew up at twelve years old. But three months ago I took a detour; strayed from the road I’d been traveling and forged a new trail through uncharted territory. 

I quit my architecture job in order to pursue photography as a career. 

That sentence leaves me giddy; so full of excitement that it is difficult to sit in this chair and continue typing. Not only is it unbelievably amazing to be chasing after a dream I never thought possible, but the unwavering support of family and friends has left me breathless.  There are scary moments, certainly, when I peer ahead and begin to doubt my ability to move forward with sure and confident steps. But then, out of nowhere, I’ll receive an email or phone call or Facebook message or tweet (what a funny world we live in, huh?) and I take another step, and another, and another until I am running so fast that I fear I won’t be able to stop. I am breathless, I tell you.

Finally, with the conclusion of a semester of teaching and 100% of my concentration set on photography, I have time for Bella Eats again. This fact I find nearly as exciting as my decision to change paths; to move towards a big dream shimmering at the horizon.  Bella Eats is part of that dream and, in fact, even the generator of it. Without this site I may not have renewed a passion for photography born long ago and lost in my pursuit of architecture. And I certainly wouldn’t have met all of you, or formed real friendships with some very inspiring and brave individuals. I owe much to this place I’ve carved from the world wide web and the people I’ve connected to through it, and am happy to finally be able to give some of that energy back.

And now, let’s talk about breakfast.

Recently, breakfast has slipped into the role of “Andrea’s favorite meal with friends”. It is usually enjoyed out, at any one of a handful of local joints, with someone I most likely haven’t seen in some time. That seems to be the case with most of my friends these days, who all seem equally as busy as I, and the breakfast hour is one that isn’t typically prescheduled for some other task. It is a mighty fine way to kick off a weekday, leaving you content and happy from the time, food, and news shared. 

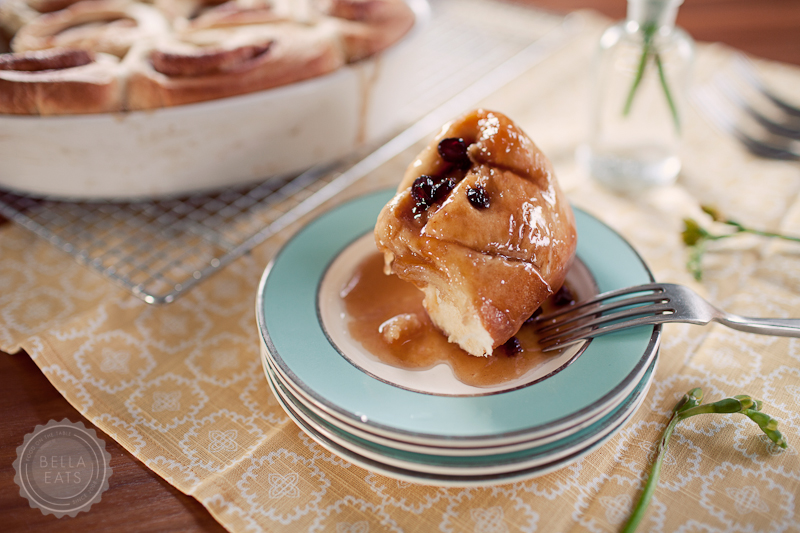
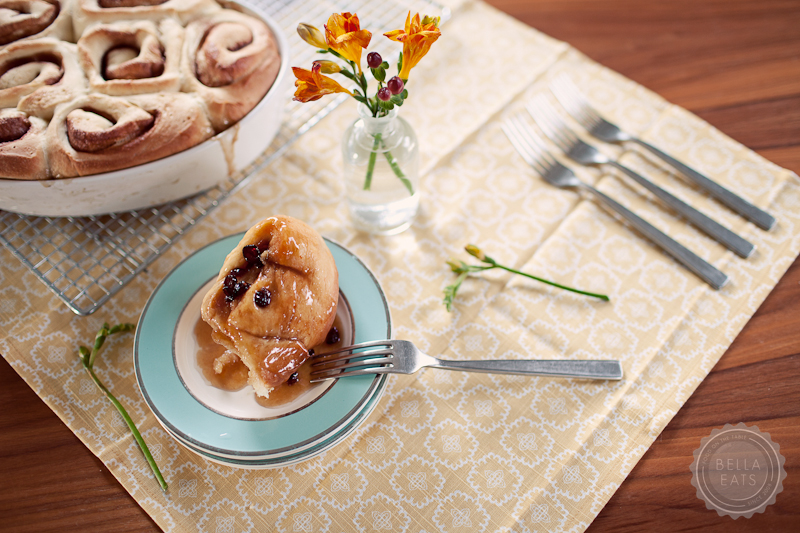
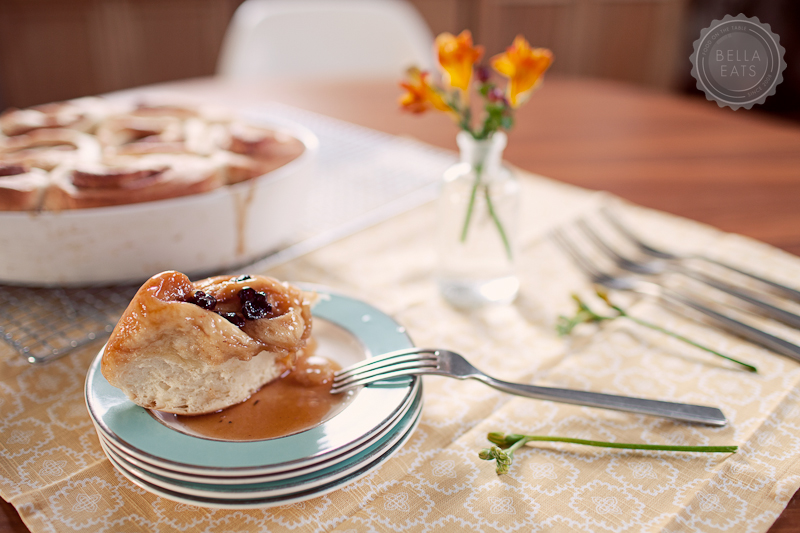
If I could, I would make each and every one of you these sticky buns one morning this week. They take a bit of planning and an early morning wake-up call, but the end result is quite worth the effort. Paired with a cup of coffee and perhaps a few slices of crispy bacon, the soft, pillowed interior makes the perfect vessel for a sticky sauce of caramel and cranberries. We made them twice within a week, once for Thanksgiving guests and again for friends...just because. 

CRANBERRY ORANGE STICKY BUNS

adapted from Peter Reinhart's The Bread Baker's Apprentice
makes 8-12 large sticky buns

Ingredients

  • 6-1/2 tbsp granulated sugar
  • 1 tsp salt
  • 5-1/2 tbsp unsalted butter, at room temperature
  • 1 large egg
  • 1 tsp grated orange zest
  • 3-1/2 to 4 cups unbleached bread flour
  • 2 tsp instant yeast
  • 1-1/8 to 1-1/4 cups whole milk, at room temperature
  • 1/2 cup cinnamon sugar (6-1/2 tbsp granulated sugar plus 1-1/2 tbsp ground cinnamon)
  • Caramel Glaze (see below)
  • 1/4 cup dried cranberries

Method

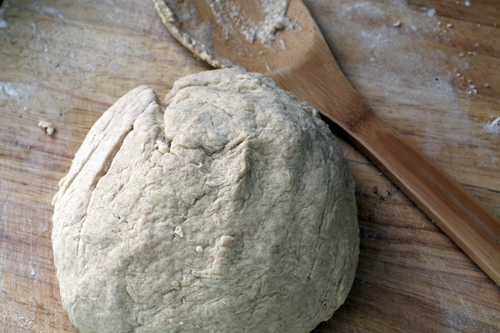
  1. Cream together the sugar, salt, and butter on medium-high speed in an electric mixer with paddle attachment. Whip in the egg and orange zest until smooth. Add the flour, yeast, and milk. Mix on low speed until the dough forms a ball. Switch to the dough hook and increase the speed to medium, mixing for approximately 10 minutes, or until the dough is silky and supple, tacky but not sticky. You may have to add a little flour or water while mixing to achieve the desired texture. The dough should pass the windowpane test and register 77˚ to 81˚F. Lightly oil a large bowl and transfer the dough to the bowl, rolling it around to coat it with oil. Cover the bowl tightly with plastic wrap.
  2. Ferment the dough at room temperature for approximately 2 hours, or until the dough doubles in size.*
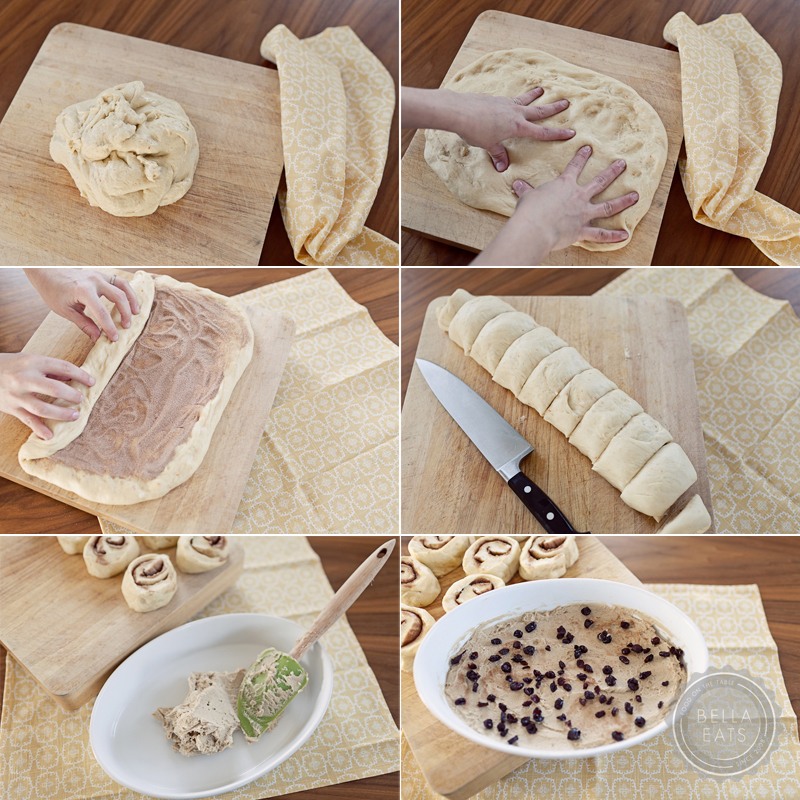
  3. Mist the counter with spray oil and transfer the dough to the counter. Roll the dough with a rolling pin or press and stretch with fingertips, lightly dusting the top of the dough with flour to keep it from sticking. Roll or press into a rectangle about 2/3 inch thick and 14 inches wide by 12 inches long. Don't roll too thin, or the resulting buns will be tough and chewy. Sprinkle the cinnamon sugar over the surface of the dough and roll the dough up into a cigar-shaped log, from the long side. With the seam side down, cut the dough into 8 to 12 even pieces each about 1-3/4 inches thick.
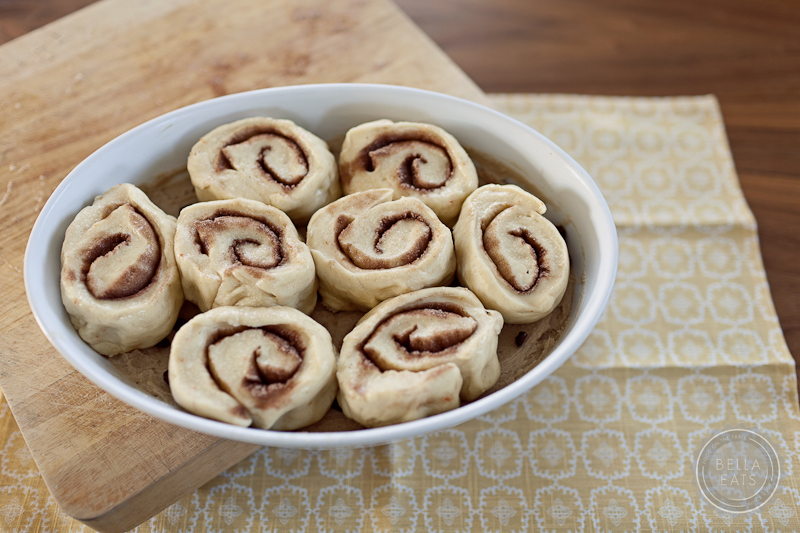
  4. Coat the bottom of 1 or more baking dishes or baking pans with sides at least 1-1/2 inches high with a 1/4 inch layer of the caramel glaze. Sprinkle on the cranberries. Lay the pieces of dough on top of the caramel glaze, spacing them about 1/2 inch apart.** Mist the dough with spray oil and cover loosely with plastic wrap.
  5. Proof at room temperature for 75-90 minutes, or until the pieces have grown into one another and have nearly doubled in size. You may also retard the shaped buns in the refrigerator for 2 days, pulling the pans out of the refrigerator 3 to 4 hours before baking to allow the dough to proof.***
  6. Preheat the oven to 350˚F with the oven rack on the lowest shelf. Place a baking sheet lined with foil on that oven rack to catch potential overflow.
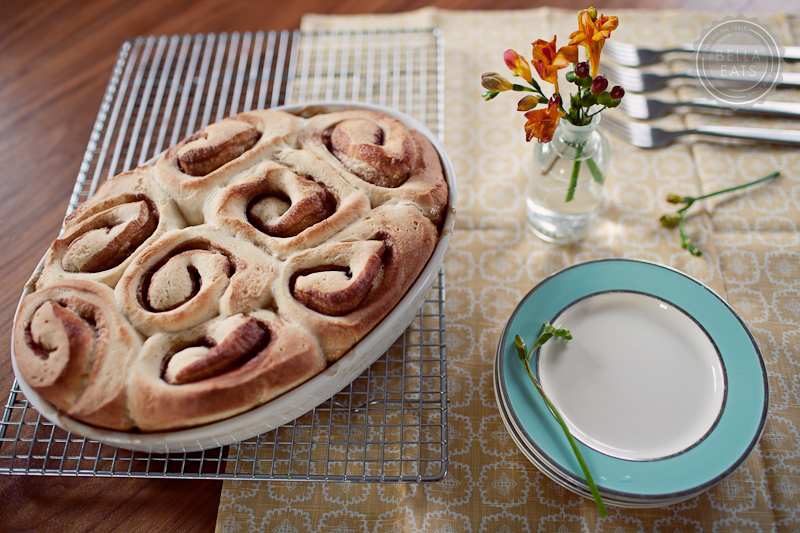
  7. Bake the sticky buns for 30-40 minutes, or until golden brown. Keep in mind that the sticky buns are really upside down, so the heat has to penetrate through the pan and into the glaze to caramelize it. The tops will become the bottoms, so they may appear dark and done in order for the underside to be fully baked.

CARAMEL GLAZE

Ingredients

  • 1/2 cup granulated sugar
  • 1/2 cup firmly packed brown sugar
  • 1/2 tsp salt
  • 1/2 pound unsalted butter, at room temperature
  • 1/2 cup light corn syrup
  • 1 tsp orange extract

Method

  1. Cream together the granulated sugar, brown sugar, salt, and butter for 2 minutes on high speed with the paddle attachment. Add the corn syrup and orange extract. Continue to cream for about 5 minutes until light and fluffy.

You probably will not need all of the glaze for the buns. Refrigerate and save any excess for future use, it will keep for months in a sealed container.

NOTES:

* When the weather is cool I warm the oven to its lowest setting, 170˚, and then turn it off. I place the fermenting dough in the oven to rise and have much better luck than just leaving it on the calendar in our 60˚ house.

** Clearly my baking dish pictured was too small.  But it's pretty, so I dealt with it.

*** The first time I made these I made the dough and fermented it the night before I wanted to bake it. After shaping the rolls and placing them in the pan on the glaze I covered them with plastic wrap and refrigerated them. I set my alarm for 4 hours before I wanted to put them in the oven, took them out of the refrigerator, and went back to bed.  They came out beautifully.

sunday mornings

Andrea

The Sunday mornings of my childhood were lazily spent at the farm table in our kitchen under a classic stained glass lamp that still hangs in the exact same spot, over the exact same table.  The pantry door would be swung open wide, the small t.v. hidden inside providing the morning soundtrack - Sunday Morning with Charles Kuralt.  I'd fish through the stack of papers on the table until the Sunday comics surfaced, and after devouring those would peruse the classified ads, always looking for the perfect pet pony or a yorkshire terrier for my momma. cinn-2 The smells that accompanied these mornings were varied but always indulgent.  Sometimes we'd have flakey buttermilk biscuits with sliced ham and provolone, or my daddy would fry up eggs that we'd sop up with buttered toast alongside lil' smokies or pan-fried bacon.  And some mornings there were cinnamon rolls or even better, orange danishes.  Popped from a can, baked for 15-18 minutes and then slathered with glaze - those Sunday breakfasts were my favorites. cinn-merge-1 These days, now that I'm all grown up (some might argue with the truth of that, even me...) Sunday mornings are still somewhat lazy and indulgent. Saturdays are started early, sometimes with a long run, and always (during the season) with a trip to the farmer's market for breakfast and the week's produce before embarking on the day's agenda full of errands, chores and projects.  Saturdays are busy and productive, the perfect justification for the extra 30 minutes in bed on Sunday mornings and the indulgent breakfasts that typically follow once my feet hit the floor. cinn 6 And even better than my extra 30 minutes in bed is the fact that Brian typically requires an extra 2 hours in bed on Sundays, leaving me with the kitchen all to myself.  This is my baking time.  I wake up to a quiet house and kick the dogs out to the back yard to ensure that it remains quiet.  I clean up any leftover dishes from the night before while going through breakfast ideas in my head.  This is the time when new pancake, biscuit and scone recipes are realized.  This is the time when I finally get to try out a recipe I've had bookmarked for quite some time, one that takes me right back to my childhood even though the lamp, reading material and soundtrack have changed. cinn 8 These cinnamon rolls were delicious, certainly a step up from the canned variety although they take about 3 times as long to prepare.  I substituted spelt flour for some of the all-purpose and loved the extra flavor that the whole grains provided.  I've become a big fan of spelt flour lately, experimenting with Wiggs' cookies from on high (post to come soon) and these biscuits, with fabulous results.  I've noted my other substitutions below.   cinn merge 3 The original Cook's Illustrated recipe can be found here, via Leite's Culinaria.  I made a few exceptions [I can't help it!].  
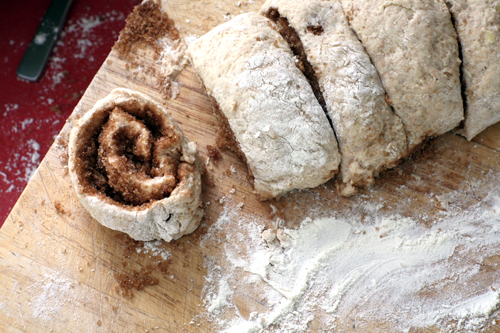
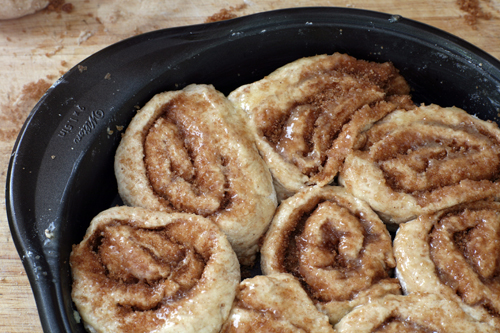
  • I used 1 cup of spelt flour and 1-1/2 cups of all-purpose flour.  
  • I substituted turbinado sugar for all of the sugar in the dough (but still used confectioner's for the glaze)
  • I used 3/4 tsp baking soda rather than 1/2 tsp
cinn 14
Read More