red beet risotto
Andrea
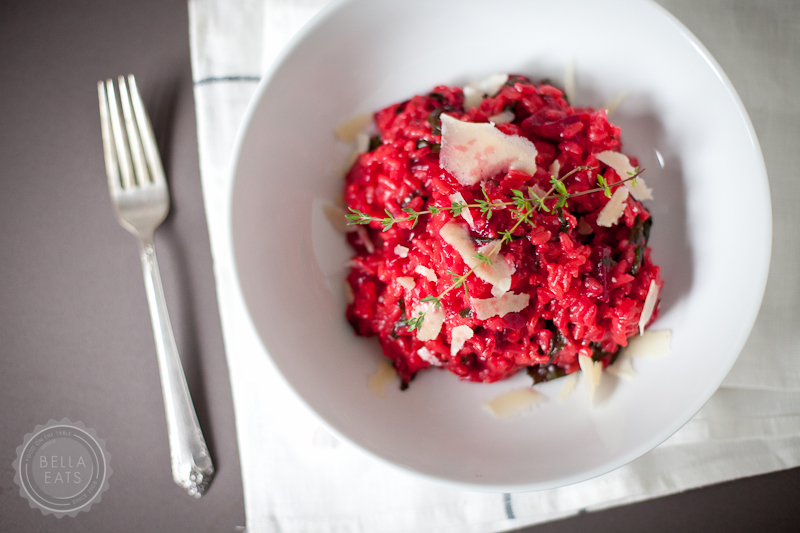
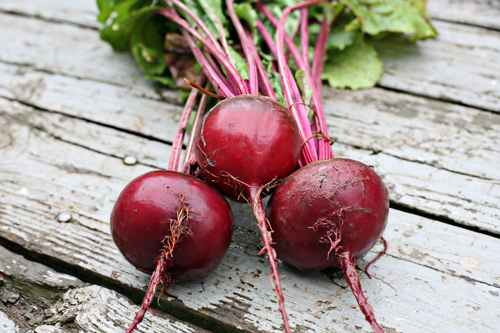
I do believe that beets are my very favorite spring vegetable. They are quickly overshadowed by tomatoes in Summer, but in May and June I could eat beets every other day. Typically I am a fan of simply roasting the globes and tossing them on a salad with chevre and a light vinaigrette. But every now and then, when I am feeling the need for something a bit more toothy and substantial I'll whip up a batch of risotto. I love the sweetness that roasted beets lend to the savory dish, and of course the vibrant hue that even a picky toddler wouldn't be able to resist.
I"ll admit...I've already written about red beet risotto here, years ago, when we were growing beets in our very own garden. The recipe has changed a bit, and the photographs have certainly improved, but I still love that first post because of its words about our little veggie patch. We're still growing beets this year, although out on Maple Hill Farm rather than just to the side of our house. And this recipe is still a favorite, one that I felt was appropriate to bring up again now that we're at the height of beet season here in Charlottesville. Plus, I just couldn't resist the urge to re-photograph the dish in all of its neon-pink glory, in proper lighting, with less distraction. It deserves to be the star of the show!
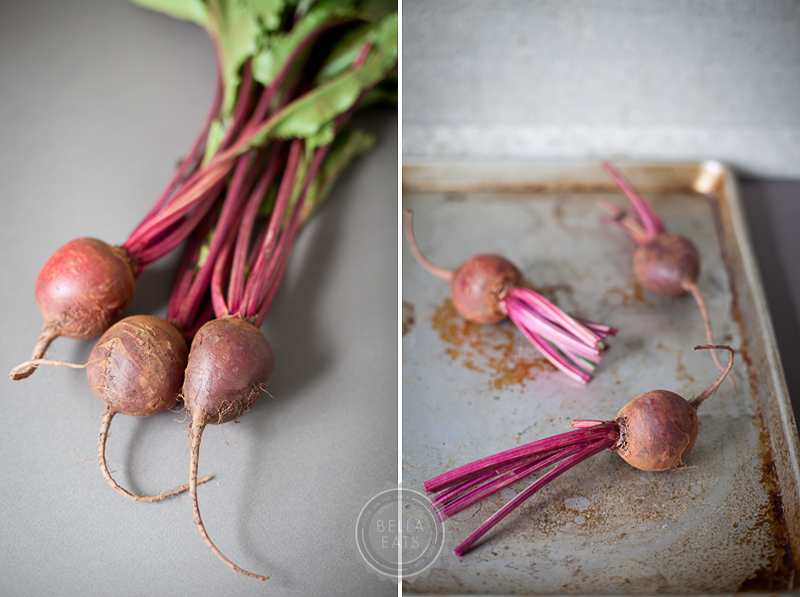
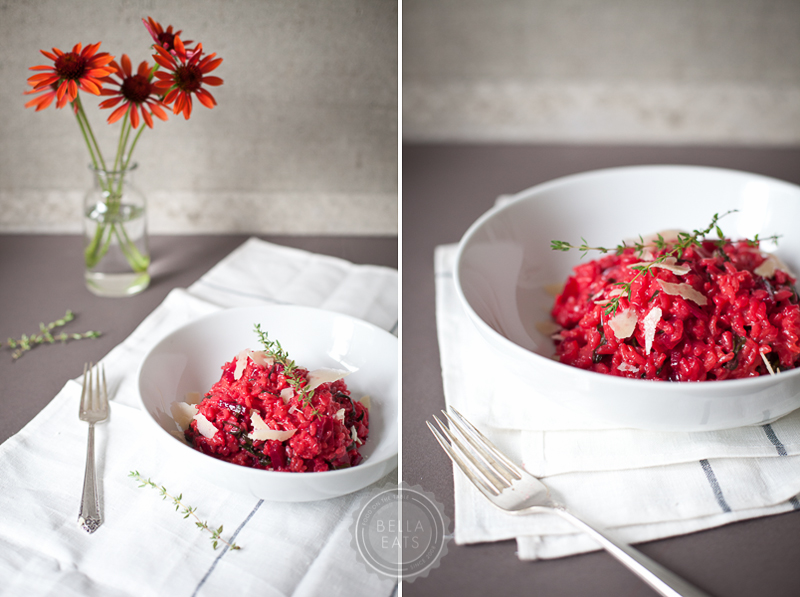
These days, I'm adding the beet greens directly to the risotto, rather than cooking them up on the side. They don't add much flavor to the dish, but I do like the additional texture and all of the nutrients packed into the deep green leaves. Thanks to the New York Times for that little suggestion.
Red Beet Risotto
from the new york times
serves 4 as a main course
Ingredients
- 3/4 pound beets (1 small bunch of 3 to 4)
- 1 bunch beet greens, stemmed and washed (from your beets, if fresh and unwilted. leave them out if they are past their prime)
- 6 to 7 cups chicken or vegetable stock, as needed
- 2 tbsp extra virgin olive oil
- 1/2 cup finely chopped onion
- 1-1/2 cups arborio rice
- 2 garlic cloves
- 1/2 cup dry white wine
- salt
- freshly ground pepper
- 1/2 cup parmesan cheese, grated
- 2 tbsp finely chopped flat-leaf parsley
Method
- First, roast the beets. Preheat your oven to 400°. Wrap the beets in aluminum foil and place on a baking sheet. Roast for about 20 minutes, until the beets are easily pierced with a fork. Remove from oven and allow to cool, then peel and dice the beets. The skin should slide off easily.
- Slice the greens into 1-inch strips, set aside.
- Place the stock in a medium sauce pan and bring to a simmer, then reduce heat to low.
- In a large, wide, heavy-bottom saute pan, heat the oil over medium. Add the onion and stir while cooking until it starts to soften, about 3 minutes. Add the rice and the garlic and stir while cooking until the rice is separate and starting to crackle, about 3 minutes.
- Stir in the wine and cook over medium heat, stirring constantly. When the wine has just about evaporated, add in 1 ladleful of stock (about 1/2 cup) just to cover the rice. The stock should bubble slowly (adjust heat). Cook, stirring occasionally, until the stock is nearly absorbed, then add another ladleful. Continue to cook in this fashion, not too fast and not too slowly, stirring often and adding more stock when the rice is dry, for about 10 minutes.
- Stir in the diced beets and sliced greens. Add more stock and continue cooking as before, for another 10-15 minutes, adding stock when the rice is dry. The rice should be tender but not mushy, with no hardness at the middle. When it has reached the correct consistency, season with salt + pepper. Add the parmesan cheese and the parsley, and stir to combine. The rice should be creamy, if it is not, add another 1/2 cup of stock.
- Adjust seasonings and serve.












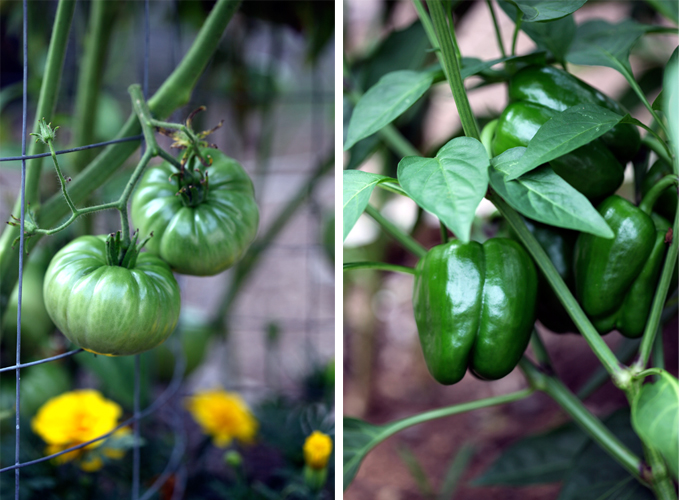

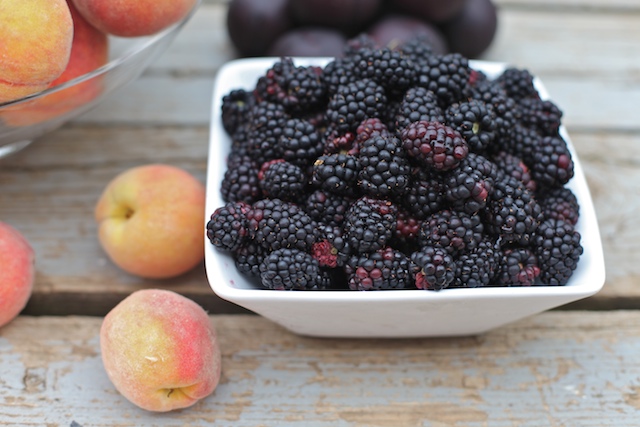


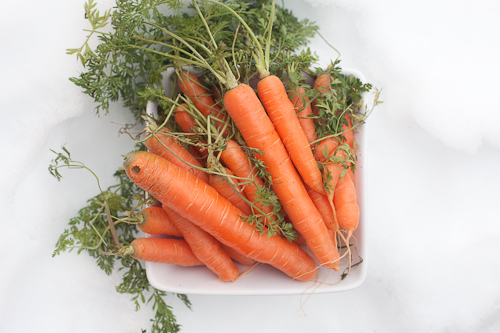


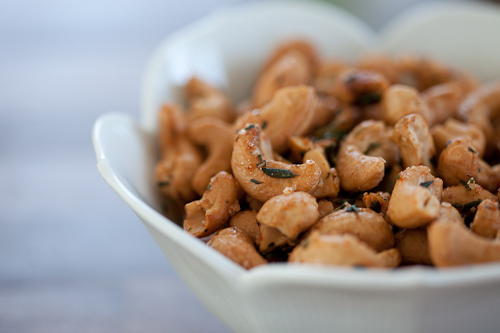
 There has been a lot of stuffing happening around our house these last few weeks, and I don’t just mean boxes full of wedding invitations for a friend or images into a presentation for a big board meeting. I mean stuffed peppers. And squash. It all started with a dinner party thrown by our dear friend Amy, who hosts fabulous gatherings at which everybody cooks a dish based on a theme for the evening. Sometimes the theme is a specific ingredient such as almonds or chocolate, and other times it is based on a method of cooking or assembly. A month or so ago the theme was “stuffed!”, and we enjoyed the food so much that Brian and I have been replicating recipes ever since.
 The timing worked out perfectly, as we had just traded extra bell peppers from our garden for a friend’s over-abundance of homegrown pattypan squash. If you’ve ever grown squash, you know that two people can’t possibly consume all of the bounty from one little squash plant. Its unreal. We planted summer squash two years ago and were so over it by the end of the season that we haven’t planted any since. The same goes for eggplant. Next year we’re planning to coordinate with our friends and plan more regular produce swaps, to take advantage of the space we each have and be sure that nothing will go to waste. Our own mini version of a CSA.
 Peppers are a different story. I never get tired of them, and the only reason for sharing is when I know that we can’t possibly finish them before they start to get soft. I haven’t always felt that way as growing up, I only knew of one type of bell pepper - green. They made appearances in the stir fries, fajitas and supreme pizzas of my childhood, their distinct earthy flavor permeating whatever dish they graced. I wouldn’t have called myself a fan, but I didn’t mind them either. Like milk with breakfast and brushing my teeth before bed, the emerald bells were just an ever-present part of my life that I didn’t bother to question.
 Sometime in college I discovered that bell peppers came in colors other than green, and the rainbow beauties started making their way into my cart each week at the market. I found the sunset-hued varieties to be much more versatile than the green, and added them to my usual pepper-laden dishes as well as pastas, quiches and salads. They aren’t inexpensive, so when I found out we could grow them in Virginia I was quite excited.
Our garden has seen them all. The first summer we were a little over-zealous with our pepper patch, planting green, purple, red, yellow and orange bells, along with one lone (although incredibly productive) banana pepper plant. Our kitchen saw much pepper experimentation that season, as we learned that we really weren’t fans of green bells anymore, that the beautiful eggplant color fades from the purple bells when they are cooked (leaving you, essentially, with a green bell) and that we couldn’t possibly keep up with the harvest from one banana pepper plant (although, now that we know how to pickle, I think we’ll try again next year).
 As summer winds down we are cherishing the last red and yellow bell peppers coming out of the garden. Smaller than those we were getting a couple of weeks ago, but every bit as tasty, they’ve added a mild sweetness and lovely color to frittatas, stir fry, fajitas, homemade pizzas and summer salads. Our favorite use lately has been to sauté thinly sliced red peppers with strips of onion, minced garlic and fresh kale, then to pile the whole mixture on top of grilled spicy Italian sausage drizzled with dijon mustard and encased in a crusty bun. So delicious, so summer.
And then, of course, there is the Stuffed! pepper option. Always a winner in my book, I finally convinced Brian of their merit a few years ago when I made them using red and yellow bells instead of green. We tried the same stuffing recipe with pattypan squash, with much success. Pattypan has such a mild flavor that it lends itself well to a full-flavored filling.
 I came up with this recipe on a whim, adding ingredients to the stuffing until it looked and tasted the way I thought it should. The result was quite tasty but I encourage you to tweak to suit your own tastes.
Stuffed Peppers or Squash
serves 4
Ingredients:
 Chiles Rellenos
serves 4
This recipe is nearly identical to the one above. But, there are a couple of ingredient changes and the method for preparing the peppers is a little different.
Ingredients:
 This weekend, Brian and I are off to Brooklyn for a childhood friend's (mine) wedding. We are so excited, even though we'll only be in the city for about 48 hours. As with all of our vacations, we are planning this one entirely around food (except for the wedding of course, but the lovely bride has Baked! catering the desserts!!!). If you have any suggestions for your favorite foodie havens in Lower Manhattan and Brooklyn...send them on! And expect a full photographic review of our trip next week...!
 September. The first month of Autumn...how is it already upon us? The end of Summer is quite visible in the shriveling of our tomato plants, the slumber of our blackberries and the fully ripe figs on the public trees just down the street (of which I have enjoyed many...). I must admit, I’ve been feeling the fingers of Fall moving in to pull me through the last few weeks of Summer for awhile now and have not been unhappy about it. For Fall, with her crisp air, golden light, crunchy leaves under feet and produce fit for warm and hearty meals, is absolutely my favorite season.
 That’s not to say that I won’t miss Summer. I’ll miss our garden, and bemoan the fact that I didn’t have enough forethought to plant winter squash, sweet potatoes or another round of beets. I’ll miss the gorgeous heirloom tomatoes that literally burst open on the vine because they are so full of juice, and the sweet taste of a peach pulled from a tree with my very own hands. I’ll miss my effervescent white wines and fresh berry tarts topped with vanilla ice cream, and simple green salads for dinner paired with a loaf of french bread. And of course there’s the kayaking, the trips to the reservoir with the dogs and the extended daylight that allows for late evening walks and runs with girlfriends.
 We’ve done our best to preserve as much of Summer’s bounty as possible. We had bigger plans for the 2009 harvest, but I’m proud that we saved so much more than last year and feel certain that we’ll do even better in 2010. We’ve made over 200 ounces of jam, in flavors ranging from strawberry rhubarb to peach lime. I’ve frozen 10 quart-bags full of blackberries and the same number full of peach slices. I’ve baked and frozen zucchini muffins and raspberry muffins to grab on the go on future rushed Autumn mornings. And I’ve slow-roasted tomatoes, 8 pounds of them, to enjoy over pasta and on sandwiches this winter when I need a little reminder of warmer days.
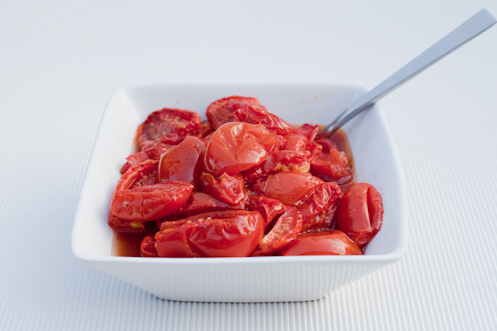
 Slow-roasting tomatoes concentrates their flavor into single bites that seem to explode in your mouth. They will instantly transform a simple parmesan-laced pasta or crusty loaf of bread spread with St. Andres or another triple cream cheese into the most satisfying meal. That is, if you can keep your husband and other fingers away from the pan as the tomatoes cool...
 If possible, I encourage you all to freeze or can as much local produce as you can this summer. I wish I'd pushed the idea earlier on, and promise that next year I'll have more comprehensive guides to canning and freezing. As I've mentioned, Brian and I try to eat as locally and seasonally as possible. Unfortunately, living in Virginia, there comes a time every winter when it is nearly impossible to get any fresh local produce. This year we decided to extend out local eating season as long as possible by preserving as much as we could. We had big plans for canned whole vegetables and fruits, salsas and tomato sauces (of which Brian did make one freezer batch). We weren't as productive as we had hoped, although the season isn't quite over yet. So, get to your local farmer's market this weekend and pick up the last of the tomatoes, peaches, berries, okra etc, and have a little canning or freezing party in your kitchen. Come winter, you'll be so happy you did.
 Slow-Roasted Tomatoes
recipe from Molly Wizenburg's
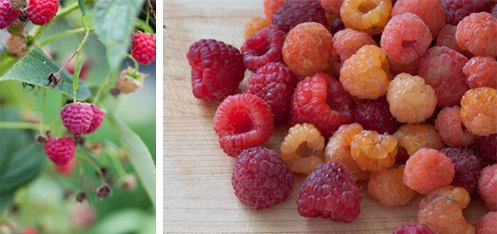 We got lucky. Their first year the raspberries didn't do much. We were rewarded with a couple of small handfuls of fruit - really only enough to snack on as you wandered through the garden checking on other plants, certainly not enough to actually do something with. But this year - the berries' second year - has been quite the surprise. Maybe its because I wasn't expecting much from them, or maybe its that their location in the garden is a bit out of the way, but just a few weeks ago I was shocked (shocked!) to discover that the raspberry branches had reached clear out of their intended boundaries and were loaded (loaded!) with plump berries. I wish I could show you photos of their progress, but the general unruliness of the garden has left me embarrassed to share the evidence.
 Its hard to not get excited about being in the kitchen, concocting new recipes when your fridge has a constantly rotating bowl full of red raspberries, golden raspberries and blackberries. Unless, like me last week, you come down with a bug right in the middle of berry season. It was nothing too serious, but provided enough sour feelings to keep me completely out of the kitchen and away from the blog. I had no interest in cooking food, writing about food or editing images of food for five full days. It was all I could do to get the
 I jumped up, so excited to have the urge to bake without a queazy feeling following along behind that urge. It was getting worrisome, this lack of desire to stand at my kitchen counter, because I had promised some dear friends that I would make cupcakes for their daughter’s third birthday party the next day. And, we had raspberries. Several bowls of raspberries freshly picked from our garden just waiting to be folded into muffin batters and buttercream frostings and made into
  These little raspberry almond muffins pulled me out of my funk, with some help from Ellie Krieger, whose book I had picked up at the library a few weeks prior. They are hearty, made with a mix of all-purpose and whole-grain flours, and pack nice little raspberry punches into each bite. Made moist by applesauce instead of butter, and topped with a crunchy cinnamon and almond topping, they provide an adequate amount of sweetness countered by the slightly tart raspberries - a sure pick-me-up for any slow morning or afternoon. I've frozen a bunch of them to use as my own little weapon against future kitchen blues...
 Raspberry-Almond Muffins
makes 16 muffins
adapted from Ellie Krieger's
  What about those cupcakes I mentioned before? Well, I made
  Other Bella Terra posts this season:
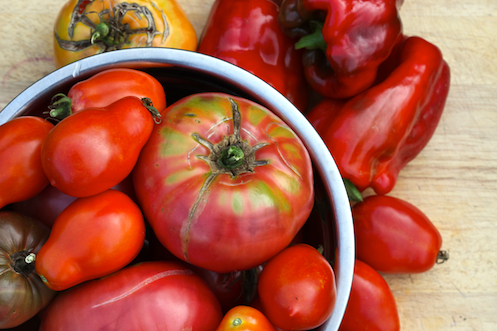 The ripening of tomatoes in our garden is a bittersweet time for me. Sweet, because we look forward to the juicy yellow, orange and red fruits from the time we plant the seedlings in mid-May, and bitter because it signals the beginning of the end - the downward slide of summer into fall. Especially this year, when our harvest season has been cut so short by the
  Despite the blight, we have had way too many tomatoes to handle all at once, just not enough for all of the canned sauces and salsas we had planned. We've had countless tomato mozzarella salads, tomato + hummus + ham sandwiches, roasted tomato pastas and just plain tomato slices sprinkled with salt and eaten while standing over the kitchen sink, juice dripping from our hands. Friends and neighbors have been lucky recipients of our extras - and in fact our guests last weekend claimed our house as the best "bed and breakfast" they'd stayed at as they loaded their car with a bag of heirloom tomatoes and a jar of homemade jam. In return, they shared a recipe for Heirloom Tomato Soup that was not only delicious, but a great way to use up large quantities of our bounty.
 We made it the next night, and I was pleased after my first taste to find that it was reminiscent of a favorite tomato basil soup I enjoyed at a local Greek restaurant while in graduate school - rich and creamy, with a nice spice that hits the back of your throat after each bite. It was wonderful with fresh heirloom tomatoes from the garden, but I also look forward to trying it with canned tomatoes in the winter when I need a little reminder of warmer days. For me, tomato soup has no particular season - I'll take it any time of the year.
 This soup is the grown-up version of a childhood favorite, and pairs perfectly with grown-up grilled cheese sandwiches. We made ours with a fresh french baguette, jarslberg cheese and salty soprassata - but feel free to use whatever soft cheese and cured meat makes you happiest.
Creamy Heirloom Tomato Soup
I adapted this recipe from a friend's adaptation of a
  We've been eating a LOT of tomatoes in our house, so stay tuned for more Bella Terra: Tomato posts...
 And, the
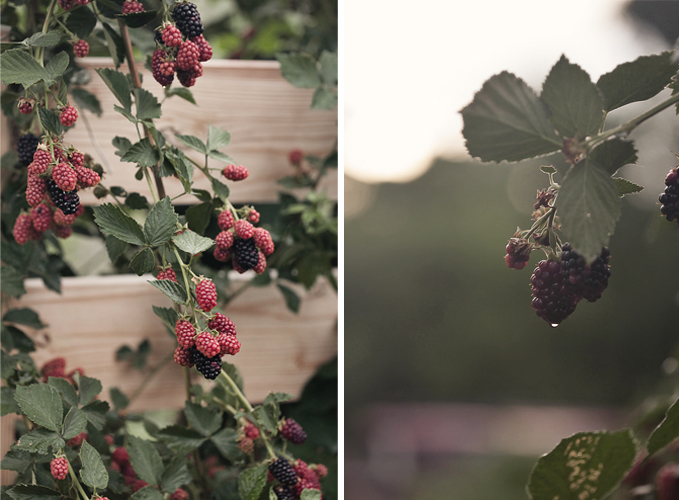
  I must admit, I’m somewhat happy to see this blackberry season come to an end. In just a couple of weeks I’ll be able to cut back all of this year’s fruited wood, and will have the space needed to train the new growth and reclaim our entrance to the garden. Blackberries bear fruit on the previous year’s growth, so as the new arms have reached out into any space they could creep to, we’ve been powerless to do anything about them. I can’t bear the thought of cutting any of them back, for fear of what that would do to next year’s harvest, but I will be very grateful to not have to play limbo to pass through the garden gate.
 I’ve actually shared this recipe with you
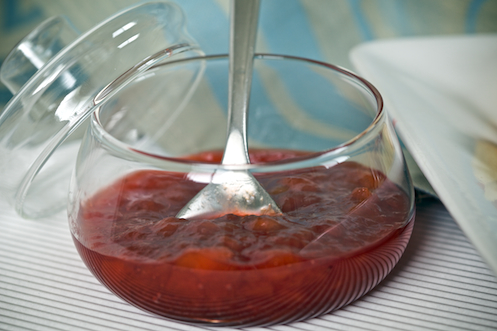
  But our favorite use of our overabundance of the sweet-tart fruit has been jam. So far we’ve tried three different varieties with our blackberries, and we have a few more in mind to try out this weekend. The peaches we’ve been picking have come in handy too, providing a natural sweetness that allows us to cut the sugar used in the original recipe. We’ve been eating jam on biscuits, waffles, pancakes, almond butter sandwiches and even pork tenderloin as a delicious glaze. We have jars upon jars stored up in our pantry, waiting to be given to friends or consumed by us over the next 11 months.
 In fact, one lucky reader will receive a 6oz jar of Bella Eats Jam to enjoy! Just leave a comment on this post telling me your favorite jam/preserves/jelly flavor. Who knows, maybe you’ll see your flavor featured after our next experimentation! I’ll announce the winner on my next post, so comment away until then.
 Blackberry Jam with Peaches or Plums
adapted from
  And, if you're not sure what to do with the 24-ish ounces of jam the recipes above produce, make
  Other Bella Terra posts this season:
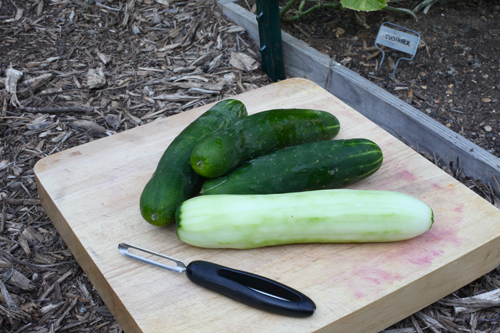
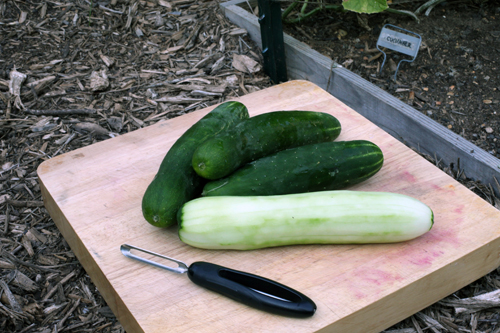
 We enjoyed an abundance of cukes this year, many more than we've been able to handle gracefully. I've shamelessly offered them to anybody who will take them, and am usually met with a pleased-yet-baffled look as I hand over an armload of huge cucumbers and am asked "any suggestions"? Salads, of course. Lots and lots of salads.
 Maybe
Maybe 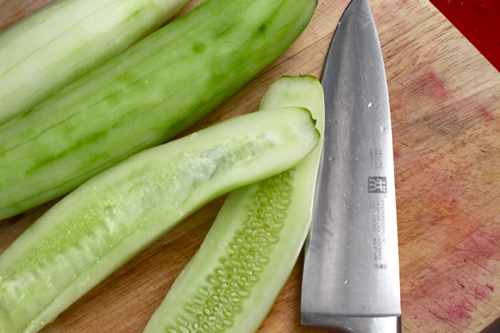 It screams summer, with its refreshing bites of cucumber and juicy tomato. The red onion adds just the right amount of bite that is tempered slightly by the creamy avocado. Take it to a picnic, a backyard fiesta or an evening dinner on a friend's front porch. Margarita not required, but definitely recommended.
 Mid-Summer Cucumber Salad with Champagne Vinaigrette
vinaigrette from emeril via
  Want to read more about our garden?
 We planted kale our first year with the garden but had very little luck with it. We were late getting the seeds in the ground that spring and wound up having very hot weather very early in the season so the poor little shoots never really had a chance. The next year we tried collard greens, having heard that they were a bit heartier than kale. Wow. Heartier was right. We had more collards than Brian and I plus the handful of friends that also like greens could handle. They were enjoyed immensely through most of the summer, but at the end of the season Brian not-so-subtly hinted that he’d had enough collards to last him for quite some time, and could we maybe try kale again next year?
 We chose lacinato kale this spring, also known as black or dinosaur kale, because we love its deep earthy flavor and feel that it is a tad less bitter than other kale varieties. The seeds went into the ground in mid-march, and because we’ve had a relatively cool and wet summer we've been enjoying a steady harvest of fresh garden kale for the last two months. The weather is getting warmer now though, and the greens are fading fast. I’m suddenly feeling the pressure to increase our intake before they all wilt away and we have to wait for the cooler fall air for our next crop.
 Luckily, this increase in consumption corresponded with a couple of key events that led to the creation of a new favorite salad. The first was an email I received a few weeks ago asking if I would like to participate in a
  It is best to use young kale leaves, just 4 to 6 inches long and 2 to 3 inches wide. They will be more tender, and less bitter, than their older siblings. I also tossed in some beet greens, which have a wonderful spicy bite to them and are best if used within one day of being pulled from the ground.
For the dressing I used
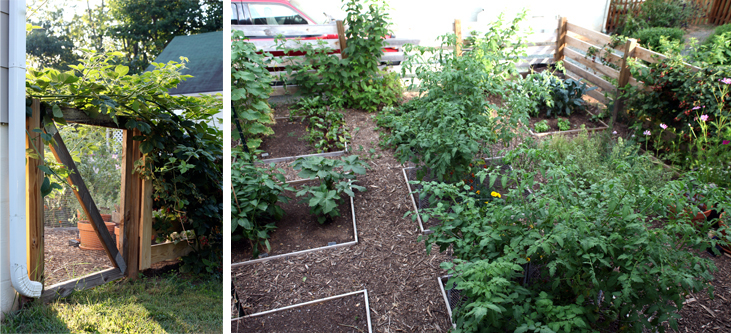 Would you look at that? The garden has gone wild! To enter one must blindly reach through the blackberries to the latch on the gate and, once the latch is found and opened, duck underneath the new growth that won’t bear fruit until next summer. Tomatoes have broken free of their cages, the strawberries are taking over our pathway,
 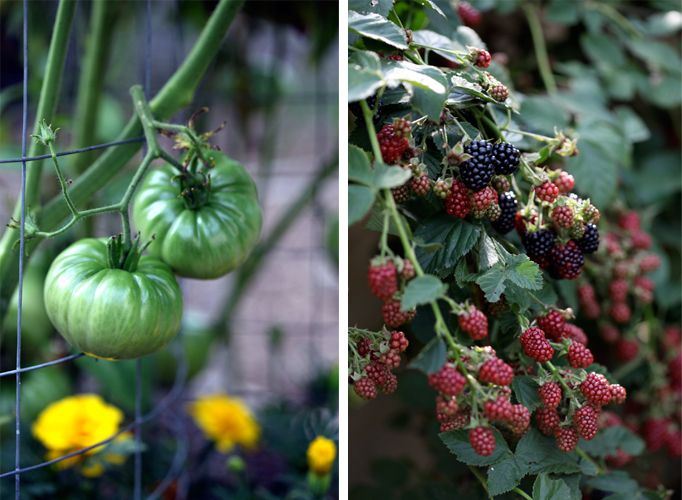 Once inside you embark on what feels like a treasure hunt, pecking through the ever-bearing strawberry patch for the tiny, sweet fruit and pulling blackberry branches aside to reveal purple berries as big as my thumb. The tomatoes are plump and just starting to ripen, moving from a deep apple green through shades of yellow, peach and pink before finally settling into deep rosy reds (romas and brandywine), golden yellows (hawaiian pineapple) or dusty purples (cherokee princess).
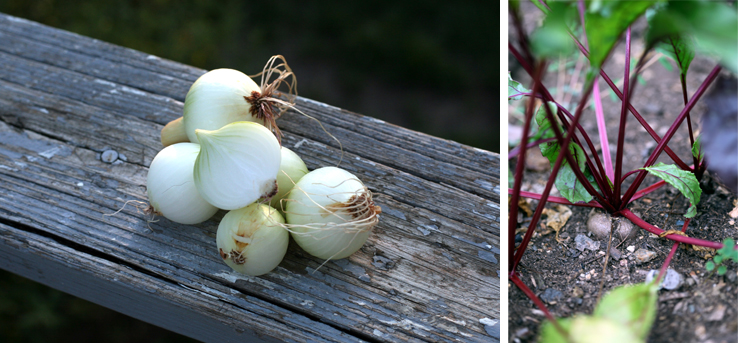 The cucumber vines have been prolific, providing us with more bounty than we’ve been able to handle, and the okra is just starting to bear its strangely-shaped pods. We’ve definitely moved from spring crops into summer, having already said our goodbyes to the
 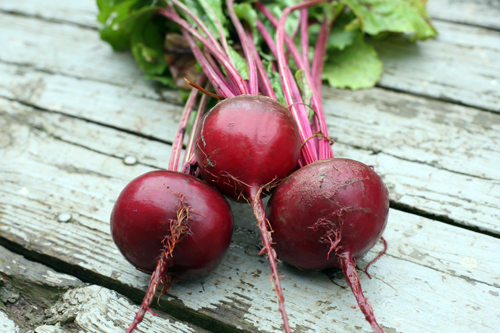 Beets are a newly acquired vegetable on my list of top ten favorites. I was introduced to them just a year or two ago, in the roasted form and mixed with a medley of potatoes, carrots, pearl onions and brussels sprouts. Having only had experience with the canned and pickled varieties in the past, I was pleasantly surprised when I took my first bite of fresh roasted beet and discovered its delightfully sweet flavor and firm texture. Ever since, beets have made it into most of our roasted veggie dishes and made select appearances in
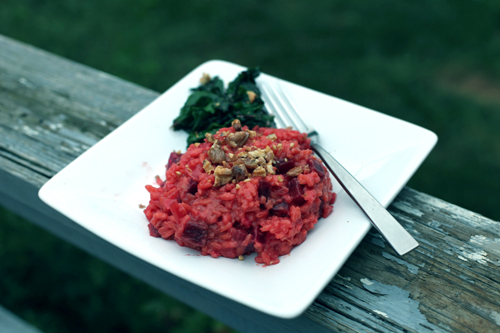
  Most recently I tried beets in a creamy risotto, and was extremely pleased with the final result. I based the recipe on a butternut squash risotto that I've been making for many years, thinking that the beets would make an easy substitute in level of sweetness and overall texture. The beets do take longer to tenderize than butternut squash, so my method resulted in a creamy risotto with bits of slightly firm beets. If you'd prefer your beets to be very soft, I suggest roasting them with a splash of olive oil for 10-20 minutes before adding them to the skillet.
Oh! And if you're lucky enough to purchase (or grow!) beets that still have their greens attached, and those greens are still crisp and brightly colored, cook them up like you would
  I think that barley would be a fantastic whole-grain substitute for the arborio rice in this recipe, we were just all out. Make sure to use pearl barley if you try it - quick-cooking barley doesn't allow for the slow release of the starches that provide the creaminess risotto is known for.
Red Beet Risotto
serves 4 as a main course
Ingredients:
 Interested in reading other posts about our garden?
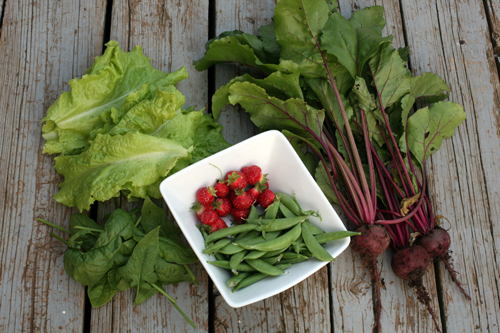 Such as how strawberries make a lovely addition to a simple salad, especially when you drizzle poppyseed dressing over the top. And how sugar snap peas are a fine enhancement for that same salad with their delightful crunch and sweet flavor. Oh, and that lettuce and spinach? Fresh from our garden as well. All the rain we've had this year has kept our lettuces very happy, we didn't have nearly the bounty in 2008 as we've had this summer.
 And I can't forget to mention that a strawberry rhubarb syrup is delicious spooned over a lemon bundt cake, a recipe I'll share with you as soon as I can weed through the gazillion other drafts waiting (im)patiently in my drafts folder.
 And what about the blackberries? They've multiplied exponentially this year, completely taking over the southern edge of the garden and providing respite from the afternoon sun for the tender herbs, onions and lettuces in their shadow.
 Even as I write this post, these pictures I am about to share with you are already inaccurate. For now, the blackberries have started to turn a rosy red. In just a few weeks they will morph into plump purple berries the size of my thumb and provide endless possibilities for jams, pies and ice creams. I can't wait. I really can't.
 But the sugar snaps, they are our greatest accomplishment yet this season. In years past we've started the seeds to0 late, so that just as the plants are starting to produce the heat zaps them and they crumple to the ground, leaving us with just enough peas to munch on in the garden but never enough to make it back to the kitchen. This year though, we've got more peas than we know what to do with. Each day I am bringing a bowl-full inside after popping half a dozen into my mouth while picking. They are delicious in salads and added last-minute to a stir-fry. The less you cook them the better - you don't want them to lose their wonderful crunch.
 My latest use for sugar snaps comes from the June 2009 issue of Bon Appetit. The peas added a nice sweetness to a salad that threatened to be overwhelming with its spicy radishes, red onions and caesar dressing. I loved the textures as well - the crunchy sugar snaps and radishes were a nice compliment for the softer potatoes. Its a nice addition to any picnic or cook-out, and if you make it just for you there will be plenty for lunch all week long.
 I decided to make this salad the day before we were to join some friends for dinner, thinking that potato salad is always more delicious after having sat overnight in the fridge. And it was delicious the second day, although no more so than the first, and certainly less beautiful. The vibrant colors you see below were captured just after the salad was assembled, with the potatoes still slightly warm. The next day all of the colors mellowed and meshed together, leaving a not-nearly-as-nice presentation. I won't make the mistake again.
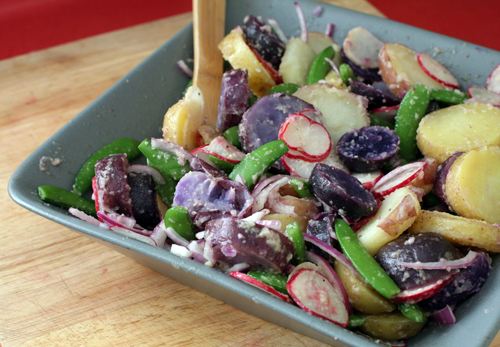 Caesar Potato Salad with Sugar Snap Peas
from Bon Appetit, June 2009
Ingredients:
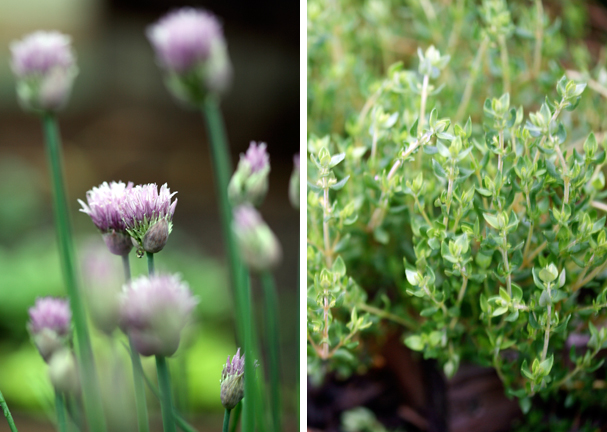 The chives are in full bloom...aren't they lovely? I clip them to put in vases around our house, not only because I love their color but also because if the flowers are left to reach full maturity in the garden we will have chives popping up in every nook and cranny next year. They are incredibly hardy and reproduce like crazy - we divide them to give to friends each year just to keep things under control. Luckily, we are big fans of cooking with chives in our household so those we keep rarely waste away in the garden.
We've also recently discovered that thyme is a very useful herb in a variety of dishes. Keep it whole in soups or as a bed for baked white fish or salmon (it will infuse the fish with a delightful flavor and scent). Or, gently pluck the leaves from the stem and stir them into a buttery barley risotto, our newest discovery and one that fast-tracked its way to the top of our favorites list.
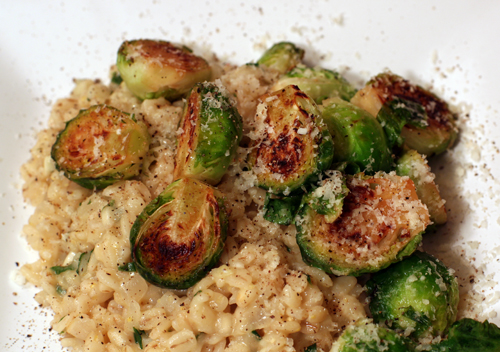
 This meal is one that I concocted while sitting at my desk in the office, waiting for the last 30 minutes of the work day to tick by. My mind tends to wander towards food often, especially when dinner is eminent. On this particular day I realized that things were getting a little sparse in our refrigerator, other than a little baggie of brussels sprouts I'd picked up at Whole Foods the weekend before that needed to be cooked as soon as possible. We always keep a variety of grains in our pantry and luckily so because on this day, thoughts of risotto topped with golden brussels sprouts danced into my head and refused to be silenced.
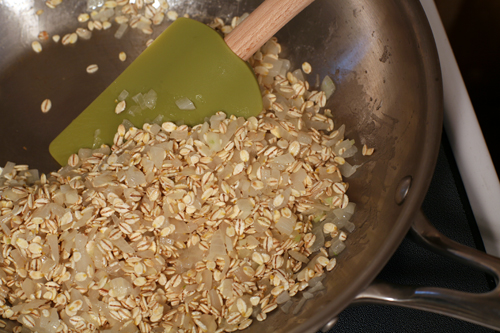 I wanted a risotto heartier than the typical white rice variety so chose to use barley instead. If you've never tried using barley in risotto I insist that you do, as soon as possible. Barley adds an earthy depth to the dish that is especially good with herbs, spinach or mushrooms. It may take a bit longer to cook than the traditional rice dish but it is more flavorful and filling*.
 Brian and I ate in complete silence this night, save the occasional "this is SO good" or "I could eat this EVERY night" comments. The thyme complements the barley and the brussels sprouts beautifully, and the high-quality butter was worth the extra splurge. I used
  Buttery Barley and Herb Risotto with Golden-Crusted Brussels Sprouts
serves 3-4
Risotto:
 *Don't get me wrong, I love a good arborio rice risotto as well, but I typically reserve it for when the risotto is a side rather than the centerpiece. Arborio rice has a milder flavor and is tasty with butternut squash or other sweeter vegetables like beets.
 see how they've grown?
 Chives are one of my favorite herbs to use in the kitchen because they are so versatile. Toss them with fingerling potatoes to roast, sprinkle them raw over top of an omelet, fold them into batter to be baked in cheddar biscuits...their mild, onion-like flavor allows for endless possibilities. I’d bookmarked
  I'd never made a frittata before. It seemed to me that it would be a difficult task and, having never read a frittata recipe before, I assumed that it would contain whole milk and cheese (similar to a quiche) and not be terribly productive to my weight-loss efforts. Boy was I wrong, on ALL assumptions. For one, the process was really easy. As long as you have a decent non-stick skillet and some patience, this dish really couldn't be easier. And I used just two dishes to make it...two! I really like a quick and simple recipe, but add "very little clean-up" to its list of attributes and I am in love.
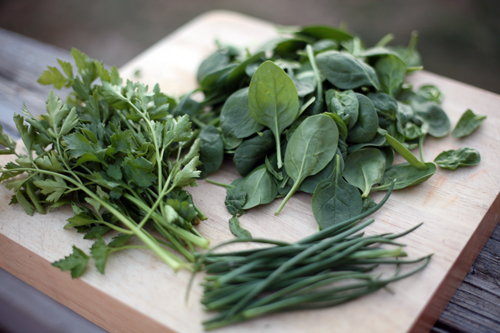 Second, the frittata is much healthier than any quiche recipe I've made. The main contributor to its healthfulness? A lack of crust. That's right...no crust. And...no cheese. The greek yogurt makes the consistency so creamy that you'll never miss it. Plus, this particular recipe is loaded with spinach and herbs, not to mention heart-healthy walnuts and yummy mushrooms.
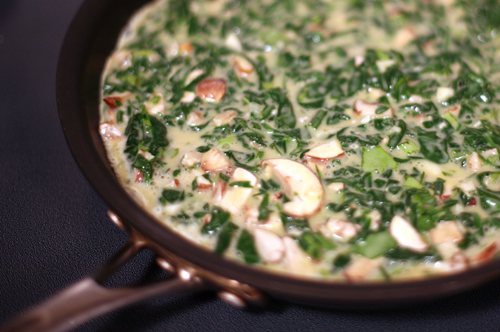 I was so impressed with my first frittata experience that I've already been dreaming up new combos of flavors. I can't wait until that pile of herbs and spinach pictured above is all home-grown from my garden, maybe with some bell peppers and tomatoes mixed in. Oh, what a glorious summer it will be...
 Spinach, Herb and Mushroom Frittata
258 cal, 19g fat, 6g carbs, 1g sugar, 2g fiber, 11g protein [nutritional info from thedailyplate.com]
recipe adapted from
  In the Blog World...
Tina at
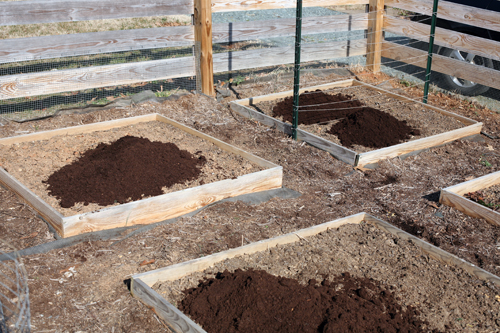
  It was perfect weather for wandering around the local garden center, picking up spring-harvest seeds and dreaming about how, if only I had my own
  On Saturday I bought lettuce and spinach, beets, peas and broccoli, all seeds that can go in the ground in the next couple of weeks and provide a harvest in as few as 45 days. In May, after danger of Virginia frost, I'll be sowing green beans and okra seeds to be harvested in July. Baby tomato, cucumber, bell pepper and squash plants will go into their assigned beds and parsley, basil and dill will join the perennial chives, thyme and oregano already starting to show some green.
 I think I am most looking forward to growing our own broccoli, although each veggie has a special place in my heart and becomes my instant favorite the minute it is ripe. But broccoli...it gave us trouble last year, or at least the squash bugs that enjoyed most of the harvest gave us trouble. And I enjoy a challenge. We will persevere with broccoli this spring and when we do we will make it
  There are a few things about this recipe that I need to share, things I will do differently when I make it again. First, I used whole coriander but will definitely use ground next time. Biting into the occasional coriander seed was an intense, unpleasant experience for me. If you love coriander feel free to use whole seeds, but I think spreading the flavor more evenly by using ground would be more enjoyable.
 Second, the tofu needs to go in the oven first. I put the tofu and broccoli in at 425* together, and the broccoli was done well before the tofu. To speed things up I wound up removing the tofu from the oven and quickly pan-frying it, but I think it would be really good roasted. I've specified in the recipe below to put the tofu in first and roast it until golden brown on one side before flipping it and adding the broccoli for the last 20 minutes.
 Roasted Broccoli with Glazed Tofu
inspired by the
  A few notes:
First, my cousin Kelly (