
As I flew over Charlottesville last Thursday en route to Florida I took note of the fiery colors starting to present themselves in the trees below. The deep orange and bright yellow hues stood out in the dark green forest like fireworks in a midnight sky. Autumnal thoughts quickly left my mind as I jetted towards a weekend to be spent with family and friends in weather that required sundresses and sandals rather than corduroy pants and scarves. Outdoor dining options were declined in favor of cool indoor air conditioning as we all sipped punch made from honeydew, mint and ginger ale. The summertime frame of mind embedded itself so deeply in my subconscious that I boarded the flight home on Sunday in a tank top and flip flops, not thinking about the sub-50-degree air I would be greeted with as I deplaned at CHO.
Despite the 85-degree weather and ever-present green of my home state, during my visit last weekend there were a couple of clues that indicated the current season. The stores there all have the same picked-over Halloween costume aisles and sections devoted to Thanksgiving decorations as we have in Virginia. Restaurant menus show some seasonal specials featuring sweet potatoes and cranberries, and the slight drop in nighttime temperature has Floridians pulling out their lightweight fleece hoodies to protect themselves from the “cold”. The light has changed, lower and more golden that it was when I last visited a few months ago. But the indicator that hit home most with me, that brought back a flood of childhood memories of Autumn in Florida, was the giant box of full-size candy bars I noticed stashed close to the front door at my daddy’s house.
Growing up in Florida, Autumn had a very different feel than it does now that I live in Virginia. In my life now, Autumn means festivals and apple picking, changing leaves and layered clothing. We attend sheepdog trials and buy pumpkins from local farmers, plan parties with locally made hard cider and hand-dipped caramel apples. In Florida, in my youth, I remember the night air turning a little bit cooler and being very, very excited if I spotted a tree changing from green to a pale yellow-brown as I drove past on the interstate. I'd insist on wearing a sweater for Thanksgiving dinner no matter the temperature outside and the fact that I may sweat through it, and longed for a day when I could justify the purchase of a scarf. And then, of course, there was Halloween. For me, Autumn in Florida was all about Halloween.
The party planning started in September. Each year my parents and I (well, my parents, really) hosted a huge Halloween bash at our house, complete with haunted cemetery in the yard, costume contest, bobbing for apples or, when my friends and I all had braces, eating donuts hung from the rafters of our back porch with hands tied behind our backs. Evenings and weekends prior to the big day were spent with my father in the garage, drawing tombstone shapes on giant pieces of foam and cutting them out with a hot knife, the smell of melting styrofoam permeating the space for weeks. Daddy is a perfectionist, so the paint job those tombstones and the corresponding cemetery sign that arched high over the gate to our back yard received was perfect. That was one scary cemetery my friends had to walk through to get to the fun and games.

Come Halloween night, a few days after our party, my father gave, and still gives, full-size candy bars out to trick-or-treaters.
Full-size. All of the neighborhood kids know about my dad and the top-notch treats he gives out, which means he buys
a lot of candy bars. I enjoyed trick-or-treating as a child, but what I enjoyed even more as a young adult was staying home with Daddy, handing out those candy bars to the costumed youth and hearing the excited tone of their voices as they whispered to each other "see! I told you he gave out the good stuff!" I'd look over at Daddy, who would grin and chuckle and comment on all of their costumes as he dropped bars into their buckets, and smile with pride that I had the cool dad who gave out the good stuff.

That's my daddy, generous to a fault, always giving out the good stuff. Whether it be full-size candy bars to strangers on Halloween, time on the telephone working through digital camera and photography questions or unbelievably kind gifts, he's always striving to put a smile on the faces of those surrounding him. At this time of year, especially, I am nostalgic for my youth and the time I spent with him each fall, wishing I could fold his tradition of handing out full-size candy bars into my life now and regretting that we live in a neighborhood that trick-or-treaters don't visit. So instead, I made Daddy's favorite kind of pie and thought ahead to Thanksgiving, when we'll sit around the same table with Brian and all of my stepfamily and enjoy an Autumn meal together.
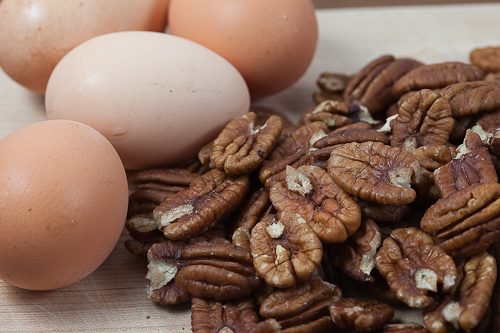
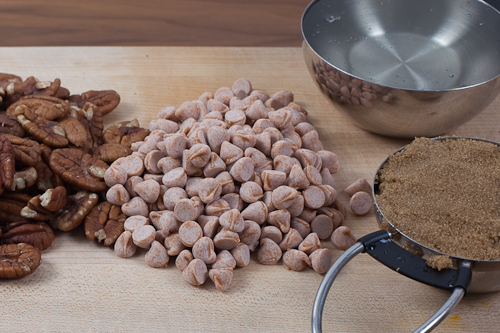
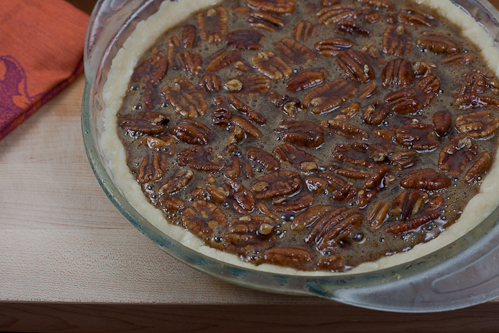
I tried out two different pecan pie recipes this week along with two different crusts. The first is more of an old-fashioned pecan pie, the filling made with dark brown sugar, butter, egg and a splash of bourbon with the pecan halves kept intact. The second pie filling consisted of a little bit of dark brown sugar paired with a lot more corn syrup, butterscotch chips, eggs and chopped pecans. They were both delicious, although there was a definite favorite amongst those surveyed at my office and in our home. I am hesitant to tell you which it was, as both recipes are great and I really recommend that you choose your favorite based on your own tastes.

Devoid of corn syrup, this pie has the dense texture that I associate with the old-fashioned pecan pie. It is sweet, being mostly sugar, but the bourbon adds a nice mild kick to the bite and a pleasant aftertaste that cuts the sweetness quite successfully.
Spirited Pecan Pie
adapted from bon appetit, october 2005
Ingredients:
- one 9-inch pie crust, raw (see below for joy's no-roll pie crust that I used, or you can use any recipe that you are comfortable with)
- 2 cups (packed) dark brown sugar
- 4 large eggs
- 1/4 cup (1/2 stick) unsalted butter, melted
- 1 tbsp bourbon
- 2 tsp vanilla extract
- 1/4 tsp ground cinnamon
- 2 cups pecan halves
Method:
- Preheat oven to 350*.
- Mix sugar, eggs, butter, bourbon, vanilla and cinnamon together in a bowl. Stir in the pecan halves. Pour filling into dough-lined dish.
- Bake pie until filling is slightly puffed and set in center, covering crust edges with foil if browning too quickly, about 40 minutes.
- Let pie cool completely before slicing.

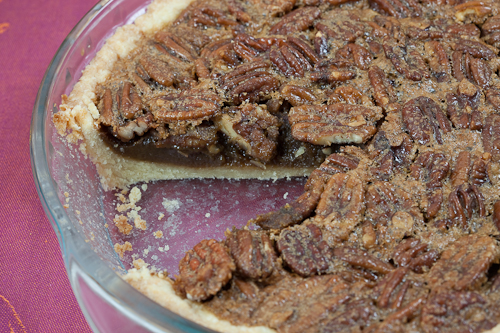
With corn syrup used as the main sweetener and the addition of butterscotch chips, this pie is ultra-sweet. The filling is silkier than the pie above, and the chopped pecans make each bite more consistent in texture. I loved the addition of butterscotch in this pie, and know my daddy will too as he is a big fan of those little golden chips.
Butterscotch Pecan Pie
from Marijean of STL Working Mom. This pie received rave reviews at the C'ville Pie Fest - the inspiration for Bella Eats Pie Month - so I just had to try it.
Ingredients:
- one partially pre-baked 9-inch flakey pie crust (I used the p-p-p perfect pie crust below, but you can use whatever recipe you are comfortable with)
- 1 cup light corn syrup
- 1/2 cup firmly packed dark brown sugar
- 1/2 stick unsalted butter, cut into pieces
- 1 cup butterscotch chips
- pinch of salt
- 3 large eggs
- 1 egg yolk
- 1-1/2 tsp vanilla extract
- 2 cups chopped pecans
Method:
- Preheat your oven to 350*.
- In a medium saucepan on the stove top, warm the corn syrup, sugar, and butter over low heat until incorporated. Remove from heat and stir in butterscotch chips. Add pinch of salt and set aside for 5 minutes, stirring occasionally.
- In another bowl, whisk the eggs and egg yolk until frothy. Add vanilla and whisk again. Add your butterscotch mixture to the eggs and whisk until well incorporated. Add the chopped pecans, stirring until all are coated with butterscotch mixture.
- Pour filling into partially-baked pie crust. Bake in lower third of oven for 40 minutes.
- Allow to cool completely before cutting.

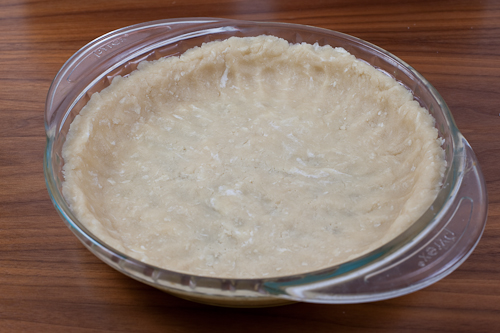
Joy is right - this pie crust is easy! If you're wanting to make a crust without much notice, or are intimidated by crusts that require rolling, this recipe is for you. The final texture was more crumbly than flakey and reminded me of the consistency of a shortbread cookie. But it held together nicely when sliced and has a pleasant, mild flavor.
No-Roll Pie Crust
from joy the baker
Ingredients:
- 1-1/2 cups all purpose flour
- 3/4 tsp salt
- 2 tbsp sugar
- 1/8 tsp baking powder
- 1/4 cup (4 tbsp) butter that has been grated on a cheese grater
- 1 tbsp cream cheese, at room temperature
- 1/4 cup vegetable oil
- 2 tbsp cold milk
Method:
- First, grate your butter on a cheese grater and place in the freezer.
- In a medium-sized bowl combine flour, salt, sugar and baking powder.
- Add frozen, grated butter and cream cheese. With your fingers, work the cream cheese and butter into the flour mixture, breaking up the butter and cream cheese so that the mixture resembles course breadcrumbs with some pea-sized bits of butter.
- Combine the milk and oil and whisk together. Add all at once to the flour/butter mixture and mix together gently with a fork, until all flour has been introduced to the liquid and the dough starts to come together in small clumps. It does not need to come together into a ball.
- Dump the dough mixture into your pie plate. With your fingers, press the dough against the bottom and up the sides of the dish. Try to get the dough as even as possible, but don't worry about finger indentations.
- Place the prepared crust in the freezer while you preheat your oven and prepare your filling. If you're going to pre-bake the crust, heat the oven to 350*and line the chilled pie crust with foil, weigh it down with pie weights or dried beans and bake for 10 minutes. Remove the foil and bake until golden brown, 5-10 minutes.
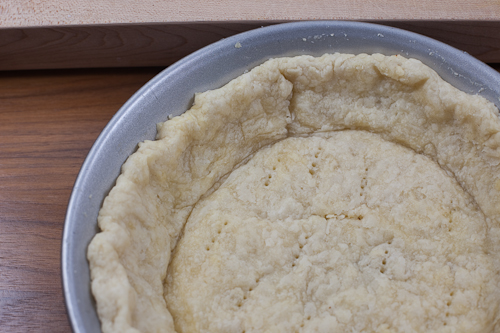
Ok, so this crust IS pretty perfect. It is an all-shortening crust, which I've never made before, and I was incredibly impressed with the flakey result. The flavor was delicious (although not as good as all butter, in my opinion) and the texture couldn't be beat . One warning, it shrinks with baking, as shortening literally "shortens" the gluten strands in the dough even more so than butter. Before pre-baking, the crust pictured below reached the top of my pie pan. So, be sure not to fill the crust as much as you normally would if you don't pre-bake.
P-P-P Perfect Pie Crust
from the pioneer woman
Ingredients:
- 1-1/2 cups vegetable shortening (non-hydrogenated)
- 3 cups all-purpose flour
- 1 egg
- 5 tbsp cold water
- 1 tbsp white vinegar
- 1 tsp salt
Method:
- In a large bowl, gradually work the shortening into the flour with a pastry cutter (or 2 butter knives, or your fingers) until the mixture resembles a course breadcrumbs, about 3-4 minutes.
- In a small bowl, beat the egg with a fork then add it to the shortening mixture.
- Mix together your water and vinegar and salt, then add to the shortening mixture.
- Gently stir the ingredients together with a fork until they are well incorporated.
- Divide dough into two equal balls (I differed from the recipe here - it called for three balls but they seemed to be too small for a pie crust to me). Place each ball in a ziplock bag and use a rolling pin to flatten them each into a 1/2-inch thick disk. Seal the bags and place them in the freezer until you need them (for at least 30 minutes but up to 3 months).
- When you are ready to use the dough to make a crust, remove from the freezer and allow to thaw for 15 minutes. On a floured surface, roll out the dough starting from the center of the disk and working your way out, rotating the disk as you go to keep it round in shape. Sprinkle dough with flour if it is sticking to your rolling pin. (I did this on a sheet of parchment paper to make transfer to the pie dish very easy). You should have a circle of dough 13-inches in diameter for a 9-inch pie pan.
- Lift the dough carefully from the counter to place in the pie pan. (Or, if you've used parchment paper, turn your pie pan upside down on top of the dough, and carefully flip the dish and dough so that the dough is on top of and settles into the dish. Peel off the parchment paper.) Press the dough into the corners of the pan and pinch and press the edge.
- Set your oven to 350*. Prick the dough bottom with a fork in several places for ventilation. Line your dough in your pan with aluminum foil, then place pie weights or dried beans on top of the foil. Bake for 10 minutes, then remove the pie weights and the foil and bake for 5 minutes more if only partially pre-baking. To fully pre-bake, bake without foil until the crust is a golden brown. Remove from oven and allow to cool completely before filling.
I've decided to extend
Bella Eats Pie Month into November for one more week, so be sure to visit next Thursday for the last installment,
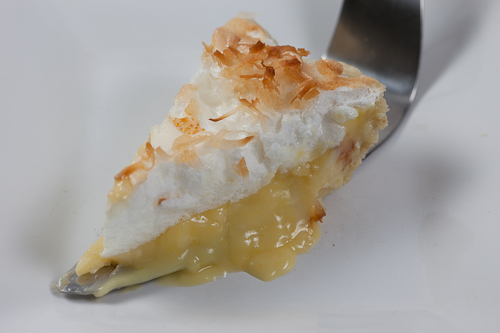
Coconut Cream Pie, along with a review of
Mrs. Rowe's Little Book of Southern Pies by Mollie Cox Bryan.
And, I'll have a special
Halloween post for you tonight or tomorrow morning, so be sure to tune back in!










 The restaurant and its legendary pie quickly slipped my mind as we moved into a house and started new jobs, busying ourselves with life in Charlottesville and the many culinary delights we have in this little city. I hadn’t thought of my momma’s story in 4 years, until I attended the
  The
The  Despite its petite size,
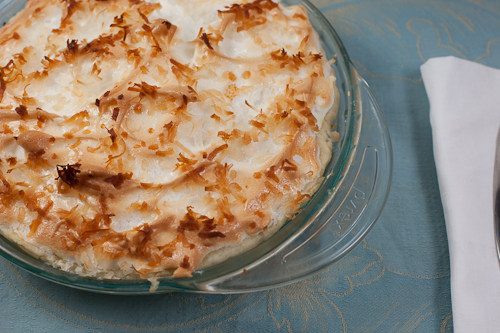
 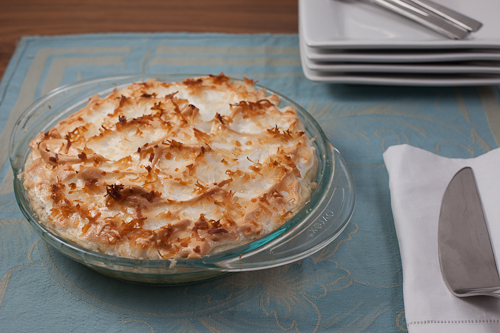 I chose to tackle the Original Coconut Cream Pie recipe rather than the apple variety my momma had raved about. As the best-selling pie at
 And that concludes Bella Eats Pie Month! 5 weeks, 5 varieties, and 5 pounds later, I've learned so much and hope you have too. Please write and tell me about any of these or other pie recipes that you try out this holiday season. I'd love to hear from you.
While I'm ready to take a short break from pie, as are all of our friends and co-workers, I look forward to continuing my experimentation and sharing more pie recipes with you in the future. Here are a few more on my list to try:
 As I flew over Charlottesville last Thursday en route to Florida I took note of the fiery colors starting to present themselves in the trees below. The deep orange and bright yellow hues stood out in the dark green forest like fireworks in a midnight sky. Autumnal thoughts quickly left my mind as I jetted towards a weekend to be spent with family and friends in weather that required sundresses and sandals rather than corduroy pants and scarves. Outdoor dining options were declined in favor of cool indoor air conditioning as we all sipped punch made from honeydew, mint and ginger ale. The summertime frame of mind embedded itself so deeply in my subconscious that I boarded the flight home on Sunday in a tank top and flip flops, not thinking about the sub-50-degree air I would be greeted with as I deplaned at CHO.
 Despite the 85-degree weather and ever-present green of my home state, during my visit last weekend there were a couple of clues that indicated the current season. The stores there all have the same picked-over Halloween costume aisles and sections devoted to Thanksgiving decorations as we have in Virginia. Restaurant menus show some seasonal specials featuring sweet potatoes and cranberries, and the slight drop in nighttime temperature has Floridians pulling out their lightweight fleece hoodies to protect themselves from the “cold”. The light has changed, lower and more golden that it was when I last visited a few months ago. But the indicator that hit home most with me, that brought back a flood of childhood memories of Autumn in Florida, was the giant box of full-size candy bars I noticed stashed close to the front door at my daddy’s house.
 Growing up in Florida, Autumn had a very different feel than it does now that I live in Virginia. In my life now, Autumn means festivals and apple picking, changing leaves and layered clothing. We attend sheepdog trials and buy pumpkins from local farmers, plan parties with locally made hard cider and hand-dipped caramel apples. In Florida, in my youth, I remember the night air turning a little bit cooler and being very, very excited if I spotted a tree changing from green to a pale yellow-brown as I drove past on the interstate. I'd insist on wearing a sweater for Thanksgiving dinner no matter the temperature outside and the fact that I may sweat through it, and longed for a day when I could justify the purchase of a scarf. And then, of course, there was Halloween. For me, Autumn in Florida was all about Halloween.
 The party planning started in September. Each year my parents and I (well, my parents, really) hosted a huge Halloween bash at our house, complete with haunted cemetery in the yard, costume contest, bobbing for apples or, when my friends and I all had braces, eating donuts hung from the rafters of our back porch with hands tied behind our backs. Evenings and weekends prior to the big day were spent with my father in the garage, drawing tombstone shapes on giant pieces of foam and cutting them out with a hot knife, the smell of melting styrofoam permeating the space for weeks. Daddy is a perfectionist, so the paint job those tombstones and the corresponding cemetery sign that arched high over the gate to our back yard received was perfect. That was one scary cemetery my friends had to walk through to get to the fun and games.
 Come Halloween night, a few days after our party, my father gave, and still gives, full-size candy bars out to trick-or-treaters. Full-size. All of the neighborhood kids know about my dad and the top-notch treats he gives out, which means he buys a lot of candy bars. I enjoyed trick-or-treating as a child, but what I enjoyed even more as a young adult was staying home with Daddy, handing out those candy bars to the costumed youth and hearing the excited tone of their voices as they whispered to each other "see! I told you he gave out the good stuff!" I'd look over at Daddy, who would grin and chuckle and comment on all of their costumes as he dropped bars into their buckets, and smile with pride that I had the cool dad who gave out the good stuff.
 That's my daddy, generous to a fault, always giving out the good stuff. Whether it be full-size candy bars to strangers on Halloween, time on the telephone working through digital camera and photography questions or unbelievably kind gifts, he's always striving to put a smile on the faces of those surrounding him. At this time of year, especially, I am nostalgic for my youth and the time I spent with him each fall, wishing I could fold his tradition of handing out full-size candy bars into my life now and regretting that we live in a neighborhood that trick-or-treaters don't visit. So instead, I made Daddy's favorite kind of pie and thought ahead to Thanksgiving, when we'll sit around the same table with Brian and all of my stepfamily and enjoy an Autumn meal together.
 I tried out two different pecan pie recipes this week along with two different crusts. The first is more of an old-fashioned pecan pie, the filling made with dark brown sugar, butter, egg and a splash of bourbon with the pecan halves kept intact. The second pie filling consisted of a little bit of dark brown sugar paired with a lot more corn syrup, butterscotch chips, eggs and chopped pecans. They were both delicious, although there was a definite favorite amongst those surveyed at my office and in our home. I am hesitant to tell you which it was, as both recipes are great and I really recommend that you choose your favorite based on your own tastes.
 Devoid of corn syrup, this pie has the dense texture that I associate with the old-fashioned pecan pie. It is sweet, being mostly sugar, but the bourbon adds a nice mild kick to the bite and a pleasant aftertaste that cuts the sweetness quite successfully.
 With corn syrup used as the main sweetener and the addition of butterscotch chips, this pie is ultra-sweet. The filling is silkier than the pie above, and the chopped pecans make each bite more consistent in texture. I loved the addition of butterscotch in this pie, and know my daddy will too as he is a big fan of those little golden chips.
 Joy is right - this pie crust is easy! If you're wanting to make a crust without much notice, or are intimidated by crusts that require rolling, this recipe is for you. The final texture was more crumbly than flakey and reminded me of the consistency of a shortbread cookie. But it held together nicely when sliced and has a pleasant, mild flavor.
 Ok, so this crust IS pretty perfect. It is an all-shortening crust, which I've never made before, and I was incredibly impressed with the flakey result. The flavor was delicious (although not as good as all butter, in my opinion) and the texture couldn't be beat . One warning, it shrinks with baking, as shortening literally "shortens" the gluten strands in the dough even more so than butter. Before pre-baking, the crust pictured below reached the top of my pie pan. So, be sure not to fill the crust as much as you normally would if you don't pre-bake.
 I've decided to extend Bella Eats Pie Month into November for one more week, so be sure to visit next Thursday for the last installment, Coconut Cream Pie, along with a review of
  Our car winds its way up the narrow gravel road to the top of
  Once parked we make our way through the crowd towards the renovated barn, dodging bundled-up children being pulled in bright red Radio Flyer wagons by slightly-frazzled parents. The smell of freshly baked apple pie and apple cider doughnuts fills the air as we find the ‘pick-your-own’ information kiosk, grab a bag, ask about availability and set off on our hunt for sweet and crisp Fuji apples. We continue our journey towards the top of the mountain, this time on foot, huffing and puffing just a little as I am reminded again of why I should wear sturdier shoes on these treks. Fifteen minutes later we have found rows full of our target. The bright pink globes dance in the wind and beg to be picked, and I am thankful again that Brian is tall and can reach the otherwise unattainable perfect specimens near the tops of the trees.
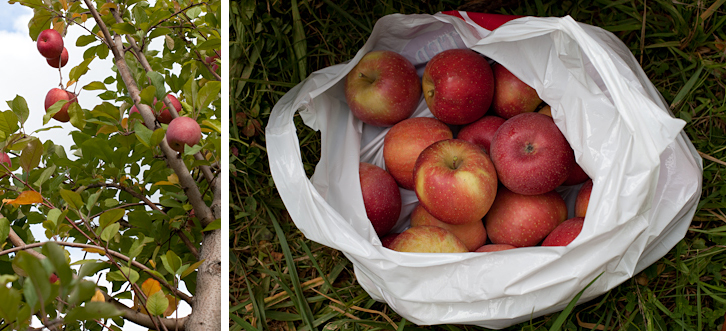 We fill our first bag, saving the second for a bin full of bright green Granny Smiths calling our name back at the barn. The pick-your-own trees once dripping with that variety were stripped the previous two weekends during the
  I knew from the first moment that Brian and I started talking about
  I really wanted to try something new (to us, at least) for Pie Month, and so started to look into apple pie variations. Initially Brian balked, for even though he is a fan of the apple cranberry pie I make every year, he is truly a classicist when it comes to his favorite dishes and was not keen on the idea of my shaking things up. Until a reader, Hannah, was sweet enough to send me her grandmother’s recipe for Cheddar Apple Pie. Cheddar? Apples? Yum! I’m embarrassed to say that we’d never even heard of such a pie in our household, not even the Wisconsin tradition of layering a slice of cheddar across a warm slice of freshly-baked apple pie. The idea appealed to both of us, especially Brian’s not-so-sweet tooth, and so Cheddar Apple Pie was penciled into the agenda.
 A bit more research later, and I discovered that I’d overlooked the
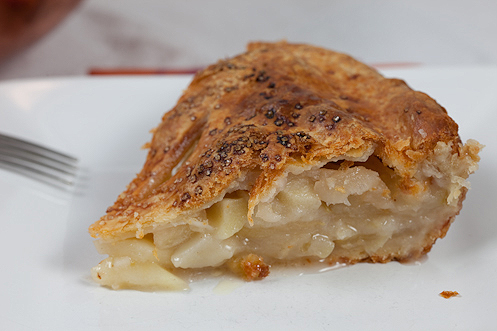
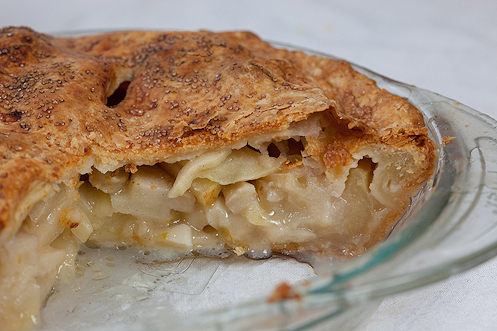
  As with most recipes I've tried from within the pages of Gourmet, this one came together beautifully. Once the dough softened up a bit and stopped giving me a killer upper-body workout, it was a dream to work with. No tears or splits or crumbles except for at the edges. The slight sweetness of the filling was perfectly balanced by the savory tone of the crust, which flaked just as it was meant to and melted away on the tongue. The cheddar added a nice punch that left me wishing I had baked off the scraps leftover after trimming the pie's edge, imagining that pairing those crispy strips with slices of fresh apple would have provided a perfect afternoon snack.
The not-too-sweet nature of this pie was the perfect follow-up to the rich chocolate + caramel pies I was producing last week. If you have loved ones who aren't big dessert fans, who just don't have much of a sweet tooth, this pie is the answer to your "what shall I make" questions. Even Brian, who has been known to pass up cake / cookies / pie / ice cream in favor of an extra helping of meat or mashed potatoes, consumed multiple pieces of this pie in a day. And then did it again the next. This pie is a winner, indeed.
 I had an additional apple pie planned for the week, a
  Cheddar-Crusted Apple Pie
 Notes:
 Last Thursday at approximately 12:00pm I learned of the
  I told myself that there was a reason for that expression and that, despite my lack of knowledge of pie baking, the task at hand was really a simple one. I had Thursday night to make two test pies trying out two different crust recipes and two different filling combinations, Friday evening to make a final test pie using the knowledge I gained from my first two pies and Friday night to assemble and bake my final entry. No problem.
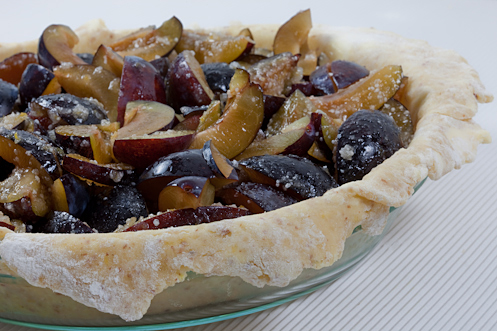 I found two reliable sources for the base pie crust (or, pâte brisée) recipes,
  For the filling, I found a handy ratio in
 But still, Friday morning Brian helped me carry the two pies (one apple-plum, one pure plum), a server, plates and forks to our office, where I received feedback from seven more people. We all agreed on the too much juice issue, but opinions varied on the preferred crust and filling. In the end, I went with my preference (and luckily Brian’s too, whose palate I trust implicitly) and advice from
  I was so convinced that the third test pie would be a winner. So convinced. We invited a couple of friends over for the final testing and pulled the lattice-topped beauty out of the oven to great fanfare and raised glasses. We let it sit on the stovetop for an hour, until we could stand the wait no longer, and then dug in. And the pie was soggy. And less cohesive than the first two pies had been. And I had no more ideas about how to fix it.
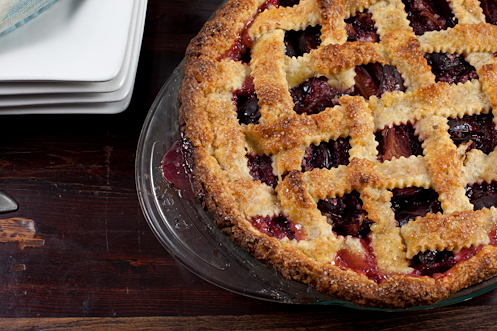 By this point it was 11:30pm, 12 hours before I was supposed to be at the
 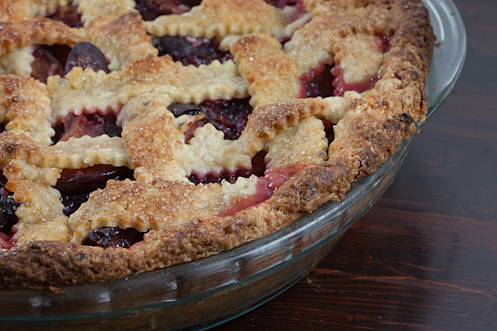 As I mentioned
 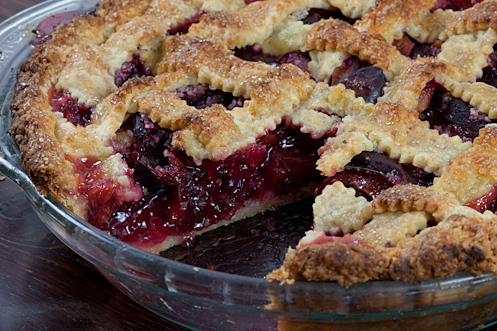 The use of tapioca wasn't the only important lesson learned in this process, either through my own experimentation or from the numerous websites and cookbooks I consulted. Below is a list of points about raw fruit pies that I plan to never forget, and I hope that you all will chime in with any lessons of your own.
Important Points for Raw Fruit Pies
 Sugar Plum Pie with Lemon Almond Crust
crust adapted from
 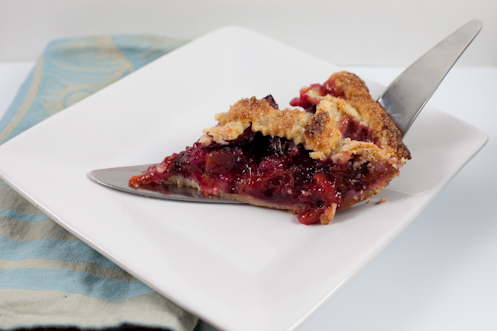 Next up: Chocolate Mousse Pie
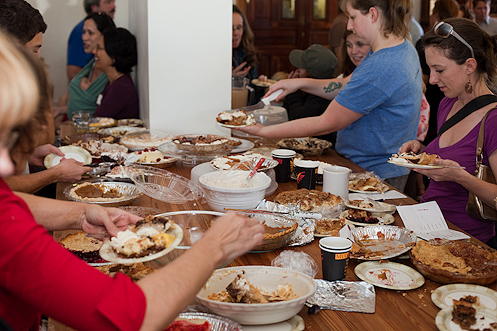
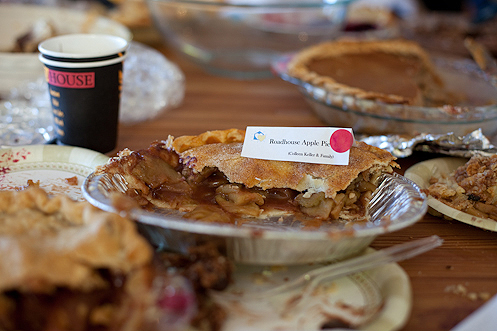
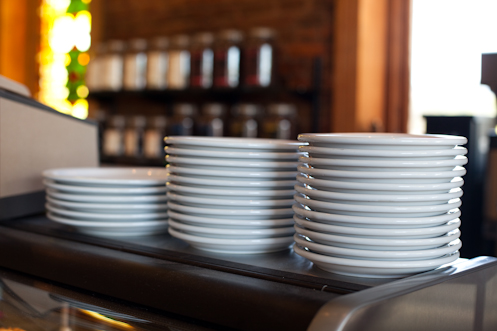 So many delicious-looking pies...

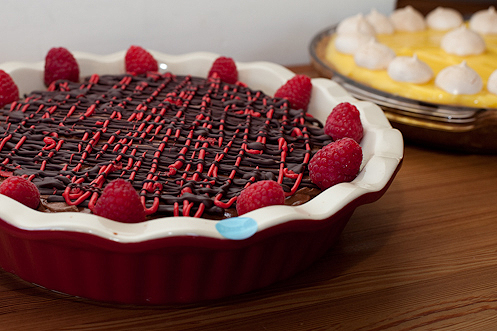
 The judging begins...


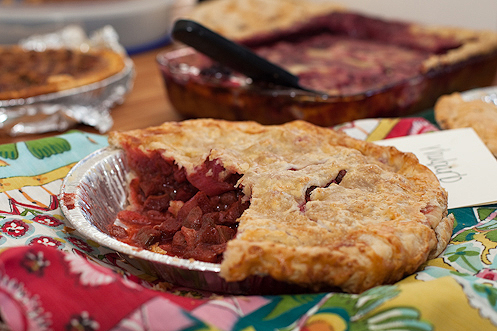 The spectators are allowed to join in the fun...

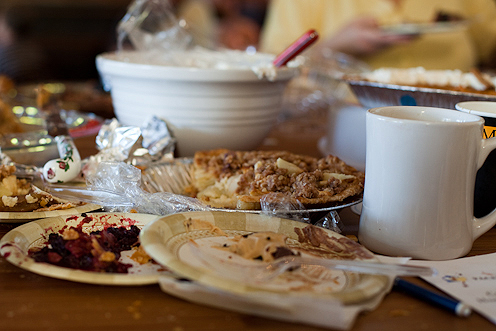
 And only shrapnel remains...
 To read more about the event, check out
  This Thursday I'll start Bella Eats Pie Month with a recap of the trials and tribulations for the Italian Plum Pie I had hoped to enter in
  I’m fairly new to the world of writing, having only started forcing myself to practice regularly when I started this blog and discovered how much I enjoy it. I’ve learned in the six months since defining the
  This evening, as I was in the middle of my uninspired third draft, my Momma called for a chat. She had some bad news about an elderly relative, my grandfather’s sister. My Great Aunt isn’t doing very well, in fact hasn’t been for awhile, and Momma wanted to update me on her status. Our conversation eventually turned to more trivial subjects to lighten our mood, and my unsatisfying third draft came up. As I explained my writer’s block my Momma chuckled, and proceeded to share with me a few of her own childhood memories of plums, of which she has many.
 She told me about “plumjum”, my grandfather’s favorite spread for toast, and how his sister (yes, the very same as mentioned above) used to make him jars of it with plums from another sister’s trees. She laughed about how surprised she was when, at an older age, she learned that the coveted spread was in fact a simple plum jam. Those family trees that produced the fruit that formed the jam were a favorite playground for my Momma and her cousins, a treetop haven where they ate as many plums as they could stomach while spitting the pits at each other (she was a bit of a tomboy, my mother, having grown up with all male cousins). As we laughed about her memories, events she probably hasn’t thought about in years, I was reminded again of how powerful food is, and thankful that even though she hasn’t read it yet, this post evoked happy thoughts of her past during a time of sadness.
 As far as my future with plums goes - and based on my family history with the fruit - I feel pretty confident when I say that we've got many happy moments ahead of us. And you can bet (a plum cake, perhaps?) that a few jars of "plumjum" will be produced this weekend from the best possible specimens, packed up and shipped to Florida for my Momma and grandfather to enjoy. With love.
 In the last few weeks, I’ve seen plums pop up in
  If you'd like this cake for breakfast, make it the night before and wrap it tightly in plastic, letting it sit on your counter until the morning. Then, about 15 minutes before you're ready to eat it remove the plastic, pop it in the oven to re-heat for a few minutes before turning on the broiler to crisp the top and caramelize the edges.
Plum Cake
adapted from
  I followed the original recipe closely except for the following adaptations:
Because about 1/2 of my plums were still a little green on the inside and therefore quite tart, I chose to macerate the fruit for a bit before layering it with the dough. Even if I use very sweet fruit in the future, I won't skip this step. The sugar helped the fruit to caramelize at the edges, producing a wonderful texture.
The addition of lemon zest to the dough and slivered almonds to the top of the cake are two tricks that I use quite often in fruit cakes and crumbles. I think that everything is better with a touch of lemon and a few almonds.

 I’ve been eating a lot of PB+J lately. Actually, to be more accurate, AB+HJ - almond butter and
  As we transition into Autumn, I find myself in a very nostalgic frame of mind. This time of year seemed to have so much more significance in my youth, always marking the start of a new chapter in my young life. Going back to school, with its new clothes and fancy backpack filled with blank notebooks and freshly-sharpened pencils signified another year of progress. I’d eagerly seek out friends I hadn’t seen in 3 months to discuss our summer vacations, who’s dating who, class schedules and the fact that we were one year closer to graduation, college and “real” life.
 In college, the return to another semester was bittersweet. I was studying architecture, and while I was eager to tackle the challenges that a new design studio - with its new city, site and building program - offered, I was also wary of letting go of a care-free summer job in exchange for the stress of all-night charrettes and design reviews in front of a panel of my peers and professors. But still, there was the seeking out of missed friends to discuss summer internships, who’s engaged to who, how we had finagled our schedules to allow for one or two(!!!) days without class and the fact that we were one year closer to graduation and finding our “dream” jobs.
 And now, here I am. Post undergraduate and graduate degrees, working in my field for a firm I respect designing projects I enjoy, one year closer to...what? For the first time in my life, I am settled into a place with no “end” in sight. I am happily married, living in a city I adore, with a job I enjoy waking up for. There’s no impending school, or graduation, or job search in my future. Its a comfortable feeling, but is at the same time a little bit unnerving. And when I’m feeling a little bit unnerved I seek additional comfort in food. Of late, that food has been the AB+HJ combination.
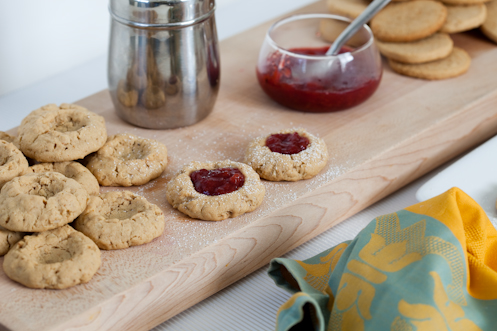
 It was only a matter of time before my latest obsession made it into a baked good. And then,
  Each of these cookies is really wonderful on their own. I recommend filling and sandwiching only the amount of cookies you and yours can eat in a day, as they will get soft when stored in an airtight container with jam. On their own, in a ziplock bag, the cookies maintain their texture for a full 5 days.
I think that each of these recipes would be wonderful with almond butter in place of the peanut butter. When I made the suggestion to Brian, who is very traditional in his dessert choices and hates to see a good thing tampered with, he vetoed it. That was ok, the tried and true PB+J combo was a success both in taste and nostalgia-induced comfort.
PB+J Sandwich Cookies
recipe from
  PB+J Thumbprint Cookies
recipe for cookie from
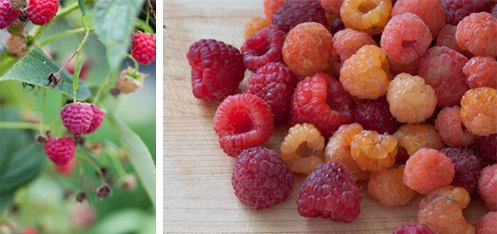 We got lucky. Their first year the raspberries didn't do much. We were rewarded with a couple of small handfuls of fruit - really only enough to snack on as you wandered through the garden checking on other plants, certainly not enough to actually do something with. But this year - the berries' second year - has been quite the surprise. Maybe its because I wasn't expecting much from them, or maybe its that their location in the garden is a bit out of the way, but just a few weeks ago I was shocked (shocked!) to discover that the raspberry branches had reached clear out of their intended boundaries and were loaded (loaded!) with plump berries. I wish I could show you photos of their progress, but the general unruliness of the garden has left me embarrassed to share the evidence.
 Its hard to not get excited about being in the kitchen, concocting new recipes when your fridge has a constantly rotating bowl full of red raspberries, golden raspberries and blackberries. Unless, like me last week, you come down with a bug right in the middle of berry season. It was nothing too serious, but provided enough sour feelings to keep me completely out of the kitchen and away from the blog. I had no interest in cooking food, writing about food or editing images of food for five full days. It was all I could do to get the
 I jumped up, so excited to have the urge to bake without a queazy feeling following along behind that urge. It was getting worrisome, this lack of desire to stand at my kitchen counter, because I had promised some dear friends that I would make cupcakes for their daughter’s third birthday party the next day. And, we had raspberries. Several bowls of raspberries freshly picked from our garden just waiting to be folded into muffin batters and buttercream frostings and made into
  These little raspberry almond muffins pulled me out of my funk, with some help from Ellie Krieger, whose book I had picked up at the library a few weeks prior. They are hearty, made with a mix of all-purpose and whole-grain flours, and pack nice little raspberry punches into each bite. Made moist by applesauce instead of butter, and topped with a crunchy cinnamon and almond topping, they provide an adequate amount of sweetness countered by the slightly tart raspberries - a sure pick-me-up for any slow morning or afternoon. I've frozen a bunch of them to use as my own little weapon against future kitchen blues...
 Raspberry-Almond Muffins
makes 16 muffins
adapted from Ellie Krieger's
  What about those cupcakes I mentioned before? Well, I made
  Other Bella Terra posts this season:
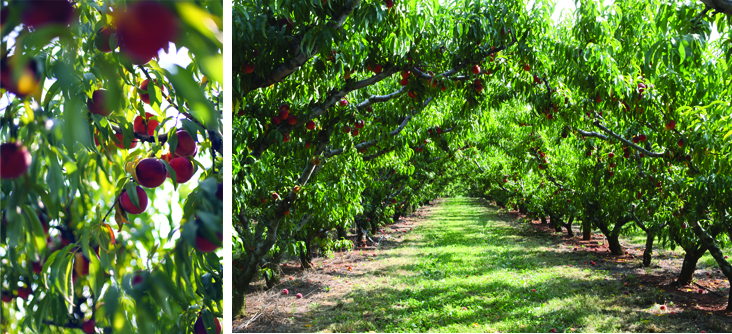 I’ll spare you the tomato argument today - it will have its place in the weeks to come, I promise. Instead, lets focus on peaches. Those perfect, plump, juicy globes with all the colors of the sunset splattered across their fuzzy skin. I love them - absolutely and with all the fervor deserved after waiting ten months for their reappearance in my daily diet. In their season, allowed to ripen on the tree and consumed within a couple of days of picking, fresh summer peaches are nothing like the bland, grainy imposters that fill bins in the supermarket during the off-season months.
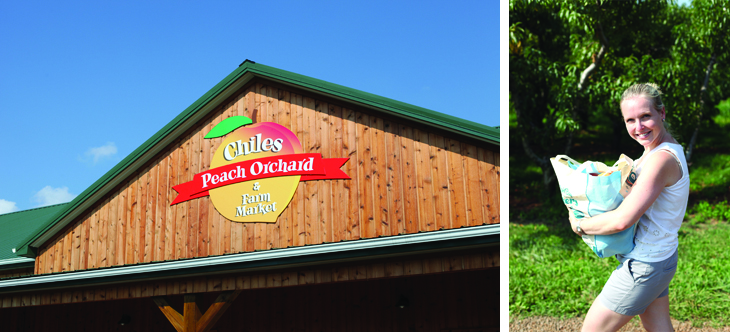
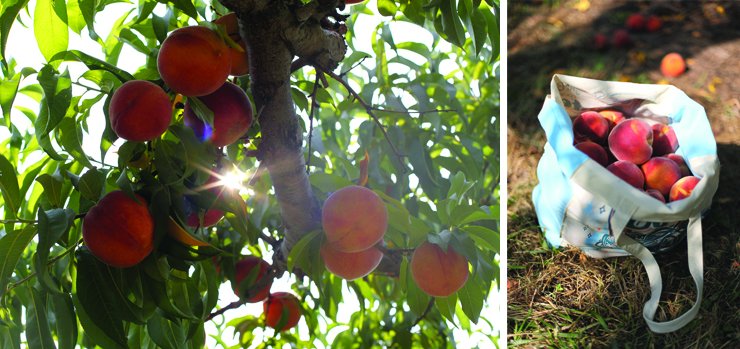 The peaches themselves played strongly into my final decision. Those flavorful bites - sweet with a little bit of tart - that result in juice running down your arms to your elbows are pretty hard to beat. But the clincher, that final argument that sealed peaches firmly into the number one position on my summer produce scale, was their procurement. The actual act of wandering the orchard, ducking into the dappled shade provided by row after row of trees, finding the perfect peach and picking it with my own hands. Brian and I have been to
  What does one (or in this case, two) do with 75 pounds of fresh peaches? Many wonderful things, dear readers. You’ve already heard about one, the
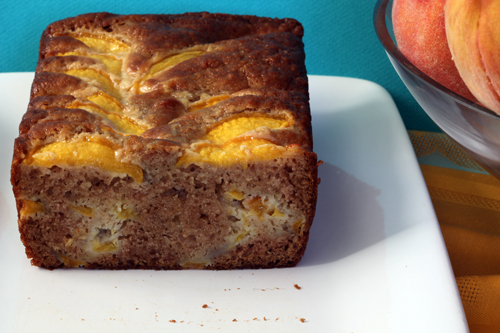
  I’ve made variations of this recipe several times in the last few weeks, tweaking a bit each time until declaring this final version my favorite. It is based loosely on a recipe of my momma’s, with a bit of influence from
  Peach Bread
makes 1 loaf
Ingredients:
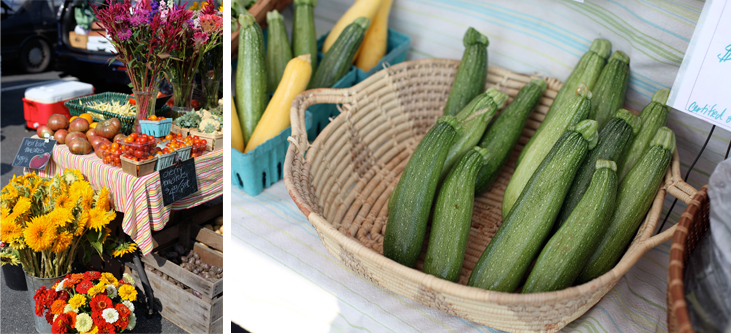 Now, admittedly, I didn’t substitute zucchini in this recipe for its flavor. Its so mild on your palette that the stronger flavors of dark chocolate, ginger, cinnamon and cloves overpower its delicate scent. What I wanted from the zucchini was the moisture that the banana typically provides without adding an additional competitor to the mix. You see, while Molly’s recipe was quite good, for me the combination of banana, chocolate and ginger was a bit overwhelming. Maybe its because I am a banana bread purist, and want the banana to be the center of attention even when complimented with another ingredient like
 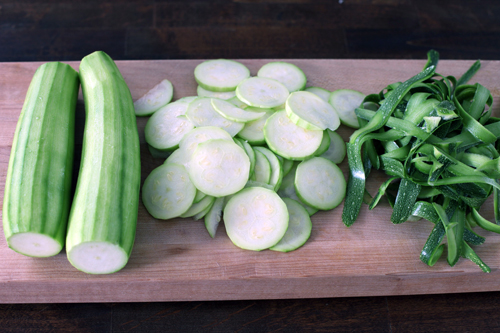 I did, however, love the idea and taste of chocolate and dried ginger combined together in a loaf, and decided to seek out another way to utilize it. Enter the zucchini, and a few other substitutions that I like to make to any bread recipe I re-create. White whole wheat flour in place of all-purpose, turbinado sugar in place of refined, fat free greek yogurt in place of regular whole milk yogurt. Throw in a couple of additional spices (cinnamon and clove) and a 12-cup tin instead of a loaf pan and the result is a muffin that is perfectly moist, not too sweet, hearty enough for breakfast yet satisfying as a dessert with a tall glass of milk or hot cup of tea.
 Because these muffins are very moist, I suggest eating them within 3 days if you’re going to keep them on your countertop in an airtight container. Refrigeration would probably save them from mold for a few days longer, but I didn’t try that so I can’t tell you what happens to their texture. I did freeze 1/2 the batch though, and am hoping that Molly’s claim that her bread freezes extraordinarily well will extend to my muffins.
If you’re interested in the original banana bread recipe, you can find it reviewed
 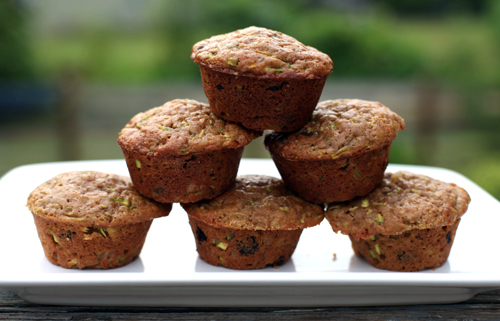 If you fill the cups to the tip-top, you will be left with 12 delicious yet oddly-shaped muffins. Fill them 3/4’s of the way full, and you’ll probably have enough batter left for two additional muffins if its worth it to you to dirty another pan. I didn’t mind their appearance, since they were just for Brian and I to share.
Zucchini Muffins with Dark Chocolate and Ginger
adapted from the banana bread recipe in
 Maybe its because I am training to be an architect, spending my days working on minute details for buildings that won’t break ground for another six months and won’t be complete for another two years. It takes a lot of time, and a lot of patience, to get to the point in a project where you feel the satisfaction of seeing the results of your hard work. The days can be frustrating, the hours long, and at the end of it all you may not even be happy with the final result. But you continue forward, filing away the lessons learned on one project for a similar situation on the next, always striving for the perfect design against the odds of disagreeable clients and undesirable sites.
 There are a lot of similarities between baking and architecture - formula, precision, a bit of risk taking, structure - but one very notable difference is timing. I can enter the kitchen, experiment with a new recipe that I’ve been dreaming about and have results in 1-2 hours. And if the final product doesn’t come out exactly as I had imagined, I can try again the next evening. Or immediately even, if the desire to get it right then and there is strong enough. That [nearly] instant gratification is what I love most about baking. The reactions from friends presented with something you’ve made from scratch help as well - who isn’t happy to be surprised with a plateful of baked goods?
 There are nights when I get home from the office needing to bake. Not just wanting to, but needing to. Sometimes I’ll pick a recipe that is tried and true, other times I’ll try drastic experiments that go horribly wrong but always teach me something new. Last week I was looking for a recipe somewhere in the middle - a recipe that someone else had tried and recommended, that I could play with and put my own twist on. Luckily I had recently discovered
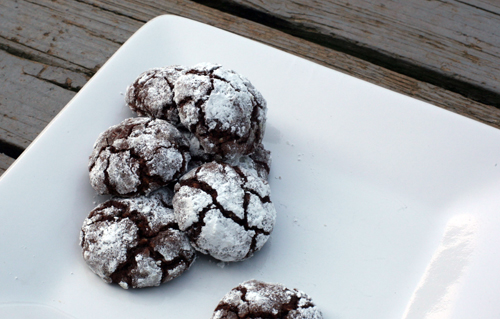
 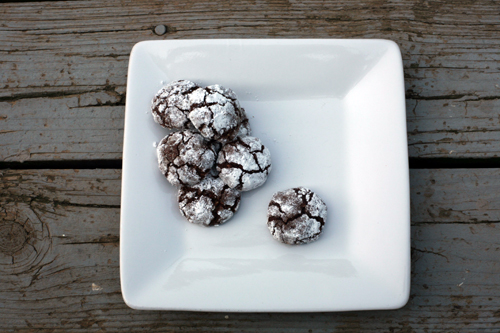 There are a lack of preparatory photographs in this post because baking these cookies on that particular night was purely for my mental well-being. I was tired, a little bit frazzled and a lot in need of the dark chocolatey, almondy, slightly salty goodness that these three-bite cookies delivered to my mouth. The process to make them was really quite simple - melt chocolate, amaretto and butter in one pan while whipping together the egg and sugar in another. You combine the two, fold in some finely processed toasted almonds and then chill the batter for 1-2 hours. If you have the patience, shoot for two hours of chilling. I couldn't stand it and pulled them after just one so that I could get to work on the methodical task of rolling each lump of dough between my palms and coating each ball with granular sugar and then powdered. They bake for a quick 10-12 minutes and then you are free to pile them onto a plate, grab a glass of wine and cuddle up to your partner on the couch. There's no better cure for a long day, I promise.
Also, if you are in need of some cheer the next evening as well, they are great crumbled over vanilla ice cream.
Dark Chocolate Almond Bites
adapted from
  Oh! And if you haven't noticed, I've added helpful links to the right side of the page for you to subscribe to Bella Eats, or follow me on
  Many thanks to the lovely
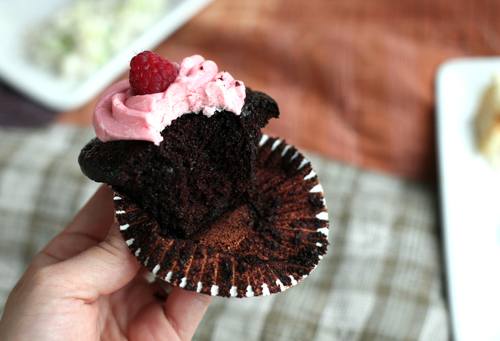
 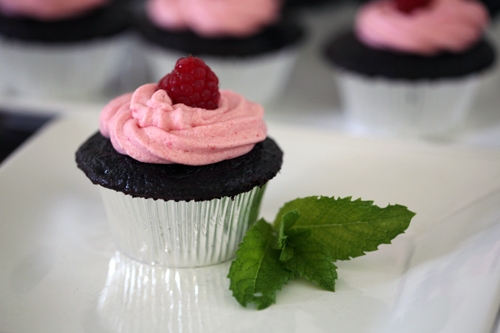 The cupcakes were delicious - rich and moist with a delicate crumb and perfectly domed tops. The tang of fresh raspberry puree' whipped into sweet buttercream frosting complimented them wonderfully. The combination was so good, in fact, that they caused a dear friend of ours to eat the two cupcakes sent home with her that were meant for her 3-year old daughter. Shhhh...I won't tell, no worries. I can't say that I wouldn't do the same thing.
For those of you celebrating, have a Happy 4th!
 Chocolate Cupcakes
original recipe from


 I agreed to get rid of the bread machine not only because we had zero space for it, but also because I thought it would be a way to force myself to learn how to bake yeast breads from scratch. It seemed like a great idea since I already loved to bake cookies and muffins and quick breads - Brian even bought me a
  It really wasn't a difficult task, making bagels from scratch, especially with
 Now, I'm not from New York or Philadelphia or any other city whose residents claim that they have the *best* bagel. I didn't grow up eating bagels every week so don't have the kind of nostalgia associated with them that so many other people have. I don't claim to have had the best bagel of my life when I was growing up in such-and-such city, and certainly haven't spent my life trying to find one that compares. So, while I can't personally claim that this bagel will match the bagel of your past, I do trust
  This recipe produces a bagel with a chewy exterior, soft interior and endless possibilities for toppings. I froze ours in gallon-size bags once they had cooled, and simply microwaved them for 30 seconds before slicing and toasting when we were ready to eat them. The flavor and texture were still perfect.
Before typing out the [rather lengthy] recipe, I did a quick search to see if I could find a link online. Luckily,


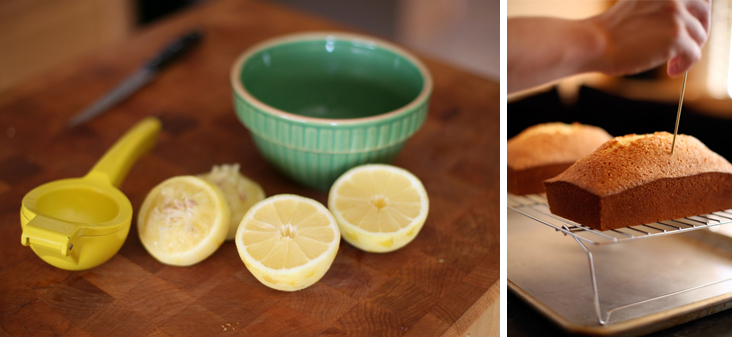 This recipe makes 2 cakes. After reading some comments from Joy's readers I would not recommend trying to bake this cake in any pan other than loaf pans. Also, I used ALL of the syrup. I just kept brushing layer upon layer of syrup over the tops of the cakes, allowing each application to soak in before adding another. And, when there was just a bit left in the bowl, I poured it onto the serving plate and plopped the cakes right on top of it, allowing the bottoms to soak it up and get nice and lemon-y. If you're not a lemon fanatic like me, you might want to only use 1/2 the syrup.
Lemon Drenched Lemon Cakes
Recipe adapted from Dorie Greenspan via
  The recipe recommends that you make this cake the day before you plan to consume it. If you do, be sure to wrap it very well to keep it fresh overnight, or keep it in a cake dome. My gentle tenting over a dinner plate didn't work so well. And don't spoon the glaze over it until you are ready to serve.
Lemon Bundt Cake with Strawberry Sauce
recipe adapted from