Contact Us

Use the form on the right to contact us.

You can edit the text in this area, and change where the contact form on the right submits to, by entering edit mode using the modes on the bottom right. 


123 Street Avenue, City Town, 99999

(123) 555-6789

email@address.com


You can set your address, phone number, email and site description in the settings tab.
Link to read me page with more information.

Blog

Filtering by Category: local

saying hello, oysters, and beyond the flavor goodness

Andrea

Hello friends! I just wanted to say hi, that I miss you all, and that I will try to be better about getting recipes up on Bella Eats a little more frequently! Life has been amazing....and busy. Until I can get another recipe up (I have high hopes for this weekend...we shall see!) I wanted to share a few fun things happening in Charlottesville at the moment. 

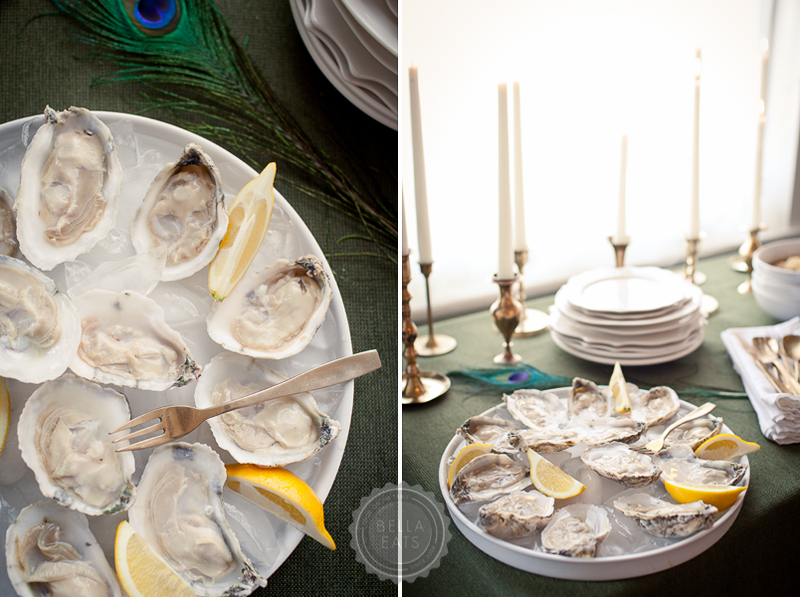
The Blue Ridge Oyster Festival is on Saturday!!! We're going, are you? There will be oysters from Mobjack Bay, amazing food from Ben Thompson of The Rock Barn, and beer + wine from Devils Backbone, Starr Hill, Cardinal Point, and Blenheim Vineyards.  See you there!

[above images from my styled bridal brunch for the Clutch Guide!]

Beyond the Flavor is going strong and has had tremendous support from our community! Sarah and I are so excited about this project, and thrilled with the feedback we've had so far. Please stop by to check out some of the wonderful recipes that have been submitted by food folks in the Charlottesville area!

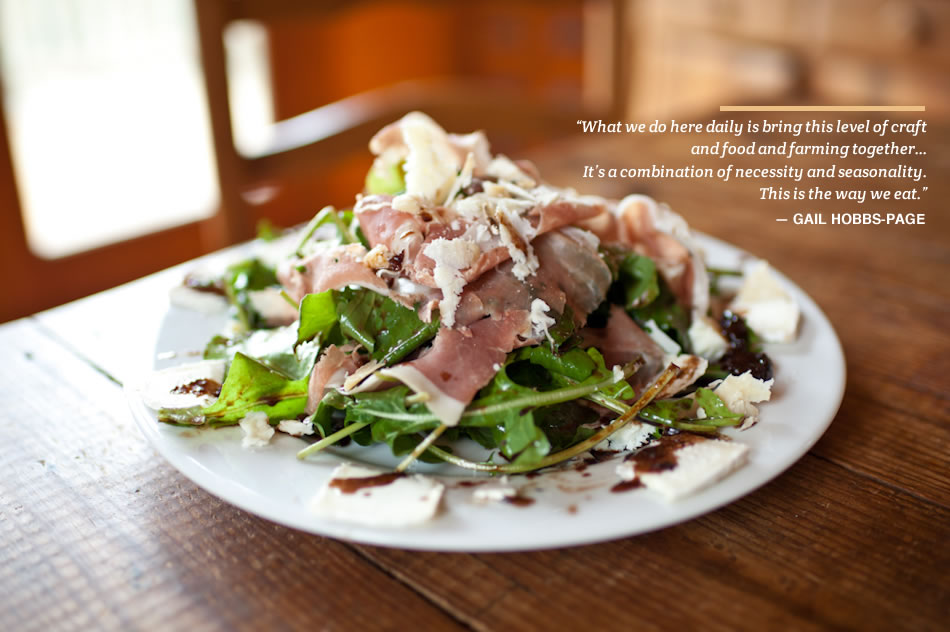
Above, Arugula with Prosciutto and Fig-Sherry Vinaigrette from Gail Hobbs-Page of Caromont Farm.

Fois Gras + Pork Belly from Justin Hershey of Zinc.

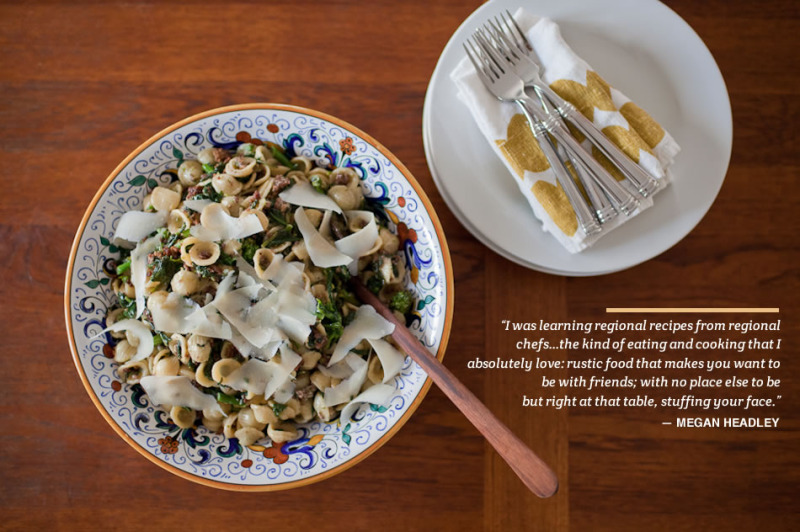
Orecchiette con salsiccia e rapini from Megan Headley, the Food + Wine Editor of Cville Weekly.

Thank you for your patience!  See you soon!!!

food photography workshop at the heritage harvest festival [tomorrow!]

Andrea

Tomorrow is the Heritage Harvest Festival at Monticello, the first of Charlottesville's fall celebrations that add to my love for the season. This year I will be giving a little workshop/demonstration/chat about food photography and styling under the Relay Foods tent at 10:15am. I hope you can join us! It will be a very informal affair, and my presentation is pretty short so I'm guessing I will give it a few times over the hour allotted to me. If you're at the festival (and you should be, for so many reasons!!!) I'd love for you to stop by and say hi! 

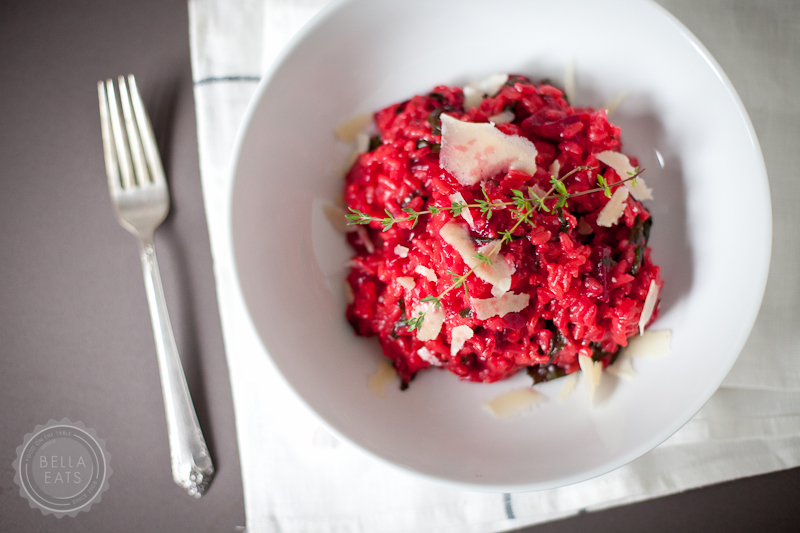
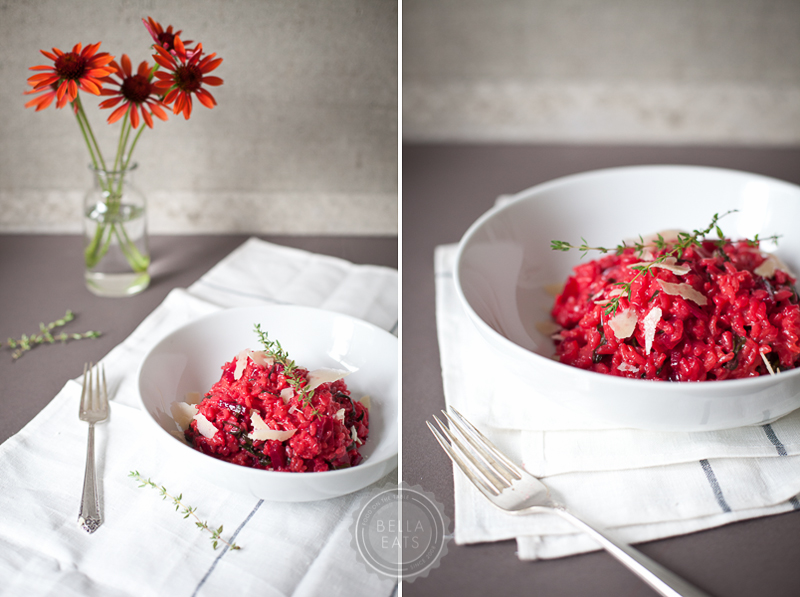
red beet risotto

Andrea

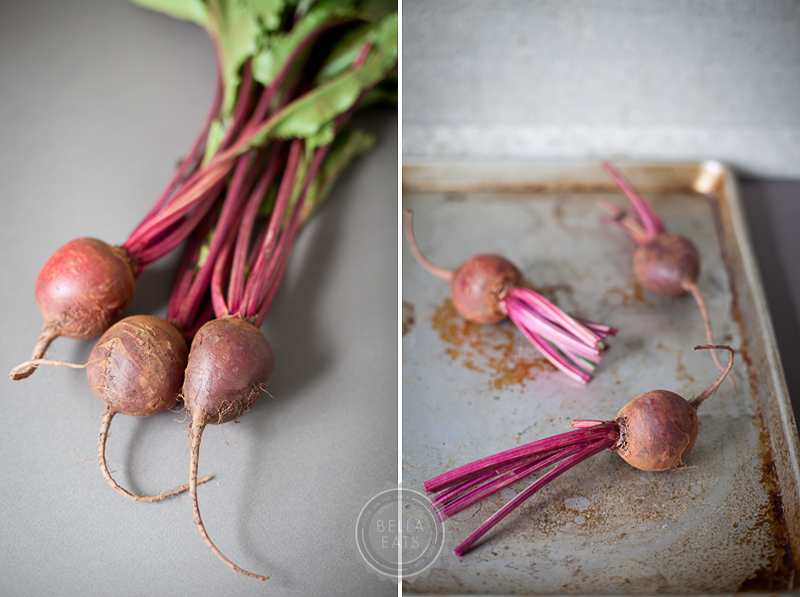
I do believe that beets are my very favorite spring vegetable. They are quickly overshadowed by tomatoes in Summer, but in May and June I could eat beets every other day. Typically I am a fan of simply roasting the globes and tossing them on a salad with chevre and a light vinaigrette. But every now and then, when I am feeling the need for something a bit more toothy and substantial I'll whip up a batch of risotto. I love the sweetness that roasted beets lend to the savory dish, and of course the vibrant hue that even a picky toddler wouldn't be able to resist.

I"ll admit...I've already written about red beet risotto here, years ago, when we were growing beets in our very own garden. The recipe has changed a bit, and the photographs have certainly improved, but I still love that first post because of its words about our little veggie patch. We're still growing beets this year, although out on Maple Hill Farm rather than just to the side of our house. And this recipe is still a favorite, one that I felt was appropriate to bring up again now that we're at the height of beet season here in Charlottesville. Plus, I just couldn't resist the urge to re-photograph the dish in all of its neon-pink glory, in proper lighting, with less distraction. It deserves to be the star of the show!

These days, I'm adding the beet greens directly to the risotto, rather than cooking them up on the side. They don't add much flavor to the dish, but I do like the additional texture and all of the nutrients packed into the deep green leaves. Thanks to the New York Times for that little suggestion.

Red Beet Risotto

from the new york times

serves 4 as a main course

Ingredients

  • 3/4 pound beets (1 small bunch of 3 to 4)
  • 1 bunch beet greens, stemmed and washed (from your beets, if fresh and unwilted. leave them out if they are past their prime)
  • 6 to 7 cups chicken or vegetable stock, as needed
  • 2 tbsp extra virgin olive oil
  • 1/2 cup finely chopped onion
  • 1-1/2 cups arborio rice
  • 2 garlic cloves
  • 1/2 cup dry white wine
  • salt
  • freshly ground pepper
  • 1/2 cup parmesan cheese, grated
  • 2 tbsp finely chopped flat-leaf parsley

Method

  1. First, roast the beets. Preheat your oven to 400°. Wrap the beets in aluminum foil and place on a baking sheet. Roast for about 20 minutes, until the beets are easily pierced with a fork.  Remove from oven and allow to cool, then peel and dice the beets.  The skin should slide off easily.
  2. Slice the greens into 1-inch strips, set aside.
  3. Place the stock in a medium sauce pan and bring to a simmer, then reduce heat to low.
  4. In a large, wide, heavy-bottom saute pan, heat the oil over medium. Add the onion and stir while cooking until it starts to soften, about 3 minutes. Add the rice and the garlic and stir while cooking until the rice is separate and starting to crackle, about 3 minutes.
  5. Stir in the wine and cook over medium heat, stirring constantly. When the wine has just about evaporated, add in 1 ladleful of stock (about 1/2 cup) just to cover the rice. The stock should bubble slowly (adjust heat). Cook, stirring occasionally, until the stock is nearly absorbed, then add another ladleful. Continue to cook in this fashion, not too fast and not too slowly, stirring often and adding more stock when the rice is dry, for about 10 minutes.
  6. Stir in the diced beets and sliced greens. Add more stock and continue cooking as before, for another 10-15 minutes, adding stock when the rice is dry. The rice should be tender but not mushy, with no hardness at the middle. When it has reached the correct consistency, season with salt + pepper. Add the parmesan cheese and the parsley, and stir to combine. The rice should be creamy, if it is not, add another 1/2 cup of stock.
  7. Adjust seasonings and serve.

bella terra 2011!

Andrea

A happy Monday to you all! Let's kick off April with an exciting announcement...bella terra is back!  But this year, I've been lucky to have the opportunity to share a bit of space in the green house at Maple Hill Farm, home of the local food hub. if you're not familiar, the local food hub is a community supported nonprofit working to strengthen and secure our local food supply by supporting small, family farms, increasing the amount of fresh food available to our community, and inspiring our next generation of farmers. I am proud to be part of a community that supports such an organization, and thrilled to have the opportunity to share images of their beautiful land and facilities with you on the AHPhoto blog!

This Spring, Summer, and Fall I will be sharing images from my time at the farm with two girlfriends, Emily (local food hub) and Stephanie (flavor magazine) as we grow food for our home kitchens. Most of the seedlings we've started out at the farm will be planted on a little plot I am sharing with these friends, but some will come home to live and grow in my backyard garden. I am planning to share the bulk of the place and detail photography at AHPhoto, and the final dishes and recipes that result from all of that hard work here on bella eats. I hope it won't be confusing, and will try to keep it simple. Let's just see how it goes.

For a recap of my 2009 garden: bella terra | 2009

For images of our first 4 weeks on the farm: bella terra | weeks 1 and 4

So, are any of you gardening this year?  If yes, what are you growing?

a call for your best pizza dough recipe...

Andrea

pizza-1.jpg

Friends...I need you! Here we are on April 1, Spring has sprung and I've already made my first grilled pizza, and I still don't have a pizza dough recipe that I am completely head-over-heels for.  May I ask...do YOU have a favorite pizza dough recipe?  And if you do, would you please, please share it with me?  In exchange, I will give you my very favorite pizza topping combination...do we have a deal? Thank you. :)

Happy weekend, all!

pizza-2.jpg

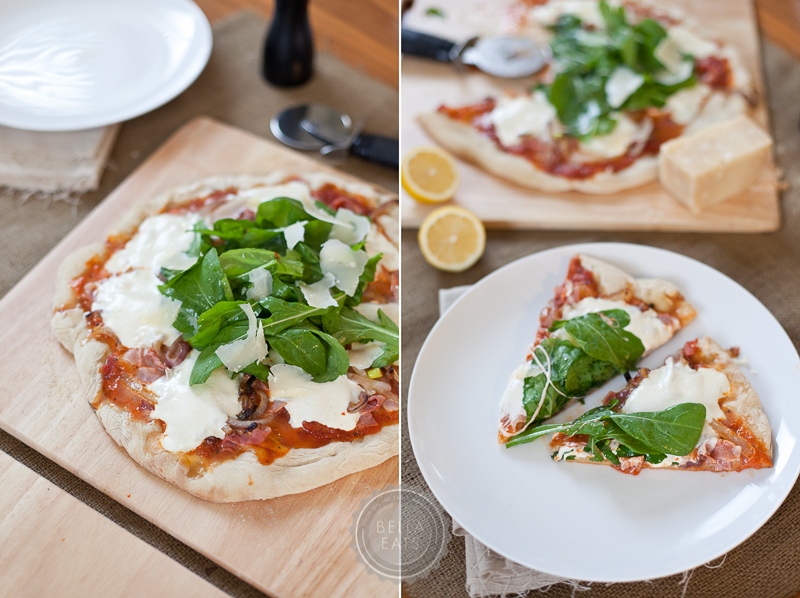
Andrea's very favorite Pizza Topping Combination, inspired by Dr. Ho's Humble Pie

  • your pizza dough of choice (please share!!!)
  • corn meal for dusting your very hot pizza stone
  • tomato sauce (preferably from this recipe)
  • thinly shaved ham (preferably from your favorite local farm...we always use Double H Farm ham)
  • fresh mozzarella (from Mona Lisa Pasta)
  • caramelized red onions (heat over medium heat in olive oil for about 10 minutes, until golden brown)
  • fresh arugula (also from Double H Farm) dressed with a little bit of olive oil and fresh lemon juice (or, lemon olive oil...yum!)
  • shaved parmesan cheese
  • sea salt to sprinkle on top

We grill one side of the pizza dough before topping, remove the dough and top the grilled side, then put the pizza back on the grill.  The arugula and shaved parmesan go on the pizza once it has come off of the grill and is ready to be served.

pizza-3.jpg

at summer's end

Andrea

Hello. My name is Andrea. I write this food blog, Bella Eats. You may remember me, or due to my long absence you may not. I’m sorry about that, truly I am. I miss this space! Life has been busy. So so so busy. I started teaching architectural design at the University of Virginia. Teaching. At a University. !!! And before that teaching officially began there was training for teaching. And in the middle of all of that I photographed the wedding of a dear friend I’ve known since the fifth grade. Fifth grade! She was such a beautiful bride, and if you’re interested in seeing some of those images please check out the AHPhoto blog.

Oh, and I started a photography business. Because I love taking pictures of people. And buildings. And food. So if you know anybody who needs somebody to take pictures of people, or buildings, or food...feel free to send them my way. I’d appreciate it so so much. And thank you, all of you, who have commented and tweeted and emailed your support. You’re the best, truly.

And yes, I am still working for an architecture firm here in Charlottesville. So...yeah. Busy.

It feels as though summer has completely passed by Bella Eats. Since June I’ve posted about cherries, blackberries, and blueberries. There have been no luscious heirloom tomatoes, no juice-laden peaches, no golden ears of corn. I even have a new trick for releasing kernels from their cob without making a complete mess of the kitchen counter and floor, and I haven’t had the opportunity to share it with you. That is sad my friends, because this trick is a good one. It will change the way you view corn entirely. Soon, I hope.

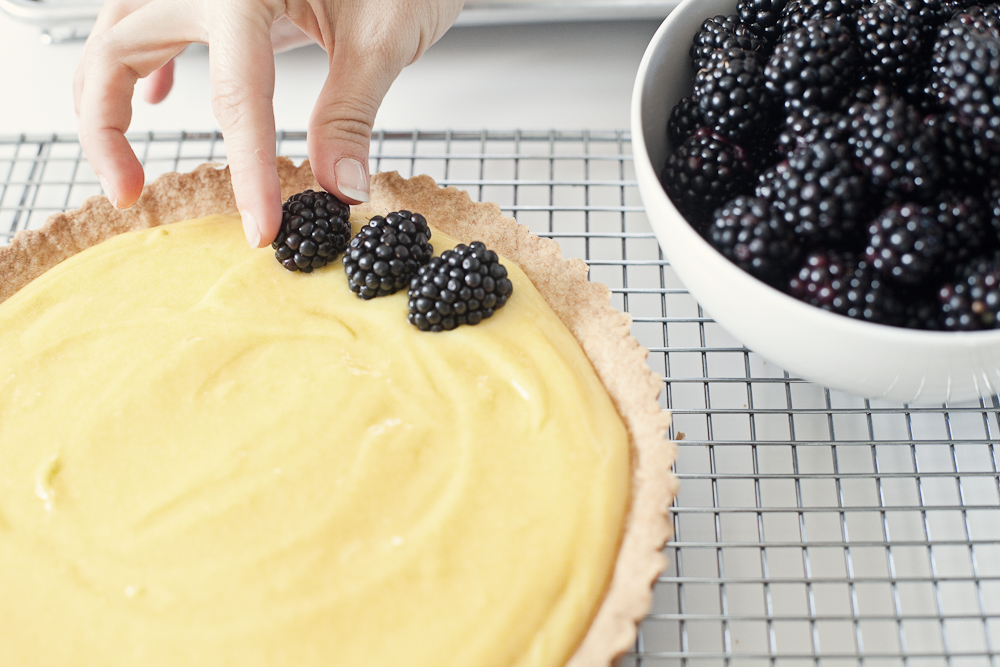
Way back in the middle of July our dear friend Kristin celebrated her birthday. She celebrated with us, and with this lime tart topped with blackberries from our garden. Blackberry season is just about over, a sign that summer is drawing to a quick close. Our bush has shed it’s bounty completely, leaving only the tiny shriveled berries that didn’t ever come to full ripeness. Our freezer is packed full of quart-size bags of the frozen fruit, our pantry shelf stocked with various forms of blackberry jam. This tart was one of the last recipes made this summer using berries fresh from the garden, and looking at these pictures already has me feeling nostalgic.

What is it about food that stirs memories stronger than those evoked by any other sense? While blackberries don't take me back to any point of my childhood, they do plop me down solidly in our backyard here in Charlottesville. For the past 4 years we've spent countless July and August evenings standing in our garden, bowls in hand, fingers stained purple, arms eaten by mosquitos, quietly and contently plucking berries one-by-one from a bush WE planted. I know that forever, no matter where we are, when I pop a freshly picked blackberry into my mouth I will be transported back to this place. I love that.

If you’re lucky you can still find pints of deep purple blackberries at your local farmers’ market, and if you do, I recommend you make this dessert before summer's end. The crust is quite perfect, nearly the consistency and flavor of a shortbread cookie. It doesn't flake and melt in your mouth like many pastry shells, but instead offers a firm vessel on which to carry a scoop of zippy lime curd. And scoop you will, because this tart never really sets up to a solid, sliceable state. Which is fine by me. The delightful combination of sweet shortbread, tart curd, and fresh blackberries had us all going back for seconds, despite our use of a spoon rather than a fork.

For the record, I am so unhappy with the spacing that this new Wordpress theme defaults too, but I just haven't had the time/energy to dig into the CSS code to fix it. And, we're working on a redesign of Bella Eats to be launched right around the two year (two years!) anniversary of this site at the end of October.  So, please bear with me and the awkward/awful spacing of the text in my recipes... Thank you.

Lime Tart with Blackberries

from bon appetit, June 2010 Ingredients for the lime curd:
  • 3 large eggs
  • 3 large egg yolks
  • 1 cup sugar
  • 3/4 cup fresh lime juice
  • 6 tbsp (3/4 stick) unsalted butter, cut into 6 pieces
for the topping:
  • (3) 6-ounce containers fresh blackberries
  • 1 tbsp blackberry jam
for the crust:
  • 1/2 cup (1 stick) unsalted butter, room temperature
  • 1/4 cup sugar
  • 1 large egg yolk
  • 1 1/4 cups all purpose flour
  • 1 large pinch of salt
Method for the lime curd:
  1. Set a fine metal strainer over a medium bowl and set aside. Whisk the eggs, egg yolks, and sugar in another medium metal bowl to blend.  Whisk in lime juice.
  2. Set bowl over large saucepan of gently simmering water (do not allow bottom of bowl to touch water). Whisk constantly until curd thickens and an instant-read thermometer inserted into curd registers 178ºF to 180ºF, about 6 minutes.  Immediately pour curd through prepared strainer set over bowl.
  3. Add butter to warm strained curd; let stand 1 minute, then whisk until blended and smooth.  Press plastic wrap directly onto surface of curd, covering completely.  Refrigerate until cold, about 4 hours.*
*Lime curd can be made up to 2 days ahead.  Keep chilled. for the crust:
  1. Using an electric mixer, beat the butter and sugar in a medium bowl until well blended, 1 to 2 minutes. Add egg yolk; beat to blend. Add flour and salt and mix on low speed until mixture resembles large peas. Using hands, knead in bowl just until dough comes together.
  2. Transfer dough to a 9-inch diameter tart pan with removable bottom. Break dough into pieces, then press dough evenly up sides and onto bottom of pan. Cover and chill 1 hour.**
  3. Preheat oven to 350ºF. Uncover crust and bake until golden brown, about 35 minutes. Cool completely in pan on rack.
**Dough can be made 1 day ahead. Keep chilled. assembly:
  1. Remove sides from tart pan and place crust on plate. Spread lime curd evenly in baked crust. Arrange blackberries in concentric circles on top of tart.
  2. Place am in small microwave-safe bowl. Heat in microwave until jam is melted, about 15 seconds. Whisk to loosen and blend, adding water by teaspoonfuls if thick. Brush jam over berries.*** (I only brushed jam over the outer ring, because I liked how they looked without the glaze.)
***Tart can be made up to 8 hours ahead. Chill uncovered.
Read More

celebrate summer with local beer, local music [giveaway!]

Andrea

A few weeks ago I received an email with the subject “Does Bella like beer?”. Well yes, Bella does like beer, and so I opened that email and kept on reading. In it, a very nice woman named Stephanie asked if I might like to visit an award-winning local brewery for a complimentary tour and tasting. She also asked if I thought the followers of Bella Eats might be interested in reading about that visit, and then submitting a comment on that post for a chance to win a pair of tickets to two separate music festivals in Virginia. Well gosh that all sounded like a lot of fun and, while product promotion and giveaways aren’t very typical in this web space of mine, I really liked the idea of reviewing a local company and hosting a giveaway that supports local music.

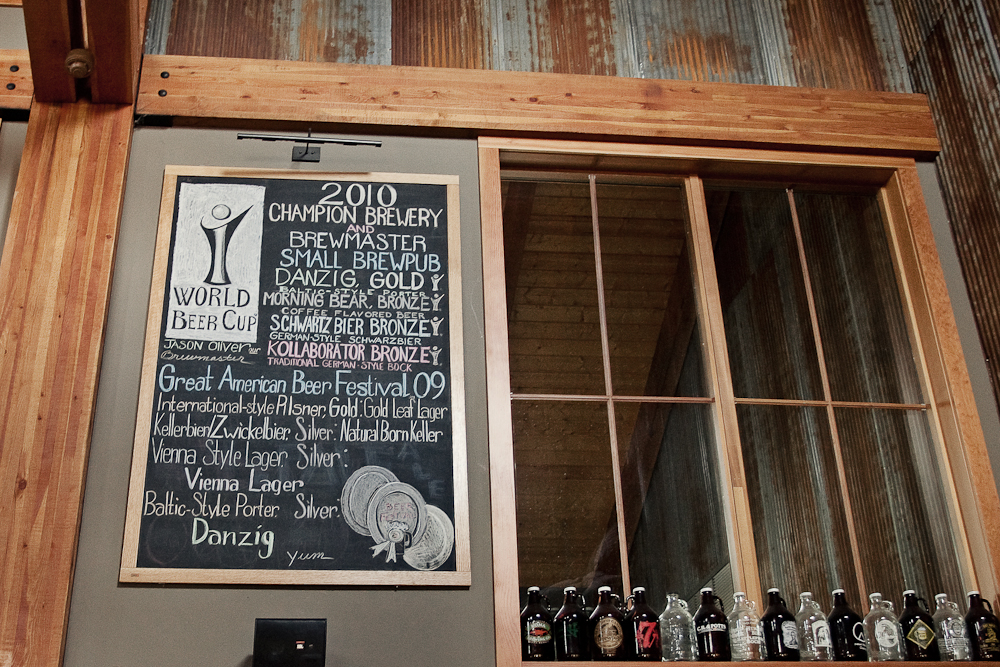
And that is how, a flurry of emails later, Brian and I found ourselves driving west out of Charlottesville two Sundays ago. Our destination, Devils Backbone Brewing Company, was recently named Champion Brewery and Brewmaster in the small brewpub category at the 2010 World Beer Cup. They also earned one gold medal and three bronze medals for individual beers entered in the same competition, and last year brought home four medals from the 2009 Great American Beer Festival. With stats like that, the not-even-two-years-old brewery had been on our "things to do/see in/around Charlottesville" list for good reason.

The brewmaster, Jason Oliver, has over 14 years of brewing experience and 15 medals for beers he's brewed. We were lucky to have a semi-private tour of the brewhouse scheduled with Jason, who is incredibly knowledgeable about his craft and patient with those of us who are not. He took us through the entire process, from steeping barley in water to fermenting with yeast to flavoring with hops. We were able to try several types of barley from a handful of different countries so that we could see for ourselves how different grains influence the final flavor of the beer we drink. It was fascinating, and very enjoyable. If you live in central Virginia, or are planning to visit the area, I highly recommend scheduling a tour of the brewhouse at Devils Backbone Brewing Company.

[thank you Brian for the above pictures of Jason and me]

After our tour Brian and I found our way to a couple of stools at the long copper-clad bar. DB Brewing Company has 10 beers on tap at all times, 4 that are brewed year-round and 6 rotating seasonal beers that are created by Jason. We decided to split the sampler, and Jason lined up our ten samples alongside a menu with their descriptions. The beers ranged in color from the champagne-toned Azreal (my favorite) to the cola-dark Inspirado (Brian's favorite).

They were each unique, some were surprising, all were quite good. The Wintergreen Weiss, a Bavarian-style hefeweizen, had my attention, as well as the Gold Leaf Lager. But the Azreal...oh, the Azreal (aka Gargamel...a little Smurf reference for you). Fruity on the nose and the tongue, so easy to drink yet nearly 8% alcohol...that one is dangerous, and I loved it. Brian's favorite, the Inspirado, was also excellent with its deep, dark color and rich, fruity flavor.

If you're in the area, make the drive out to Nelson County to visit Devils Backbone Brewing Company. Take the tour, try the sampler, stay for lunch. And be sure to go home with a growler or two. DB Brewing Company beer is available on tap at a few restaurants around Charlottesville, but the only way to take it home with you is to get it straight from the brewery.

Many thanks to Jason and Devils Backbone Brewing Company for hosting us, and to Stephanie for setting it all up!

Music Festival Tickets Giveaway!

Devils Backbone Brewing Company is hosting two music festivals on their Concert Grounds at Devils Backbone, the Brew Ridge Music Festival and The Festy. Bella Eats is giving away one pair of tickets to each music festival! You have three opportunities to win tickets:
  1. Leave a comment on this post specifying that you are interested in winning the tickets and which festival you would prefer to attend.
  2. Become a friend of both BRTMF and The Festy on Facebook and leave a second comment on this post telling me you've done so. (Honor system here folks!)
  3. Follow The Festy on Twitter and leave a third comment on this post telling me you've done so. (Again, honor system!)
Post comments by Friday, August 13th. I will pick the winners using a random number generator and announce them on Saturday, August 14th. Good luck!

Brew Ridge Music Festival: The second annual Brew Ridge Trail Music Festival is an all ages event featuring top musical artists and sixteen local beers on tap. Scheduled for Sat, August 21 at the Concert Grounds at Devils Backbone (Nelson County, VA, 45 miles from Charlottesville), Cerberus Productions, 106.1 "The Corner" and the Brew Ridge Trail members are thrilled that this year's festival will be headlined by Ivan Neville's Dumpstaphunk. Additional confirmed acts include Devon Allman's Honeytribe and William Walter & Co. For overnight accommodations, Wintergreen. Gates open at noon, rain or shine. For more information or to purchase tickets, please visit Brew Ridge Trail Music Festival.

One winner will receive two Taphouse Tent tickets, which include admission to the festival and (8) 4oz beer tasting tickets!

Follow on Facebook

The Festy: The Infamous Stringdusters, The Artist Farm, Cerberus Productions and Devils Backbone Brewing Company present The Festy Experience, a 2-day camping festival over Columbus Day weekend (Oct 9 & 10) at The Concert Grounds at Devils Backbone in Nelson County, Virginia (45 mi. from Charlottesville). Hosted and curated by The Infamous Stringdusters, The Festy Experience will celebrate and combine the best in live music, outdoor sports and lifestyle, craft beer culture and raging good times.

In addition to two nights with The Dusters, confirmed acts include Railroad Earth, Josh Ritter, Toubab Krewe, The Tony Rice Unit and a slew of musically diverse acts that embody The Festy Experience spirit.

Wanna festy, but don't wanna camp? Weekend day passes are available, but bypass couch surfing for the Wintergreen Resort Experience. All rooms booked at the Wintergreen Resort in association with The Festy Experience will receive an exclusive 20% off.

One winner will receive two tickets to The Festy! Follow on Facebook Follow on Twitter
Read More

truly, I do

Andrea

The mosquitoes are out in full force, covering my skin with pink welts each time I venture into our overgrown garden. My hair frizzes to twice its volume as soon as I consider stepping outside. I can’t walk down the block without tiny beads of sweat popping up on the back of my neck, yet my office is frigid enough to require a sweater. Spring seems to have moved on early this year, leaving in her wake an abrasive and demanding Summer.

But, despite all of this personal discomfort, I love this time of year. Truly, I do.

I love the thunderstorms that sweep in like clockwork each afternoon, lending the sky an ominous tone and the air an electric buzz. I love the booths at the farmer’s market, the tables full of greens and berries and cucumbers and beets. I love that the water is warm enough to take the dogs swimming at the reservoir, and that those trips are the perfect opportunity for a picnic. I love drinking Moscow Mules on the back deck while watching fireflies glow in the trees, and the smell of sun screen and citronella and bug spray made sweeter by the intoxicating aroma of freshly-mown grass and trampled mint.

Those are all compelling arguments, I know, but what I love most about this Almost-Summer time of year is the local Virginia fruit. Those few days where I find myself wandering between tidy rows of strawberries, or ducking under tree branches dripping with both rainwater and cherries, are worth every welt on my itchy legs. Filling our basket with blueberries and melons at Charlottesville's City Market makes the sweltering heat just bearable as we make our way between stalls. And folding homegrown raspberries into whipped buttercream...oh my. There aren't many discomforts that fresh raspberry buttercream can't fix.

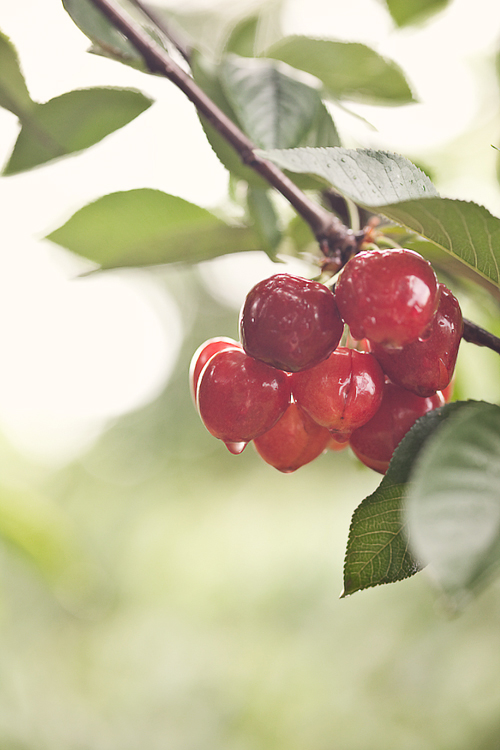
But today, let's focus on those cherries. Ten-year-old Andrea would probably tell you that they are her favorite fruit...ever...for their appearance at the grocery store was always perfectly timed with the end of school and the beginning of Summer vacation. My momma, a teacher and just as excited for the break, would plan day trips to Florida’s fresh water springs for my friends and me. A bag full of sweet cherries was always packed as part of our lunch. After a few hours of swimming and snorkeling and sharks’ tooth hunting the dark-skinned globes would come out of the cooler, icy cold and immediately covered in tiny beads of condensation.

We’d find a spot in the grass, out of the shade of our claimed pavilion. The spring water was frigid, and the sun felt good on our skin as we spread a blanket and chose our places for the competition that was sure to follow. Small hands reached into the Ziplock bag, pulling out handfuls of tangled fruit to place in cross-legged laps. One-by-one, plucked from the mass by rubbery stems, the cherries were popped into eager mouths.  Rolled around and around the tongue, the pit was picked clean before being spat from juice-stained lips across the sun-soaked lawn.

Oh, summer.

I won't deny that my adult days have seen the occasional cherry-pit-spitting contest.  Yes, I do that.  But 28-year-old Andrea has also learned how to bake and how to make jam, and that cherries pair well with savory partners as well as sweet.  Take this dish, for instance, a variation on the classic tomato and basil bread salad.  In it, sweet cherries are paired with the tang of  balsamic vinegar and spicy arugula, all held together by a base of crisped bread and a topping of creamy chevre.  It is a very adult meal, a lovely, rustic dinner for two on the back deck that is complimented nicely by an effervescent vinho verde.

Just be sure to save some of those whole cherries for dessert...you never know when your inner child will demand a little friendly competition.

Bread Salad with Cherries, Arugula and Goat Cheese

from A Homemade Life, by Molly Wizenberg makes 4 first-course servings, or a meal for 2 Ingredients
  • 6 oz rustic bread, preferably a day old (I used a whole wheat baguette)
  • olive oil
  • 1/2 pound cherries, halved and pitted (I used sweet cherries, and a cherry pitter was SO handy)
  • 1/8 tsp pressed or crushed garlic
  • balsamic vinegar
  • salt
  • arugula
  • fresh chevre, coarsely crumbled
  • black pepper
Method
  1. Preheat oven to 400 degrees.
  2. Trim crust from bread, and discard the crust.  Tear the bread into rough, bite-size pieces (you should have about 4 cups, total).  Dump the bread onto a rimmed baking sheet, and drizzle it with olive oil.  Toss to coat. Bake until crispy and golden in spots, shaking the pan once, 8 to 10 minutes.
  3. Meanwhile, put about one-third of the cherries in a small bowl and mash them lightly with a fork to release their juices.
  4. When the bread is nicely toasted, turn it into a large bowl. While it is still hot, add the crushed garlic and toss well.  Set the bowl aside to cool for a minute or two, then add all of the cherries, both mashed and halved, and toss. Add 2 tsp balsamic vinegar and toss again. Add 1 tablespoon olive oil and a pinch or two of salt and toss again.
  5. Taste, and adjust the vinegar, oil and salt as needed.  The bread and cherries should taste good on their own. When you're satisfied with the flavor, add about 2 handfuls of arugula and toss one last time.  Finish with a generous amount of crumbled goat cheese and a few grinds of the pepper mill, and serve.
Read More

perfect as they are

Andrea

Last month, at the very beginning of May (where did you go, sweet May?) Brian and I went strawberry picking. I’d received the email days before that shouted against a bright green backdrop “strawberries are here!”.   I anxiously await this announcement each year.  Not only does it mark Spring’s firm hold on this time in Charlottesville, it also foreshadows the other emails to come reporting the arrival of cherries(!) and peaches(!!) throughout the summer. (I'll add that, since it has taken me so very long to share this post and recipe with you, I've already received both the "cherries are ready!" and "peaches are early, and ready!" emails.  I'll try to do better this month with timely posting...)

And so Brian and I hopped in the car that Friday and drove out to the country to fill a flat with ten pounds of bright and beautiful berries. Never mind the fact that we have a garden on the side of our house that is absolutely FULL of strawberry plants. Plants that have well exceeded their raised bed boundary and tumbled into the aisles of what was once a very organized patch. Plants that, during the time we were heading towards the orchard with windows down and music blaring, were completely covered with star-shaped flowers and tiny green fruit.  But those country strawberries, they were ready RIGHT THEN, and I just couldn’t wait another week for ours to ripen.

There is something very special about moving slowly between those neat rows of plants, bending down to push emerald leaves aside, revealing the ripe and ready gems hiding in their shade.  The berries come off their stems with the most satisfying "snap!", and if popped in your mouth at that exact moment are one of the most delicious treats to ever touch your tongue.  Warmed by the sun, the fruit seems to explode in the mouth as vibrant juice seeps into every nook and cranny. It is so overwhelmingly good that you must close your eyes, tilt your face up towards the sky and slip into a little food dance of happiness.  Yes, I do that.

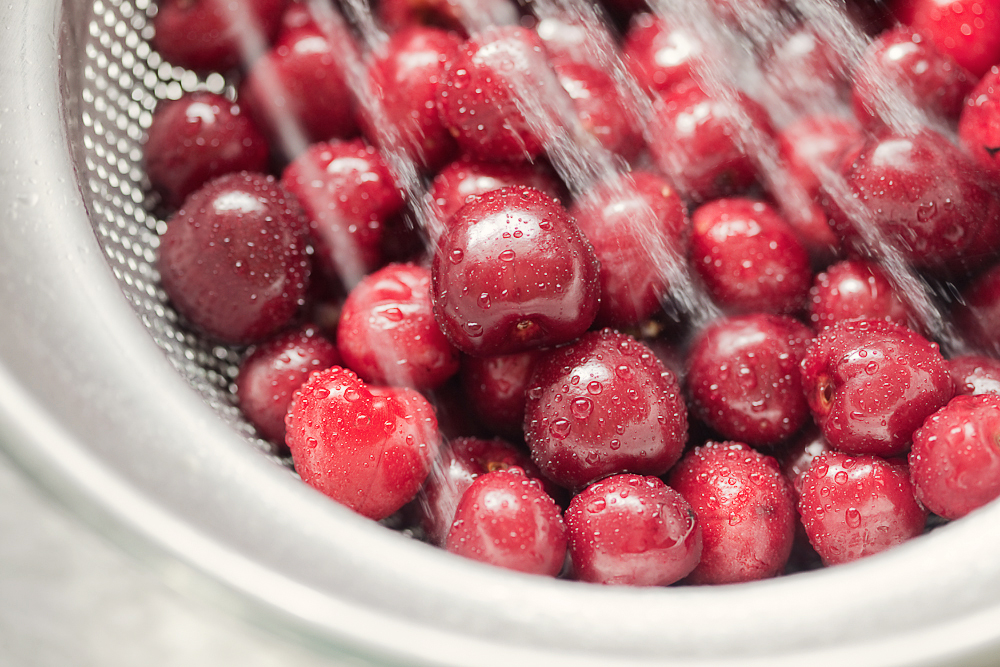
Once home, I set to work finding recipes for our bounty.  I thought about pie and jam and cobbler, but in the end decided that the berries were perfect just as they were.  And so I rinsed them all and placed most in a large colander in the fridge, ready for breakfast yogurt and cereal, afternoon snacks and ice cream topping.  The pint that I set aside was slated for tiny tarts, the raw berries sliced thinly and laid across a filling of cooked rhubarb within a crisp, buttery shell.

The marriage of rhubarb and strawberry is timeless, like that of chocolate and peanut butter, or coconut and lime.  One will never tire of the other, and folks will undoubtably continue to enjoy their combined company for years to come.  In these tarts, the rhubarb is cooked down in a process that resembles the making of jam, and the end result is quite similar to the classic jarred spread.  The tartness of the rhubarb is gently subdued by the sugar it is reduced with, but still punchy enough to provide nice balance to the sweet berries.

The best part of these tarts is the strawberries themselves, kept raw and firm and perfectly sweet on their own.  Find the freshest fruit possible and you can't go wrong.

Rhubarb Strawberry Tarts

from The Greyston Bakery Cookbook makes one 9-inch tart or six 4-inch tarts Ingredients
  • 1/3 cup sugar
  • 1/2 cup water
  • 1-1/4 pounds fresh rhubarb, trimmed and cut diagonally into 1/4"-thick pieces (about 5-6 cups)
  • 1 pint strawberries
  • 1 fully baked 9" Tart Pastry (see recipe below), cooled
Method
  1. In a heavy saucepan, combine the sugar and water.  Stir over medium-low heat until the sugar dissolves. Add the rhubarb, increase the heat, and bring to a boil.  Reduce the heat to medium-low, cover, and simmer for 5 minutes, or until the rhubarb is just beginning to soften.  Remove the pan from the heat.  Let stand, covered, for 10 minutes, or until the rhubarb is tender.
  2. Set a mesh strainer over a medium bowl and drain the rhubarb, reserving the liquid.  Allow the rhubarb to cool completely.  In a small saucepan, simmer the reserved liquid over medium-low heat for 5 minutes, or until it is reduced to a thick syrup.  Set the syrup aside and allow it to cool completely.
  3. Meanwhile, wash and hull the strawberries.  Thinly slice the strawberries lengthwise.
  4. Spread the cooled rhubarb evenly over the bottom of the tart shell.  Arrange the strawberry slices in concentric circles over the rhubarb filling, covering it completely.  Brush or spoon the cooled syrup over the top of the strawberries.  Chill before serving.

Tart Pastry

Ingredients
  • 1-1/4 cups all-purpose flour
  • 2 tbsp sugar
  • 1/4 tsp salt
  • 7 tbsp unsalted butter, cut into very small pieces and chilled
  • 1-3 tbsp ice water, as needed
Method
  1. In a bowl, whisk together the flour, sugar, and salt to blend thoroughly.  Using a pastry blender, metal pastry scraper, two knives or your fingers, cut or rub the butter in the dry ingredients until the mixture resembles a coarse meal.
  2. Using a fork, stir in the water, 1 tbsp at a time, adding just enough for the dough to hold together without becoming wet.  Gather the dough into a ball and then flatten it into a disk.  Wrap the disk of dough in plastic wrap and chill for 1 hour.
  3. Remove the dough from the refrigerator.  Using a rolling pin on a lightly floured board, roll the dough to form a rough circle about 1/4" thick.  Carefully transfer the dough to a 9" fluted tart pan (or six 4" pans) with a removable bottom.  Press the dough lightly but firmly into the edges of the pan, allowing the excess dough to hang over the edges of the pan.  Roll the rolling pin over the top of the pan to trim the excess dough from the pan rim.  Pierce the bottom of the dough several times with the tines of a fork.  Chill for at least 30 minutes before baking.
  4. Position a rack in the center of the oven and preheat the oven to 400*F.  Line the chilled shell with foil or parchment and fill with pie weights, dried beans, or raw rice.
  5. Bake the shell for 12 minutes, or until the pastry is set and golden.  Carefully remove the foil or parchment and weights and continue to bake the shell another 10 to 15 minutes (a little less if you use the smaller pans), or until the pastry is golden brown.  If the edges start to brown too much, cover them with strips of foil or piecrust shields.  Cool on a rack.
Read More

it's better this way

Andrea

Last Monday I sat on a plane at Louis Armstrong International Airport, Brian’s hand in mine as we taxied down the runway and lifted off, on our way home to Charlottesville. Out the window I watched a city that I love dearly fall away, nostalgic and missing New Orleans already.

We’d arrived Friday morning to heat and humidity that we won’t (hopefully) see in Virginia for another two months. After checking bags at our hotel, changing into shorts and slathering on sunscreen we set out into the city with two friends who’d joined us for four days of exploring, absorbing, listening and, most importantly, eating. As the veteran visitors, Brian and I had laid out an agenda based on food - our nine meals were carefully scheduled and the rest of the trip was woven loosely around their locations.

There were muffalettas and seafood po-boys, chicken andouille gumbo and spicy jambalaya, raw oysters and bags of boiled crawfish, black ham biscuits and fluffy omelets served with fries, powdered beignets and pecan-laden pralines. We sipped Pimm’s Cups as we strolled the French Quarter, cooled off with a creamy Bourbon Milk Punch at Bourbon House, swirled ice in our vodka tonics while listening to set after set of incredible jazz. We walked and biked between those meals to help counter the indulgence of the weekend, oftentimes feeling that what we really, really needed was to find a shady spot to stretch out horizontally for a nice, long nap.

As New Orleans disappeared beneath a bank of hazy clouds last Monday I found myself thinking that we could live there, Brian and I, in a cute Creole cottage just downriver from the French Quarter. We’d paint our home in shades of blue and grey with a vibrant yellow, or maybe eggplant, accent around the windows and doors. There would be bikes leaned up against the side of the house, one with a basket, ready at a moment’s notice to be ridden into the Quarter for lunch or to the Crescent City Farmer’s Market for fresh, local seafood and produce. Our yard would be tiny, just big enough for a vegetable garden and a stone terrace with an umbrella-covered picnic table. We’d string lanterns from the trees and host crawfish boils on that terrace, invite guests who would wear jaunty hats and sip frosty cocktails as they unconsciously swayed to the sounds of Doreen’s clarinet wafting from the stereo.

It is a lovely dream, one that I could see becoming a reality one day if we could just find a way to get used to the stifling heat. And the cockroaches - complete terror only scratches the surface of the affect that those little buggers have on me. And the city’s status as the murder capital of the USA...  Minor details, since I already have the biggest obstacle solved - vegetables. Did you notice that my list of traditional NOLA fare does not include even a hint of green? While we happily consumed fried / buttered / sugared food for four full days, I believe that four days must be the limit. For as I dreamt about our little blue Creole cottage and crawfish boils and lanterns strung from trees and clinking glasses of frosty beverages, I managed to squeeze a giant bowl of homegrown greens onto the linen-covered table in the middle of that backyard terrace.

A vegetable garden would be an absolute necessity to our New Orleans lifestyle.

The next day, back at work in Charlottesville and fully submerged in reality, Brian and I met a friend for lunch at Feast. I ordered a mixed salad plate, and while I couldn’t stop talking about the wonderful food in New Orleans, my mind was distracted by how amazingly satisfying the plate full of veggies in front of me was. And on Saturday, at our own City Market, we filled our basket with all the green we could get our hands on - two heads of lettuce, two bunches of both kale and collards, two pounds of asparagus.

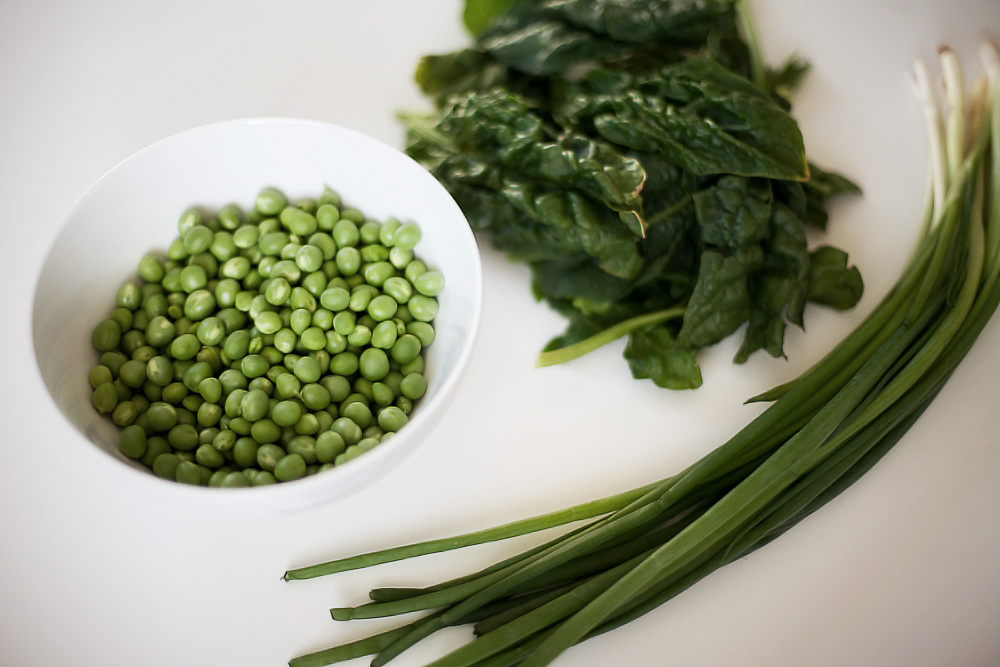
I plan to share some of our favorite New Orleans-inspired dishes here on Bella Eats in the next month or two (along with some photographs from our trip!), but just had to give our systems a break this last 10 days.  I'd originally thought that a full month of NOLA fare on this little blog could be fun, but have decided instead to spread those rich, indulgent dishes out, to balance them with recipes like this side of wilted spinach tossed with fresh peas, garlic and scallions.  It's better this way, I promise.

Tangles of earthy spinach play well with the sweet peas in this dish. The mild flavors are complimented nicely by the subdued bite of sliced garlic and a generous handful of scallions.  Serve alongside a fillet of white fish dressed simply with lemon, sea salt and herbs for a healthy, feel-good-to-the-core meal.

Spinach with Peas and Scallions

adapted from The Naked Chef Takes Off by Jamie Oliver serves 4 Ingredients
  • 2 tbsp olive oil
  • 2 tbsp butter, divided
  • 1 bunch of scallions, dark and light green parts diced (about 1/4 cup)
  • 3 garlic cloves, sliced
  • 2 cups of fresh or frozen peas
  • 1 cup white wine
  • 4 large handfulls of spinach, tough stems removed
  • sea salt and pepper
Method
  1. Heat olive oil and 1 tbsp butter in deep skillet over medium heat. Add the scallions and sliced garlic, stirring to coat with oil and butter.  Let saute' for 2-3 minutes, not letting the garlic brown.
  2. Add the peas, and saute' for another 2-3 minutes, until the garlic starts to turn golden brown.  Add the wine, and bring to a boil.  Reduce to a simmer and allow to cook for another 2-3 minutes.  If using fresh peas, be sure to test one before adding the spinach to be sure that it is cooked.
  3. Add the spinach, stirring to coat with liquid.  Allow spinach to heat through and wilt, 2-3 more minutes.  Add last tbsp of butter and salt and pepper to taste.
Read More

two local meals [and a side of cornbread]

Andrea

December 1st...what? How did that happen? November rushed by as if being chased by a ticking time bomb and I have no doubt that December will disappear just as quickly. We’re coming up on the end of another year, one that I am not so sad to see put behind us as I hope for a happier 2010. Don’t get me wrong, there have been some really fabulous experiences in 2009 that I hope never to forget, many of them being food-related and therefore blog-related, and two of those having happened in November. I’ve been meaning to write this post since the 9th of last month, after an especially wonderful evening spent with dear friends at a favorite Charlottesville restaurant, and one week after an afternoon spent with the same friends at Double H Farm outside of Charlottesville. On both occasions we were immersed in a local food nirvana, surrounded by the people who produce a good portion of the food served on our household table and others who support their efforts. What follows is a pictorial tour of both events with some notes on the experiences. I feel that this post will be most enjoyed by those who live in the Charlottesville area and have no doubt eaten pork or eggs or arugula from Double H Farm, had a conversation with Richard and Jean at the Farmer’s Market and perhaps even participated in one of the Local Food and Spirits Nights hosted by Maya. But I hope that my non-local readers will enjoy it as well, and possibly be prompted to explore similar opportunities in their own localities. And, way down at the bottom of this post, there’s cornbread.

Double H Farm

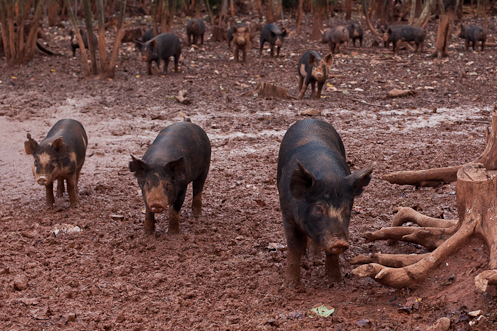
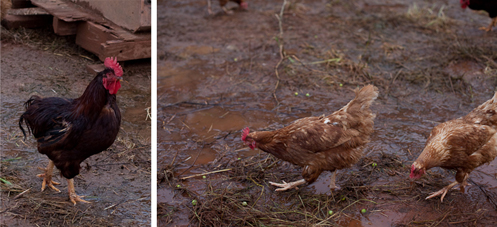
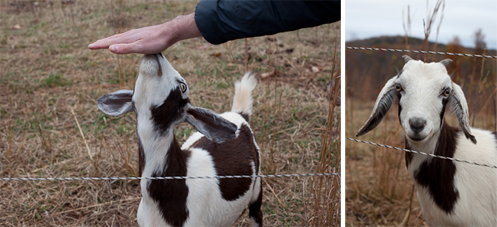
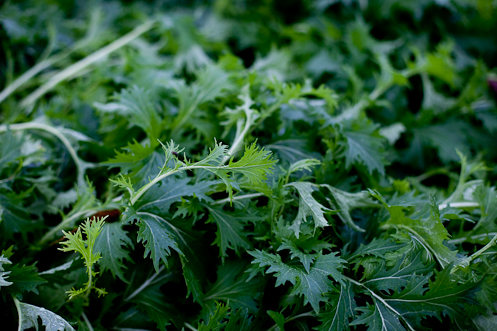
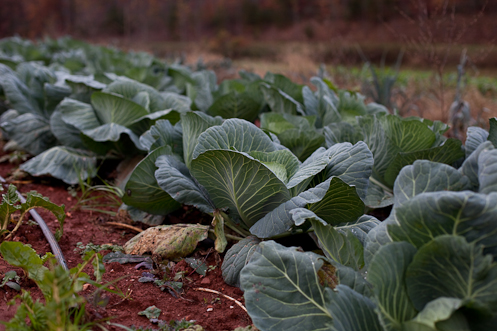
Many, many thanks to Richard Bean and Jean Rinaldi for inviting us to their home.  Double H Farm (which stands for Happy Hearts) provides sustainably raised pork and vegetables to Charlottesville-area restaurants and individual consumers.  Richard is one of the only true butchers left in our vicinity, cutting meat on his farm after the pigs have been slaughtered at a licensed, USDA-inspected facility as required by Virginia law.  You can read more about his process here. The Berkshire hogs roam freely on a portion of the 32-acres at Double H Farm.  They are curious about visitors at their fence and will come up to say hello if you're careful not to make sudden movements. The chickens at Double H provide some of the best eggs I've ever tasted.  Their yolks are a deep orange and add a luxurious texture to baked goods.  The birds are free-roaming; their pen and hen houses are moved by tractor every couple of weeks to a new, fresh piece of land. Goats.  So cute, so friendly.  I won't tell you about their fate as I prefer to think of them happily frolicking around their pen with the Great Pyrenees dogs that act as their protectors. I just adore the spicy bite that arugula lends to salads and soups, and Richard and Jean grow some of the best around. One of my favorite veggies - collard greens.  I am a southern girl, after all.

Maya : Local Food and Spirits Night : November 9th, 2009

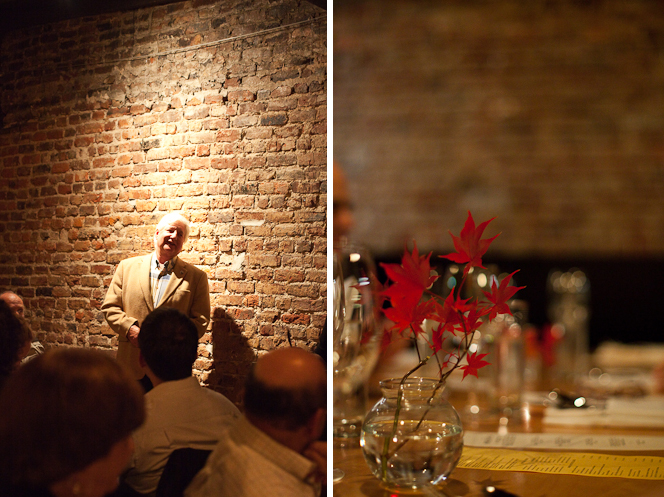
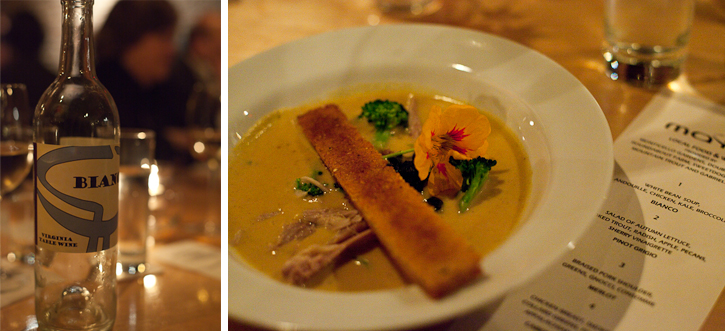
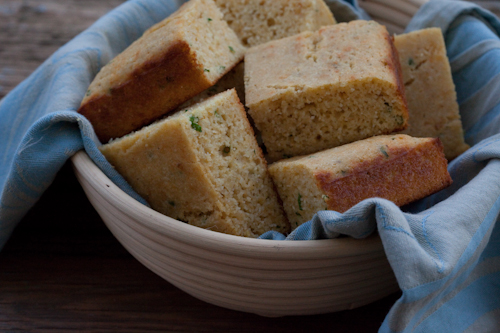
Each month Maya hosts a Local Food and Spirits Night.  The restaurant offers a 5-course menu created using only locally-sourced ingredients, each course accompanied by locally-produced spirits. And, even better, the farmers, winemakers and brewers who make this special evening possible are invited to the event so that they may share and discuss their practices with the rest of the guests. Every item on the menu was local except for the sherry vinegar in the salad dressing and the pecans on the salad. The farmers and winemaker featured at the dinner we attended (along with their contributions) were: Richard Bean of Double H Farm - pork shoulder, sausage, greens, cornmeal Megan and Rob Weary of Roundabout Farm - vegetables Peter Hatch of Monticello Gardens - vegetables Tom Silliman of Sweet Dog Farm - poultry Rag Mountain Trout - trout Gabriele Rausse of Gabriele Rausse Winery - wine With its dim lighting, exposed brick walls and tiny tea lights on the long community tables adorned with festive autumn leaves, the warm ambience of the upstairs dining room at Maya provided the perfect backdrop for the southern-inspired meal we were served.  Outside the air was brisk but inside our bodies were warmed by a subtly smokey white bean soup with andouille sausage, chicken, kale and broccoli.  This first course was paired with the Gabriele Rausse Bianco, a white table wine composed of 90% viognier grapes - my personal favorite - aged for five months in French oak barrels.  This course fought hard to be my favorite of the evening, but in the end was over-shadowed by the braised pork shoulder.  I guess I'm just a sucker for Double H Farm pork. While enjoying a salad of autumn lettuce, smoked trout, radish, apple and pecans, we learned about the history of the Gardens at Monticello and Thomas Jefferson's experimentation there.  Megan and Rob Weary of Roundabout Farm described their sustainable farming practices and their appreciation of Peter Castiglione and Christian Kelly, owners of Maya, who once explained their desire to own a restaurant that "brings [local] food in the back door to sell out the front". The evening continued with more wine from Gabriele Rausse and delicious food from the kitchen.  We enjoyed chicken breast rolled with smoked ham, served with collard greens and an appalachian cheese sauce as we heard Tom Silliman of Sweet Dog Farm discuss the joys and challenges of running his family-owned farm and just how he had raised the chicken on our plate.  Our party agreed that the third course of braised pork shoulder with mixed greens, gnocci and crumbled bits of bacon was the highlight of the evening, and cheered for our friend Richard as he expressed the importance of eating locally and asking the right questions.  "Where does it come from?  How was it raised?  You've got to ask!" We finished the meal with warm apple tart tatin and the Collage dessert wine; our bellies full, our minds slightly fizzy and our mouths exclaiming that we'd be back again soon.  For sure. Cornbread, for me, is one of the most comforting recipes to make when the weather turns cold.  This particular recipe I made with eggs and white cornmeal from Double H Farm and chives from our own garden. Its quite good with a bowlful of piping-hot chili on a frigid evening, a not-so-bad way to welcome Winter and a new year.

Cheddar Chive Cornbread

adapted from The Joy of Cooking Ingredients
  • 1-1/4 cups stone-ground cornmeal
  • 3/4 cup white whole wheat flour
  • 1 tbsp sugar
  • 2 tsp baking powder
  • 1/2 tsp baking soda
  • 1/2 tsp salt
  • 2 large eggs
  • 1-1/3 cups milk (I used 1%)
  • 3 tbsp melted unsalted butter
  • 1/2 to 1 cup grated cheese (this will very based on the strength of your cheese.  I used 1/2 cup of cheddar, and wish I'd used more)
  • 2 tbsp fresh chives, minced
Method
  1. Preheat oven to 425*F.  Butter a 9 x 9-inch baking pan.
  2. In a large bowl, whisk together all of the dry ingredients.
  3. In a smaller bowl, whisk together the eggs and the milk.
  4. Add the wet ingredients to the dry ingredients and stir until moistened.  Fold in the melted butter. Fold in the cheddar and chives.
  5. Scrape batter into greased baking pan, tilting pan to level.  Bake for 20-25 minutes until toothpick inserted in center comes out clean.
  6. Let the cornbread cool in the pan for 15-20 minutes.  Invert the pan to release the cornbread and slice into 9 pieces.  Serve warm.
Read More

5 weeks, 5 pies, 5 pounds

Andrea

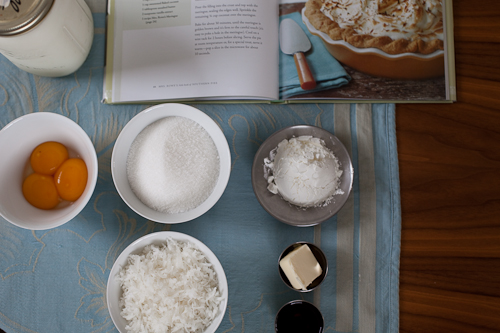
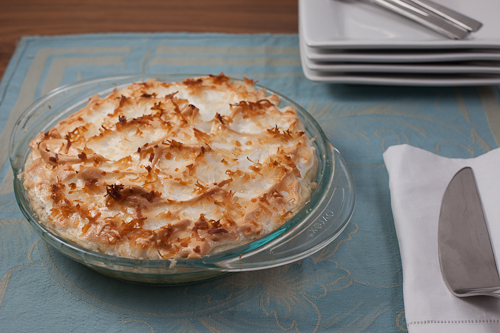
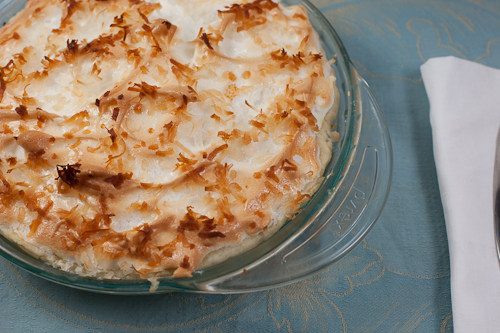
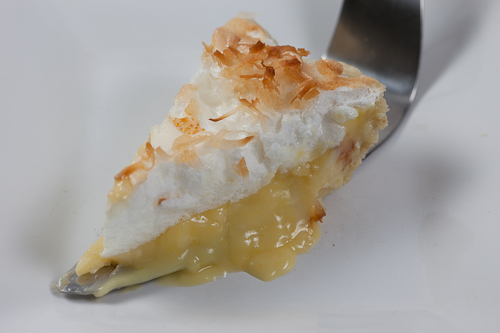
When we moved to Virginia 4+ years ago, my momma told Brian and I about an incredible pie experience she’d had years prior at a little restaurant in Staunton, about 45 minutes from Charlottesville. She waxed poetic about an apple pie better than any she’d ever had, including her grandmother’s recipe which had previously held first place on her pie-ranking list. We were encouraged to drive over the mountain chain separating us from Mrs. Rowe’s Restaurant and Bakery one Saturday for a special treat, to indulge in one, or maybe even two slices of a pie that still had a mouth-watering affect on her all these years later. CC Pie-10 The restaurant and its legendary pie quickly slipped my mind as we moved into a house and started new jobs, busying ourselves with life in Charlottesville and the many culinary delights we have in this little city. I hadn’t thought of my momma’s story in 4 years, until I attended the C’ville Pie Fest and learned of Mollie Cox Bryan and the cookbook she’d written about Mrs. Rowe and her pies. I didn’t have the opportunity to meet Mollie as I was busy photographing and she was busy judging, but we did get in contact with each other afterwards via Twitter and she generously offered to send me a copy of her book to aid me in the kitchen during Bella Eats Pie Month. CC Pie-20 The cookbook arrived on my doorstep a few days later, and I was delighted by what I found as I immediately began flipping through its pages. Mrs. Rowe’s Little Book of Southern Pies is lovely with a simple, intuitive layout and beautiful photos of many of the featured pies sprinkled throughout. Mollie starts by introducing her reader to Mildred Rowe and the Staunton restaurant, describing the space and the woman behind it with clarity and detail that only someone who has spent much time there could. The reader is then taken through one section detailing pie-making equipment and another describing techniques for various crusts and toppings. While the Plain Pie Pastry and Vinegar Pie Crust recipes seem simple enough, Mollie points out that the light touch of an experienced baker can take years to master. I plan to continue practicing. CC pie merge 1 Despite its petite size, Mrs. Rowe’s Little Book of Southern Pies is packed with useful tips and 65 recipes, some straight from Mrs. Rowe’s Restaurant and Bakery and others from journals found during Mollie’s research. Restaurant favorites such as the Original Coconut Cream Pie, Chocolate Meringue Pie, Peanut Butter Pie and French Apple Pie are all present along with some classic Southern varieties like Shoofly Pie, Lemon Chess Pie and Blackberry Pie.  Each recipe is accompanied by a small tidbit of history, a direct quote from a member of the Mrs. Rowe's team or a memory from a loyal customer.  The book is personal; peppered with heartfelt writing and recipes that are sure to remind you of a special occasion in your life, when a certain pie was served to a table full of your closest family or friends. CC Pie-1 I chose to tackle the Original Coconut Cream Pie recipe rather than the apple variety my momma had raved about. As the best-selling pie at Mrs. Rowe's Restaurant and Bakery it seemed to be a safe bet.  And, I really wanted to try my hand at meringue, a baking challenge I hadn’t yet subjected myself to. I found the recipe to be fairly easy to follow, although previous experience baking cream pies might have been helpful to me. Where the recipe called for a mixture of milk, sugar, cornstarch and egg yolks to be heated and stirred until "very thick", about 4 minutes, I had no frame of reference in mind for what that consistency should be.  Having reached 6 minutes with a pudding-like consistency, I pulled the mixture from the heat thinking it would thicken up more when baked.  No such luck.  Upon slicing, the cream filling oozed from the center of the slice into a pool on the plate.  Clearly my idea of "very thick" was not thick enough.  The meringue, however, was absolutely perfect. CC Pie-2

Some Notes on Cream Pies and Meringue Tops

The runny nature of my pie was most certainly the result of my own lack of experience in cream pie baking and not the fault of the recipe itself. Here are my notes for the next time I tackle a cream pie.
Many cream pie recipes call for the use of a double boiler when heating and thickening the cream mixture.  A double boiler is basically two saucepans that fit together, allowing water to boil in the larger pan with your cream mixture heated in the smaller pan set just above the boiling water.  I realized after this latest pie-making adventure that my "double boiler" is not really a double boiler in the traditional sense.   I think it hindered my process rather than helped it, and believe I would have been better off setting a large stainless steel bowl containing my cream mixture over a large saucepan containing boiling water.  If you're shopping for a double boiler, find one that looks like this, rather than like this.  Or, just set a stainless steel bowl over a saucepan. When heating and thickening the cream mixture, the texture is more important than the time it takes to get to that texture.  As I learned, all stove tops and double boilers are different, so it could take more or less time to reach the desired consistency depending on your situation.  You're going for a thick, custard-like consistency.  It shouldn't be runny at all, should fall from a spoon with a thick "plop" rather than run off of the spoon with any resemblance to liquid. Don't let the milk actually come to a boil as you're heating it, you don't want it to scald. Your meringue will take more or less time to come together depending on your environment.  Mine took about 10 minutes of consistent beating with a stand mixer (whisk attachment), on a cool, rainy day. When making your meringue be sure to add your sugar slowly, as it is important for all of the sugar to dissolve into the egg whites between each addition. Meringues are subject to "weeping", when the sugar solution comes out of the meringue in little droplets.  This happened with mine, and after a little research in The Joy of Cooking I discovered that it is more likely for a meringue to weep on a humid day.  It still tasted delicious, there were just small droplets of liquid sugar sprinkled across the surface of the meringue, and it wasn't as dry to the touch as you would expect it to be. Be sure not to overfill your pie crust with your cream filling.  Leave at least 1/4-inch of the crust exposed to be sure your filling doesn't overflow.  Also, when you add your meringue to the top of the filling it can cause overflow, so it is good to have a little bit of wiggle room as you design your topping. Meringue can be shaped with a spatula in any way you wish.  Smooth it over, swirl it around, form fancy little peaks.  Let your inner artist shine! Seal the edges of your meringue by wetting your finger with cold water and running it over the rim of your crust.  Press the meringue down into your crust to help prevent weeping and potential filling overflow.
CC Pie-5

Original Coconut Cream Pie

from Mrs. Rowe's Little Book of Southern Pies by Mollie Cox Bryan, pg 64 I've written the recipe as it appears in the cookbook, but see my notes above to learn from my mistakes. makes one 9-inch pie Ingredients:
  • 1/2 recipe plain or vinegar pie crust (I used this one because I had it in my freezer already), prebaked
  • 3 large egg yolks (be sure to reserve the whites for the meringue, below)
  • 1 cup sugar
  • 1/4 cup cornstarch
  • 1/4 to 1/2 cup water
  • 3 cups whole milk
  • 1 cup sweetened flaked coconut
  • 1 tbsp unsalted butter
  • 2 tsp vanilla extract
  • 1 recipe Mrs. Rowe's Meringue (below)
Method:
  1. Preheat the oven to 325*.
  2. Stir together the egg yolks, sugar, cornstarch and just enough of the water to make a smooth paste.
  3. Heat the milk in a double boiler set over simmering water. (Or, place a medium-size stainless steel or glass bowl into a large saucepan filled with a couple of inches of simmering water.)  When the milk begins to steam gradually whisk in the egg mixture.  Cook, stirring occasionally, until very thick, about 4 minutes.  Remove from the heat and stir in 3/4 cup of the coconut, the butter and the vanilla.  Set aside.
  4. Make your meringue, see below.
  5. Pour the filling into the prebaked crust and top with the meringue.  Seal the edges well by wetting your finger with cold water and running it along the edge of the crust, pressing the meringue into the crust as you go.  Sprinkle the remaining 1/4 cup coconut over the meringue.
  6. Bake for about 30 minutes, until the meringue is golden brown and its firm to the careful touch (its easy to poke a hole in the meringue).  Cool on a wire rack for at least 2 hours before slicing.

Mrs. Rowe's Meringue

makes enough to cover one 9-inch pie Ingredients:
  • 4 large egg whites, at room temperature
  • 1/4 tsp cream of tartar
  • 3 tbsp granulated sugar
Method:
  1. Combine the egg whites and cream of tartar in a chilled bowl and beat with an electric mixer on slow speed.  Gradually increase the speed as the egg whites thicken, eventually landing on medium speed.  Beat until soft peaks form.  Add the sugar 1 tbsp at a time, beating for about a minute after each addition.  Beat until stiff peaks form, but not so long that the peaks become dry.  The meringue is now ready to pile lightly over the pie.
CC Pie-7 And that concludes Bella Eats Pie Month!  5 weeks, 5 varieties, and 5 pounds later, I've learned so much and hope you have too.  Please write and tell me about any of these or other pie recipes that you try out this holiday season.  I'd love to hear from you. While I'm ready to take a short break from pie, as are all of our friends and co-workers, I look forward to continuing my experimentation and sharing more pie recipes with you in the future.  Here are a few more on my list to try: Peanut Butter Banana Cream Pie Key Lime Pie Bourbon Peach Hand Pies Lemon Meringue Pie Pear Cranberry Pie
Read More

a winner, indeed

Andrea

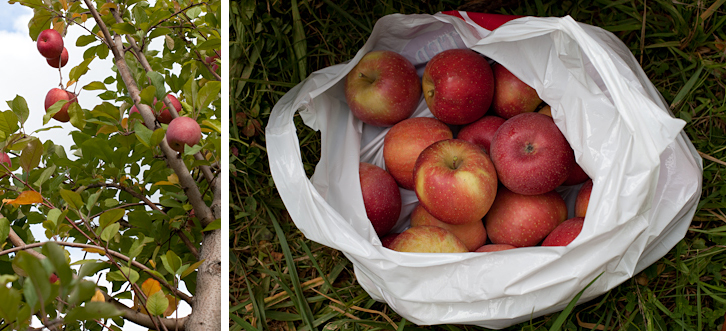
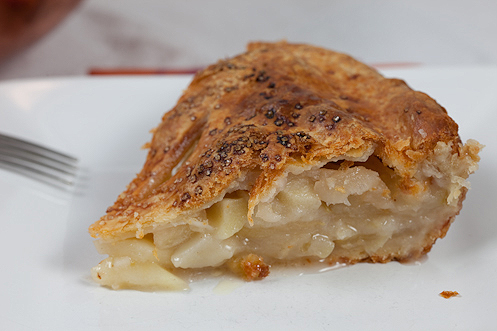
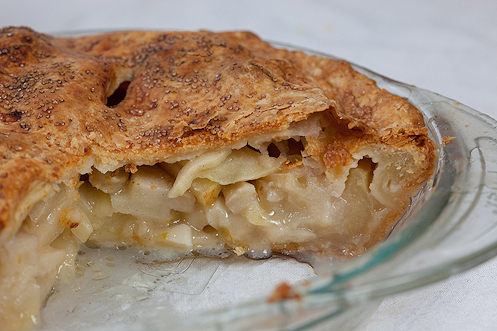
pie logo apple Our car winds its way up the narrow gravel road to the top of Carter Mountain. The windows are cracked, and the almost-too-cold October air slips in and lifts my hair from my face. The early afternoon light is diffused by retreating rain clouds that lend the sky a lovely texture rather than pose any real threat of storms. We bump along the pitted drive, ignoring the dust billowing up from beneath the tires of the [very slow] car full of tourists in front of us. We have no schedule, no place to be, just plans for picking bags full of apples and enjoying this first rain-free afternoon in days. cheddar apple pie-6-edit Once parked we make our way through the crowd towards the renovated barn, dodging bundled-up children being pulled in bright red Radio Flyer wagons by slightly-frazzled parents. The smell of freshly baked apple pie and apple cider doughnuts fills the air as we find the ‘pick-your-own’ information kiosk, grab a bag, ask about availability and set off on our hunt for sweet and crisp Fuji apples. We continue our journey towards the top of the mountain, this time on foot, huffing and puffing just a little as I am reminded again of why I should wear sturdier shoes on these treks. Fifteen minutes later we have found rows full of our target. The bright pink globes dance in the wind and beg to be picked, and I am thankful again that Brian is tall and can reach the otherwise unattainable perfect specimens near the tops of the trees. cheddar apple merge 1 We fill our first bag, saving the second for a bin full of bright green Granny Smiths calling our name back at the barn. The pick-your-own trees once dripping with that variety were stripped the previous two weekends during the Carter Mountain Apple Festival, the bounty already baked into pies and crisps across the city of Charlottesville. Once we’ve gathered more apples than we probably need, stashed a half-gallon of apple cider under an arm and paid for our haul, we make our way back to the car already planning our next trip to the orchard in two weeks, when Pink Ladies will be ripe for picking. cheddar apple pie-10 I knew from the first moment that Brian and I started talking about Bella Eats Pie Month that I would be making an apple pie. Not because of the time of year, or its classic role on the Thanksgiving dinner menu, or the fact that we have a lovely orchard located a mere 15 minutes from our house with trees loaded down with apples. No, I knew that apple pie would be on the agenda because it is my husband’s number one, all-time favorite, could eat it every day, dessert. If I am the director of our kitchen and weekly menus (and truly, I don’t hold all the control), he is the marketing agent for the apple pie, advocating for its place at our table as soon as the first golden light of fall spills through our windows and across the dining room floor. cheddar apple merge 3 I really wanted to try something new (to us, at least) for Pie Month, and so started to look into apple pie variations. Initially Brian balked, for even though he is a fan of the apple cranberry pie I make every year, he is truly a classicist when it comes to his favorite dishes and was not keen on the idea of my shaking things up. Until a reader, Hannah, was sweet enough to send me her grandmother’s recipe for Cheddar Apple Pie. Cheddar? Apples? Yum! I’m embarrassed to say that we’d never even heard of such a pie in our household, not even the Wisconsin tradition of layering a slice of cheddar across a warm slice of freshly-baked apple pie. The idea appealed to both of us, especially Brian’s not-so-sweet tooth, and so Cheddar Apple Pie was penciled into the agenda. cheddar apple pie-14 A bit more research later, and I discovered that I’d overlooked the Cheddar-Crusted Apple Pie in the September 2009 issue of Gourmet. Given the recent, heart-breaking turn of events for one of the most beloved food publications out there, I decided to give that recipe a try, having never been disappointed with a recipe from Gourmet and wanting to mourn its untimely demise in my own way. cheddar apple merge 4 As with most recipes I've tried from within the pages of Gourmet, this one came together beautifully.  Once the dough softened up a bit and stopped giving me a killer upper-body workout, it was a dream to work with.  No tears or splits or crumbles except for at the edges.  The slight sweetness of the filling was perfectly balanced by the savory tone of the crust, which flaked just as it was meant to and melted away on the tongue.  The cheddar added a nice punch that left me wishing I had baked off the scraps leftover after trimming the pie's edge, imagining that pairing those crispy strips with slices of fresh apple would have provided a perfect afternoon snack. The not-too-sweet nature of this pie was the perfect follow-up to the rich chocolate + caramel pies I was producing last week.  If you have loved ones who aren't big dessert fans, who just don't have much of a sweet tooth, this pie is the answer to your "what shall I make" questions.  Even Brian, who has been known to pass up cake / cookies / pie / ice cream in favor of an extra helping of meat or mashed potatoes, consumed multiple pieces of this pie in a day.  And then did it again the next.  This pie is a winner, indeed. cheddar apple pie-17 I had an additional apple pie planned for the week, a classic version shared by Joy, but a busy weekend and even busier evenings prevented its assembly in our kitchen. Luckily this first pie came out wonderfully, other than a few of my own mistakes that I've noted below the recipe. And, given Brian’s obsession and the ripening of Pink Ladies on the trees at Carter Mountain Orchard in a short amount of time, I feel certain that I will be making Joy's pie in the near future and will be sure to share it with you all. If you're in the mood for more of an apple crisp or crumble, try out Nana's recipe.  You won't be disappointed. cheddar apple pie-18 Cheddar-Crusted Apple Pie from Gourmet, September 2009 (sniff, sniff) serves 6 to 8 Pastry Ingredients:
  • 2-1/2 cups all-purpose flour
  • 1/2 tsp salt
  • 1/2 pound extra-sharp cheddar (preferably white), coarsely-grated (2-1/2 cups)
  • 1 stick cold, unsalted butter, cut into 1/2-inch pieces
  • 1/4 cup cold vegetable shortening, cut into 1/2-inch pieces (I had no shortening, so used more butter instead)
  • 6 to 8 tbsp ice water
  • 1 tbsp milk (or 1 egg whisked with 1 tbsp water), for wash
Filling Ingredients:
  • 3 pounds of apples (I used Fuji and Granny Smith, but will substitute either Pink Ladies or more Granny Smiths for the Fuji next time), about 6 medium apples
  • 2/3 cup sugar
  • 3 tbsp all-purpose flour
  • 1 tbsp fresh lemon juice
  • 1/4 tsp salt
  • 1 tbsp cold unsalted butter, cut into bits
For the Pastry Dough:
  1. Stir together flour, salt and cheese in a large bowl.  Add butter and shortening and blend with your fingertips or a pastry blender until the mixture resembles course breadcrumbs and the biggest pieces of butter are no larger than a pea.
  2. Drizzle 6 tbsp of the cold water over the mixture and stir with a fork until incorporated.  Squeeze a lump of the dough between your fingers.  If it holds together it is ready, if it falls apart it needs more water.  Add a tablespoon at a time, testing after each addition until the consistency is right.  Do not overwork or your pastry will be tough.
  3. Turn out dough onto floured work surface and divide in two.  Shape each half into a smooth 5-inch diameter disk and wrap in plastic.  Refrigerate for at least one hour, or up to two days.  It can be frozen at this stage for up to three months.
Assemble the Pie:
  1. Put a foil-lined baking sheet in the middle of the oven and preheat oven to 450*.
  2. Peel and core the apples.  Slice into 1/4-inch thick pieces.  (see note below)  Toss apples with lemon juice, flour, sugar and salt until evenly coated.
  3. Roll out one disk of dough on a lightly floured surface into a 13-inch round. (see note below)  Fit into a 9-inch pie plate (mine is glass) leaving a 1/2-inch overhang.  Roll out the second disk of dough into an 11-inch round.
  4. Transfer filling to the shell.  Dot with butter (see note below), then cover with the second pastry round.  Trim edges, leaving a 1/2-inch overhang.  Press edges together to seal then fold under.  Crimp edges as desired.  Brush top of crust with milk (or egg, my preferred wash) and sprinkle with course sugar.  Cut vent 5 vent holes (1-inch long).
  5. Bake on hot baking sheet for 20 minutes.  Reduce heat to 375* and bake until crust is golden brown and filling is bubbling, 30-40 minutes more.  (I baked mine for full 40, but should have removed it at 30 as the filling and bottom crust were over-done).
  6. Cool to warm or room temperature, 2 to 3 hours.
cheddar apple pie-20 Notes:
After removing the dough from the refrigerator, let it sit for 5 minutes or so to soften up before rolling it out.  And be ready for a workout!  The cheese binds this dough together very nicely, which makes it a bit tough to work until you get it pretty thin. The Granny Smith apples held together nicely, but the Fuji apples were reduced to the consistency of a chunky applesauce.  If you're going to use two varieties of apples with different textures, be sure to compensate by slicing the softer apples thicker than the others. Do not bake this pie on the bottom rack, as I did with my Italian Plum Pie.  I'm not sure if it was the addition of cheese in the crust, or the fact that the apples weren't as juicy as the plums (and therefore less likely to soften the crust), but after baking this pie on the bottom rack the bottom crust was overdone, even with less baking time.  It tasted just fine, but was tough to cut through with only your fork.
cheddar apple pie-22

Local

The Virginia Chutney Festival is this weekend (the 24th) in Sperryville!  Go check it out and report back to me since I won't be in town to participate in the festivities! WriterHouse in Charlottesville is hosting a morning seminar this Saturday (the 24th) with Molly Cox Bryan (author of Mrs. Rowe's Little Book of Southern Pies and Mrs. Rowe's Restaurant Cookbook) titled "Writing About Food - Turning Appetite Into Art and Articles".  I SO wish I were going to be in town for this!!!  Again, GO and report back to me! And last, I've just learned of a special dinner being held at Maya in Charlottesville on November 9th that will feature ALL local food!  Participants include two of my City Market favorites, Double H Farm and Roundabout Farm, along with local wine.  There are other exciting details, but unfortunately I haven't been able to find any information online.  Call 434.979.6292 for additional details and reservations.  I'll post more as I learn more, but I can assure you that Brian and I (along with a couple other foodie friends) will be there!
Read More

blog of the week!

Andrea

Exciting news!!! Last night, Bella Eats was featured on CBS19 News in Charlottesville! I was absolutely thrilled when Marijean Jaggers (STL Working Mom) asked if I would like to be the Charlottesville Blog of the Week. Um, yes please!  Many thanks to Marijean and CBS19 for the great coverage. Picture 2 Here are links to the two videos that were shown - an initial promo clip and then the full story. Enjoy! The Bella Eats Introduction Bella Eats as Blog of the Week You can read my full interview on Marijean’s blog, but here are a few highlights...
Bella Eats was born nearly one year ago - October 31, 2008.  It began as a food diary - a way to hold myself accountable to my healthy lifestyle goals and to track my training for the Charlottesville Ten-Miler... ...While I enjoyed the support of the food diary community and the wonderful emails I received from readers who were inspired by my training and eating habits, what I really discovered about myself in those first four months was a renewed passion for cooking, writing and most of all, photography... ...There are two food issues that I feel passionately about and would like to push more on the blog:  daily cooking at home and using seasonal and locally-sourced ingredients... ...By testing out recipes in my own kitchen and then posting them on Bella Eats, I feel like I am a filter for the countless recipes available in cookbooks, magazines and online that can sometimes be overwhelming for those with little kitchen experience... ... I always try to give credit to the source of ingredients in my recipes, and have started a "Local" page with links to area food providers and businesses that support local food...I have big plans for weekly City Market recipes next summer and would like to start conducting monthly interviews with local farmers and business owners.  While I realize that these Charlottesville-centered posts may not be as helpful to my non-local readers, I hope that they will be inspired to learn more about their own local food communities... ...I've learned so much since starting Bella Eats - about photography, writing, cooking and baking.  I have no formal training in any of these areas and have certainly had my share of disasters over the last year, but have found that there is no better way to learn than to practice.  The food blog community is strong and supportive and I've "met" some really amazing people through our blogs...There is an amazing amount of knowledge out there to tap into, and I'm excited to be providing a fraction of it to my readers...
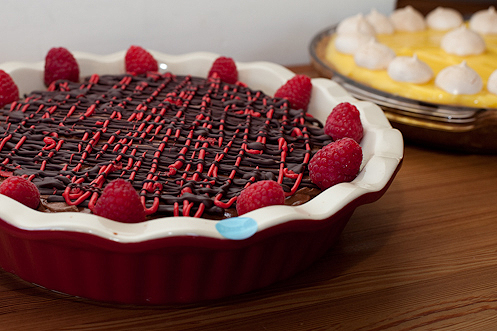
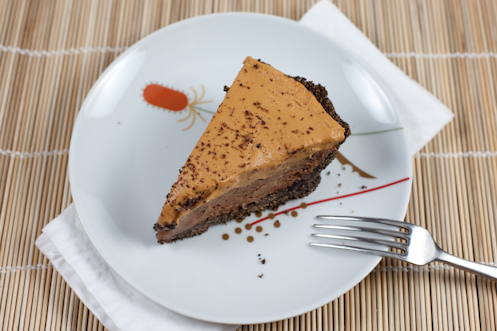
I'll be back tomorrow for the next installment of Bella Eats Pie, but here's a little teaser of the first test this week, Chocolate and Salted Caramel Mousse Pie... mousse pie-1
Read More

c'ville pie fest!

Andrea

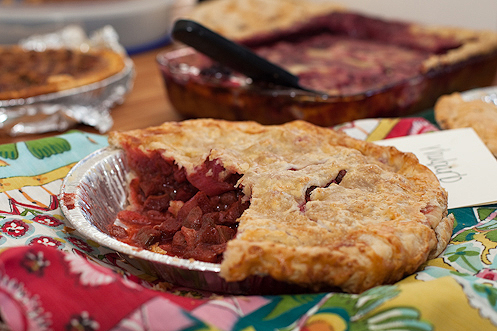
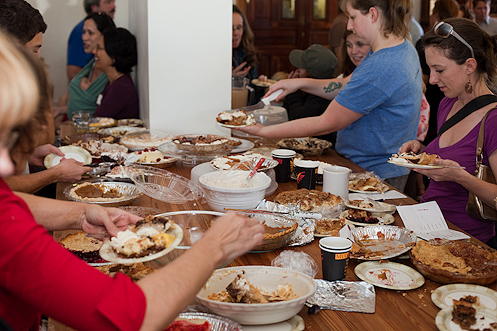
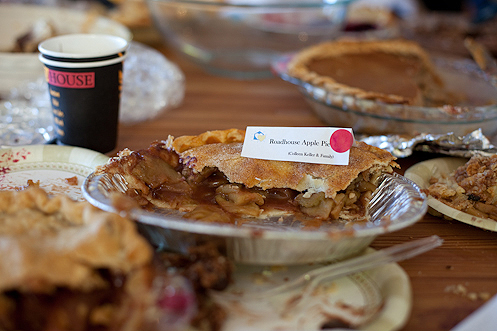
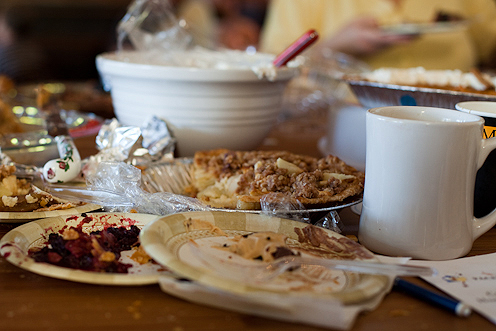
If you follow me on Twitter, you probably know that I spent the end of last week learning about the C'ville Pie Fest, deciding to enter, quickly developing a recipe spinning off of the Italian Plum Cake that I made last weekend, testing and tweaking the recipe for two nights and then deciding not to enter the contest at the last minute.  It was a whirlwind 36 hours, starting at noon on Thursday and ending at midnight Friday, with most of the action occurring between 6pm and 12am both nights.  By the time I decided that I just wasn't prepared with a contest-worthy entry I was exhausted, covered in flour and so sick of plum pie that I vowed to not eat anymore for a year (until I woke up Saturday morning and had it for breakfast). Despite being disappointed with my lack of an entry, the whole C'ville Pie Fest experience was fantastic.  I made some new friends on Twitter and met most of them in person at the lovely and brand new Mudhouse Coffeehouse in Crozet, including Brian [The Food Geek], MariJean [STL Working Mom], Mollie Cox Bryan [author of Mrs. Rowe's Little Book of Southern Pies, which I'll be reviewing here on Bella Eats in the next few weeks!] and Angie Brement [Angie Brement Photography].  The organizers put on a wonderful event that drew an impressive crowd of spectators, bakers and judges, all to benefit PACEM, an organization that helps the homeless in Charlottesville. A few photos from the event.  First, thank you to Mudhouse Coffeehouse for lending your space... piefest merge 1 piefest-20 So many delicious-looking pies... piefest-2 piefest-4 piefest-3 The judging begins... piefest merge 2 piefest-10 piefest-11 The spectators are allowed to join in the fun... piefest merge 3 piefest-12 And only shrapnel remains... piefest-17 piefest-15 To read more about the event, check out The Daily Progress and CBS19 News. I learned a few important lessons over the last four days, namely that one should never enter a pie contest with only 36 hours to prepare without a fool-proof recipe in hand.  I also realized that I really have no pie recipes in my repertoire, other than this cranberry apple pie that only does me good when cranberries are in season.  And so, since we are approaching two major holidays that traditionally include a lot of pie, I've decided to declare October Bella Eats Pie Month, focusing on one pie recipe each Thursday for the next 4 weeks.  Are you excited?  I am! pie logo This Thursday I'll start Bella Eats Pie Month with a recap of the trials and tribulations for the Italian Plum Pie I had hoped to enter in C'ville Pie Fest.  I hope to have reached a solution by then...keep your fingers crossed for me. For the other three weeks, I was planning to feature some traditional holiday pie recipes but am still open to suggestions.  Please leave a comment and tell me what you'd like to see, I look forward to your feedback!
Read More