perfect for a 'snow day'
Andrea
As I write this post snow is softly falling outside, turning my little city into a winter wonderland. In the five winters that Brian and I have spent in Virginia, we've never seen a snowfall like this. Its breathtakingly beautiful, the 22-inches we've received so far softening the landscape with a blanket of white, turning our street into an unrecognizable scene dotted with pedestrians in bright winter parkas out enjoying the snow.
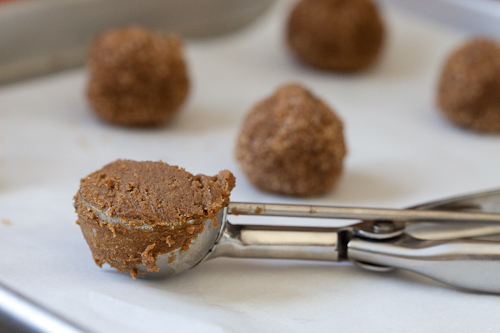 Holed up inside for the day, I managed to pull myself away from the window for about an hour to satisfy the urge to bake. An urge that is unavoidable when your outside world is blanketed with snow and inside, curled up in your favorite chair, under a quilt, with hot coffee (and perhaps a splash of Bailey's Irish Cream...), you are toasty warm and feeling very domestic. I'll share the cake that I just pulled from the oven in the next day or two, but on this snowy afternoon I feel it appropriate to give you a recipe for some chewy ginger cookies. They feel so very 'snow day', the perfect snack waiting on the counter when you come in from making snowmen and snow angels.

 Ginger cookies have been a longtime favorite in our household, but I do believe that this is the first time I've ever made them myself. I've helped my momma on many past Christmas Eves to roll out perfect little balls of ginger snap dough, the delightfully crunchy cookies a staple between meals on Christmas day. But last year Brian and I were introduced to a different variety of ginger cookie, one that was chewy rather than crispy in texture, and laced with chunks of crystallized ginger. Brian declared them his favorite cookie, ever, and I vowed to find a recipe to replicate them prior to the next Christmas. Lucky for me, Bon Appetit read my mind.
 We love the soft, chewy interior texture of these cookies, complemented perfectly by the crunchy shell of turbinado sugar that coats the exterior. The bits of crystallized ginger throughout are wonderful surprises.

Read More
 Holed up inside for the day, I managed to pull myself away from the window for about an hour to satisfy the urge to bake. An urge that is unavoidable when your outside world is blanketed with snow and inside, curled up in your favorite chair, under a quilt, with hot coffee (and perhaps a splash of Bailey's Irish Cream...), you are toasty warm and feeling very domestic. I'll share the cake that I just pulled from the oven in the next day or two, but on this snowy afternoon I feel it appropriate to give you a recipe for some chewy ginger cookies. They feel so very 'snow day', the perfect snack waiting on the counter when you come in from making snowmen and snow angels.

 Ginger cookies have been a longtime favorite in our household, but I do believe that this is the first time I've ever made them myself. I've helped my momma on many past Christmas Eves to roll out perfect little balls of ginger snap dough, the delightfully crunchy cookies a staple between meals on Christmas day. But last year Brian and I were introduced to a different variety of ginger cookie, one that was chewy rather than crispy in texture, and laced with chunks of crystallized ginger. Brian declared them his favorite cookie, ever, and I vowed to find a recipe to replicate them prior to the next Christmas. Lucky for me, Bon Appetit read my mind.
 We love the soft, chewy interior texture of these cookies, complemented perfectly by the crunchy shell of turbinado sugar that coats the exterior. The bits of crystallized ginger throughout are wonderful surprises.
Triple Ginger Cookies
adapted from bon appetit, december 2009 Ingredients- 2-1/2 cups all purpose flour
- 1/3 cup minced crystallized ginger
- 2 tsp baking soda
- 1/4 tsp salt
- 3/4 cup (1-1/2 sticks) unsalted butter, room temp
- 1 cup (packed) light brown sugar
- 1 large egg, room temp
- 1/4 cup blackstrap molasses
- 1-1/2 tsp finely grated fresh peeled ginger
- 1-1/2 tsp ground ginger
- 1 tsp ground cinnamon
- 1/2 tsp ground cloves
- 1/2 cup turbinado sugar (for rolling cookies in)
- Position 1 rack in top third of oven, 1 rack in bottom third; preheat to 350*. Line two baking sheets with parchment paper.
- Whisk together flour, crystallized ginger, baking soda and 1/4 tsp salt in a medium bowl.
- Using an electric mixer, beat butter until creamy and light in a separate bowl for about 2 minutes. Gradually add brown sugar and beat on medium-high speed until creamy, about 3 minutes. Add egg, molasses, fresh ginger, ground ginger, cinnamon and cloves. Beat to blend.
- Add flour mixture to wet mixture in two additions, beating on low speed just to blend between additions.
- Place 1/2 cup of turbinado sugar in small bowl. Measure 1 tbsp of dough (a 1-tbsp ice cream scoop works really well) and roll into a ball between palms of hands. Roll dough in sugar and place on baking sheet. Repeat with remaining cookie dough, spacing cookies 1-1/2 to 2-inches apart.
- Bake cookies until surfaces crack and cookies are firm around edges but still slightly soft in center, about 15 minutes. Cool completely on sheets on rack.









 The restaurant and its legendary pie quickly slipped my mind as we moved into a house and started new jobs, busying ourselves with life in Charlottesville and the many culinary delights we have in this little city. I hadn’t thought of my momma’s story in 4 years, until I attended the
  The
The  Despite its petite size,
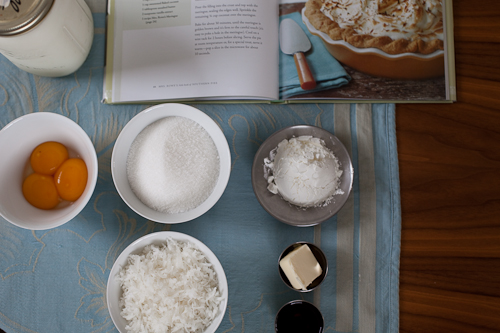
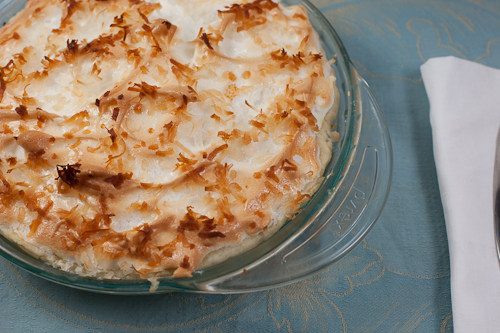
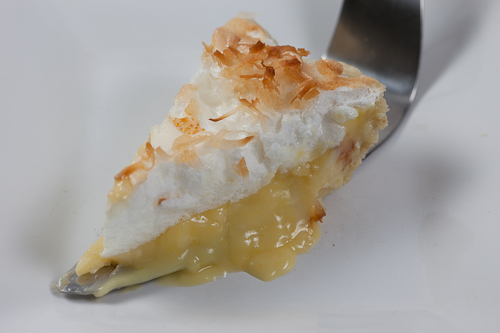
 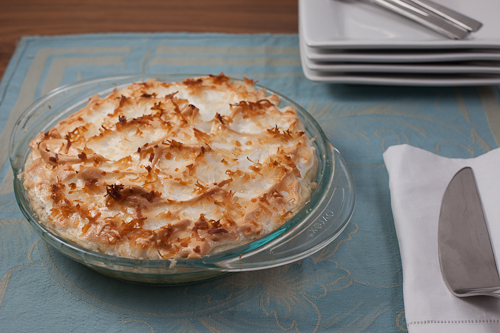 I chose to tackle the Original Coconut Cream Pie recipe rather than the apple variety my momma had raved about. As the best-selling pie at
 And that concludes Bella Eats Pie Month! 5 weeks, 5 varieties, and 5 pounds later, I've learned so much and hope you have too. Please write and tell me about any of these or other pie recipes that you try out this holiday season. I'd love to hear from you.
While I'm ready to take a short break from pie, as are all of our friends and co-workers, I look forward to continuing my experimentation and sharing more pie recipes with you in the future. Here are a few more on my list to try:
 Today, Brian and I will join a few friends and make a similar mess as we celebrate Halloween and Bella Eats' First Birthday! There will be pumpkin carving and
  I find it pretty hard to believe that it has been
 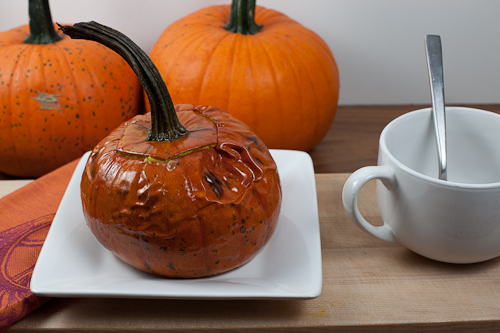 For you, dear readers, I have a recipe that you simply must make this Autumn. In fact, I hope that you will read this in time to carve out a spare pumpkin today, on Halloween, to fill with strong swiss cheese, bread and heavy cream. Its a grown-up spin on a classic favorite, warm and gooey and eye-rollingly good. It is absolutely a dish that one shares with friends - nothing this good should be kept to oneself.
Enjoy, and have a Happy Halloween!
 Don't forget to save your seeds. They are delicious toasted with a dash of cayenne pepper for a little kick.
Pumpkin Fondue
from
  Spicy Pumpkin Seeds
Ingredients:
 I take pride in the fact that we don’t keep a lot of pre-packaged food in our house. If you open our freezer you’ll find some vegetables, a TON of fruit (
 This simple approach to evening meals extends to lunch as well. On most days, Brian and I will come home to eat. We are lucky enough to live just 2.5 miles from the office where we work (yes, together!) and enjoy the afternoon break from our computers almost as much as our dogs enjoy being let out for some mid-day fetch. Sometimes we’ll have leftovers from the night before, but more often we’ll make ham sandwiches or simple PB + J’s with our plethora of
  Lately, my lunch of choice has been tomato and hummus sandwiches served on rustic bread, occasionally with a slice of high-quality ham from Double H Farm or some cured meat from
  Maybe I shouldn’t call this condiment hummus, since it does not contain any tahini. Perhaps “chickpea spread” is more appropriate. No matter what you call it, I hope you’ll make it. Its simple, quick, healthy - and more than likely you've got all of the ingredients on hand. If you try other mustards, please let me know how they turn out. I’ve been pretty hooked on
 Also, I have two more bottles of Saucy Mama Lime Chipotle Marinade to give away! To my two readers who won the last give-away, your sauce is coming. I promise. For some reason I’ve had a difficult time making it to the post office lately... If you are interested in trying out this great sauce, leave a comment before my next post.

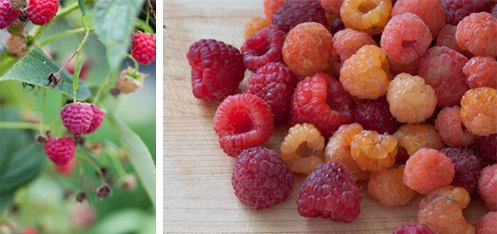 We got lucky. Their first year the raspberries didn't do much. We were rewarded with a couple of small handfuls of fruit - really only enough to snack on as you wandered through the garden checking on other plants, certainly not enough to actually do something with. But this year - the berries' second year - has been quite the surprise. Maybe its because I wasn't expecting much from them, or maybe its that their location in the garden is a bit out of the way, but just a few weeks ago I was shocked (shocked!) to discover that the raspberry branches had reached clear out of their intended boundaries and were loaded (loaded!) with plump berries. I wish I could show you photos of their progress, but the general unruliness of the garden has left me embarrassed to share the evidence.
 Its hard to not get excited about being in the kitchen, concocting new recipes when your fridge has a constantly rotating bowl full of red raspberries, golden raspberries and blackberries. Unless, like me last week, you come down with a bug right in the middle of berry season. It was nothing too serious, but provided enough sour feelings to keep me completely out of the kitchen and away from the blog. I had no interest in cooking food, writing about food or editing images of food for five full days. It was all I could do to get the
 I jumped up, so excited to have the urge to bake without a queazy feeling following along behind that urge. It was getting worrisome, this lack of desire to stand at my kitchen counter, because I had promised some dear friends that I would make cupcakes for their daughter’s third birthday party the next day. And, we had raspberries. Several bowls of raspberries freshly picked from our garden just waiting to be folded into muffin batters and buttercream frostings and made into
  These little raspberry almond muffins pulled me out of my funk, with some help from Ellie Krieger, whose book I had picked up at the library a few weeks prior. They are hearty, made with a mix of all-purpose and whole-grain flours, and pack nice little raspberry punches into each bite. Made moist by applesauce instead of butter, and topped with a crunchy cinnamon and almond topping, they provide an adequate amount of sweetness countered by the slightly tart raspberries - a sure pick-me-up for any slow morning or afternoon. I've frozen a bunch of them to use as my own little weapon against future kitchen blues...
 Raspberry-Almond Muffins
makes 16 muffins
adapted from Ellie Krieger's
  What about those cupcakes I mentioned before? Well, I made
  Other Bella Terra posts this season:
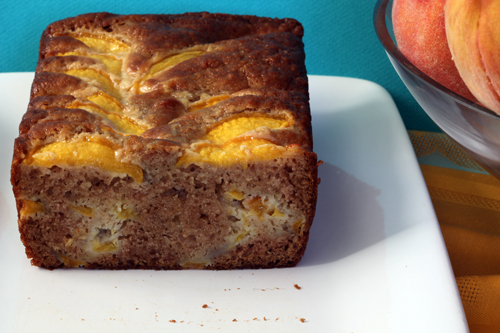
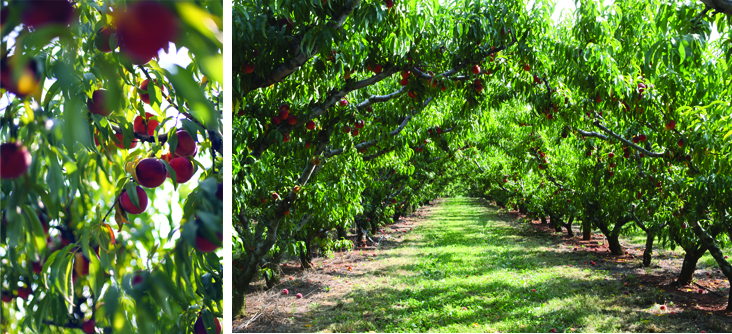 I’ll spare you the tomato argument today - it will have its place in the weeks to come, I promise. Instead, lets focus on peaches. Those perfect, plump, juicy globes with all the colors of the sunset splattered across their fuzzy skin. I love them - absolutely and with all the fervor deserved after waiting ten months for their reappearance in my daily diet. In their season, allowed to ripen on the tree and consumed within a couple of days of picking, fresh summer peaches are nothing like the bland, grainy imposters that fill bins in the supermarket during the off-season months.
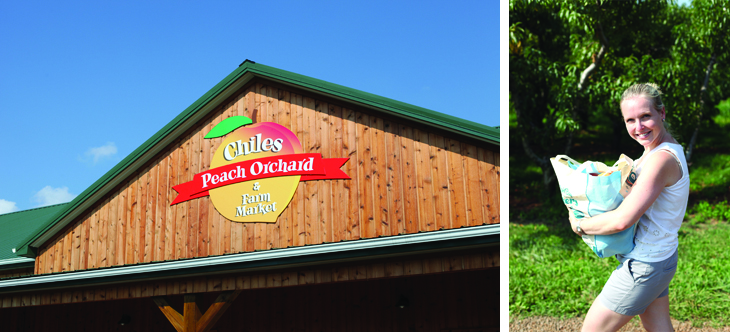
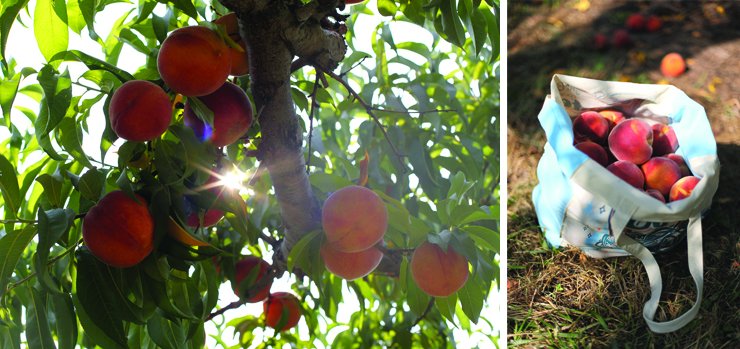 The peaches themselves played strongly into my final decision. Those flavorful bites - sweet with a little bit of tart - that result in juice running down your arms to your elbows are pretty hard to beat. But the clincher, that final argument that sealed peaches firmly into the number one position on my summer produce scale, was their procurement. The actual act of wandering the orchard, ducking into the dappled shade provided by row after row of trees, finding the perfect peach and picking it with my own hands. Brian and I have been to
  What does one (or in this case, two) do with 75 pounds of fresh peaches? Many wonderful things, dear readers. You’ve already heard about one, the
  I’ve made variations of this recipe several times in the last few weeks, tweaking a bit each time until declaring this final version my favorite. It is based loosely on a recipe of my momma’s, with a bit of influence from
  Peach Bread
makes 1 loaf
Ingredients:
 I’m feeling very behind, watching a pile of seasonal recipes I want to share grow taller and taller and realizing that I’ve been spending a lot of time in the kitchen and behind the camera but not enough at my computer. There are simply too many wonderful foods in season right now and not enough time in the day to cook all of the recipes I’m itching to try, let alone write about them.
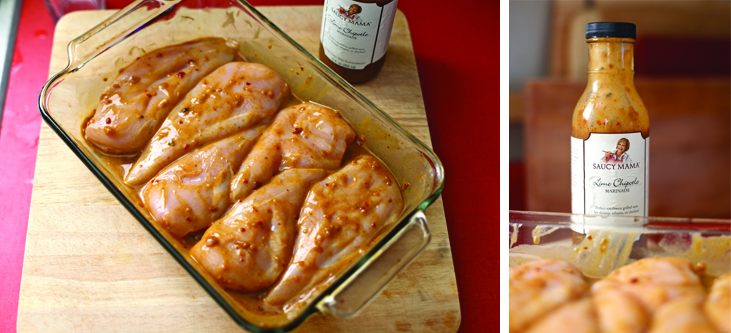 I was so overwhelmed last weekend that instead of sitting down to write in order to relieve some of the pressure, I simply closed the lid of my MacBook Pro, poured a lovely glass of vino verde and started baking. It did help, my de-stress baking (or maybe it was the effervescent white wine?), and made me realize that more important than giving you long, wordy posts is sharing with you the quick, simple and healthy meals we've been having at our house.
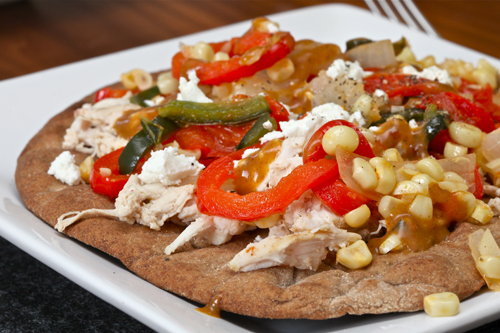
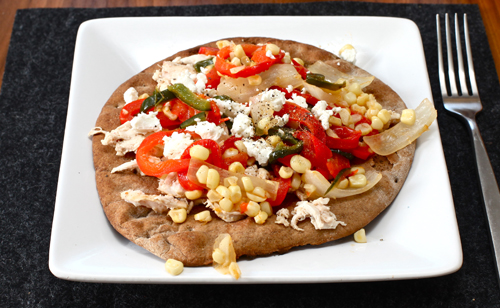 That is what summer is all about, right? Wonderful, fresh, delicious produce cooked simply and paired with other whole, healthy (hopefully local!) ingredients? If you're on board with that thinking then I have a nice little recipe to share with you. This one was a collaboration between Brian and I, thought up shortly after visiting our farmer's market and coming home with a basket full of local produce and even some locally made chevre. We happened to have a bottle of
 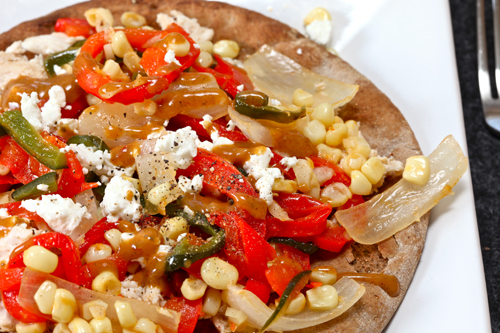 Now, as much as I appreciate
 I don’t know what it is about running, but I feel like I have a little addiction to it. The funny thing about that is that I don’t particularly like to run. And I always seem to injure myself, which to me seems like a sign that maybe my body doesn’t like for me to run either. But I keep coming back, and every few months I get the urge to sign up for a big race to motivate me to increase my mileage. This time it started innocently enough, with registration for the
  Its enough to make a girl feel a little crazy - all this back-and-forth, love/hate relationship with running stuff. But you have to understand that I read some
  Because Saturday mornings are reserved for the farmer’s market and a vinyasa yoga class, I’ve made Sunday mornings my long run days. This has been tough for me, as Sunday mornings have historically been leisurely, quiet and full of baked goods. I’m slowly adjusting, but have decided that recipes that can be started the night before (and the bloggers / chefs that share them) are going to be my new best friends. I tried my first last weekend, courtesy of the amazingly creative
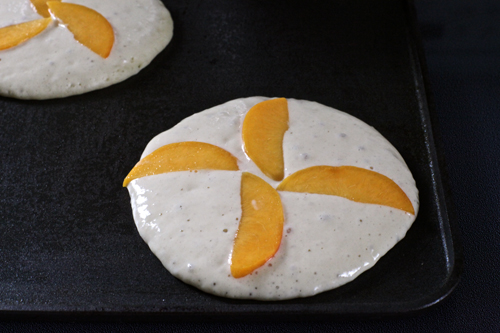
  Once home I switched on the stove to heat my griddle, added some cooking spray and slowly ladled pools of the yeast-full batter I’d made the night before. As the batter set I added the peach slices and waited for the tiny bubbles forming on the surface of the ‘cakes to start to pop, then flipped them over to reveal the golden brown surface below. I woke Brian, who quickly went to get us coffee (since I broke our french press carafe last week, sob), and we settled around the table no later than usual. The only difference this Sunday morning had to those of our past was that post-run, an indulgent Sunday breakfast is so much more satisfying.
One bite in and I knew that these were the best pancakes I'd had. Ever. Light and fluffy, with a nice yeast-y tone, they were complimented beautifully by the sweet peaches and real maple syrup. We had leftovers, and they kept very well in an airtight container in the fridge until I re-heated them in the oven for breakfast this morning.
Slow-Rise Pancakes
adapted from
 We enjoyed an abundance of cukes this year, many more than we've been able to handle gracefully. I've shamelessly offered them to anybody who will take them, and am usually met with a pleased-yet-baffled look as I hand over an armload of huge cucumbers and am asked "any suggestions"? Salads, of course. Lots and lots of salads.
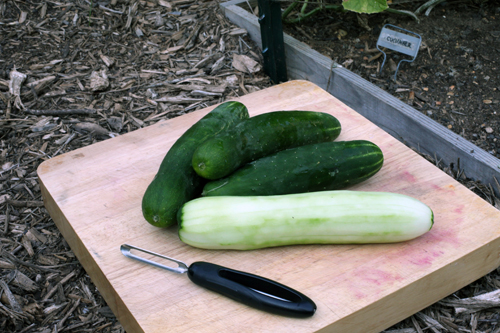 Maybe
Maybe 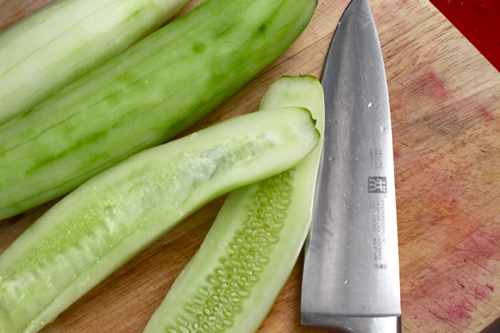 It screams summer, with its refreshing bites of cucumber and juicy tomato. The red onion adds just the right amount of bite that is tempered slightly by the creamy avocado. Take it to a picnic, a backyard fiesta or an evening dinner on a friend's front porch. Margarita not required, but definitely recommended.
 Mid-Summer Cucumber Salad with Champagne Vinaigrette
vinaigrette from emeril via
  Want to read more about our garden?
 It is undoubtably our favorite part of the week, and we make sure to leave ourselves with plenty of time to talk to Richard about the problems we are having with our own tomato plants and to gush to Jean about the magic of her hens’ eggs. We have a direct connection to the people who supply the food on our table, something that I think the majority of the world population doesn’t have and may not understand.
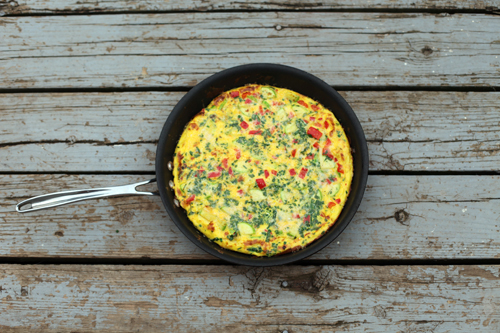 I know that we're very fortunate, and was reminded of it again last week when I made this vegetable frittata. As we sat down to eat I realized that every single ingredient, except for the parmesan cheese and olive oil, was locally grown. The eggs, milk, bell pepper, leeks and zucchini all came from the farmers' market, and the herbs were grown in our own garden. How cool is that?!? I'm not trying to rub it in, I'm really not, I just had to share with you all the amazing feeling that I had knowing that our dinner was not only delicious, but also supporting our local farmers.
 With
With  I challenge you all to make this frittata and try to include at least one local ingredient, even if it is just herbs from pots on your porch. Every little bit counts!
Feel free to switch up the veggies, the recipe is very versatile. And delicious too, I might add.
Farmers' Market Frittata
Ingredients:

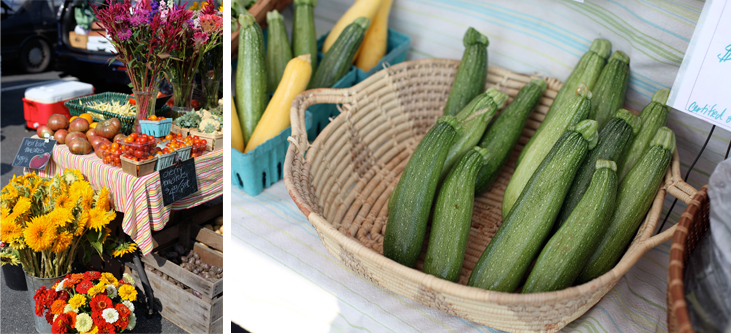 Now, admittedly, I didn’t substitute zucchini in this recipe for its flavor. Its so mild on your palette that the stronger flavors of dark chocolate, ginger, cinnamon and cloves overpower its delicate scent. What I wanted from the zucchini was the moisture that the banana typically provides without adding an additional competitor to the mix. You see, while Molly’s recipe was quite good, for me the combination of banana, chocolate and ginger was a bit overwhelming. Maybe its because I am a banana bread purist, and want the banana to be the center of attention even when complimented with another ingredient like
 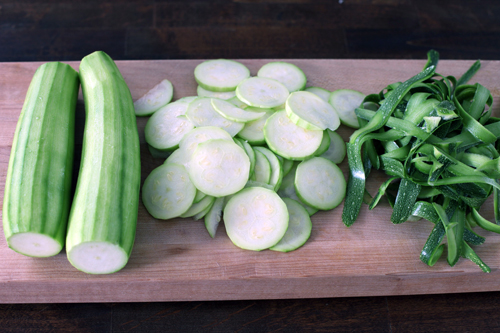 I did, however, love the idea and taste of chocolate and dried ginger combined together in a loaf, and decided to seek out another way to utilize it. Enter the zucchini, and a few other substitutions that I like to make to any bread recipe I re-create. White whole wheat flour in place of all-purpose, turbinado sugar in place of refined, fat free greek yogurt in place of regular whole milk yogurt. Throw in a couple of additional spices (cinnamon and clove) and a 12-cup tin instead of a loaf pan and the result is a muffin that is perfectly moist, not too sweet, hearty enough for breakfast yet satisfying as a dessert with a tall glass of milk or hot cup of tea.
 Because these muffins are very moist, I suggest eating them within 3 days if you’re going to keep them on your countertop in an airtight container. Refrigeration would probably save them from mold for a few days longer, but I didn’t try that so I can’t tell you what happens to their texture. I did freeze 1/2 the batch though, and am hoping that Molly’s claim that her bread freezes extraordinarily well will extend to my muffins.
If you’re interested in the original banana bread recipe, you can find it reviewed
 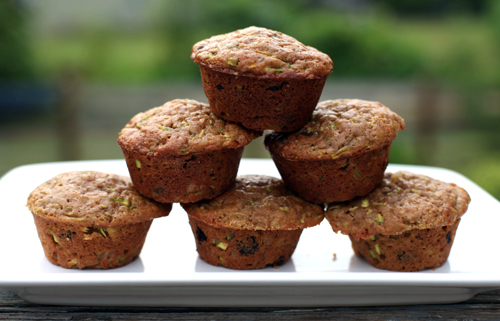 If you fill the cups to the tip-top, you will be left with 12 delicious yet oddly-shaped muffins. Fill them 3/4’s of the way full, and you’ll probably have enough batter left for two additional muffins if its worth it to you to dirty another pan. I didn’t mind their appearance, since they were just for Brian and I to share.
Zucchini Muffins with Dark Chocolate and Ginger
adapted from the banana bread recipe in
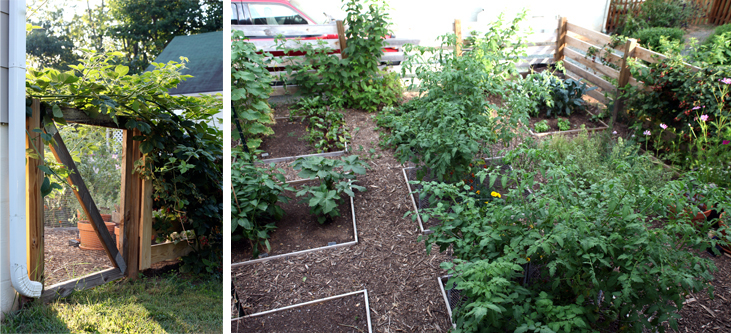 Would you look at that? The garden has gone wild! To enter one must blindly reach through the blackberries to the latch on the gate and, once the latch is found and opened, duck underneath the new growth that won’t bear fruit until next summer. Tomatoes have broken free of their cages, the strawberries are taking over our pathway,
 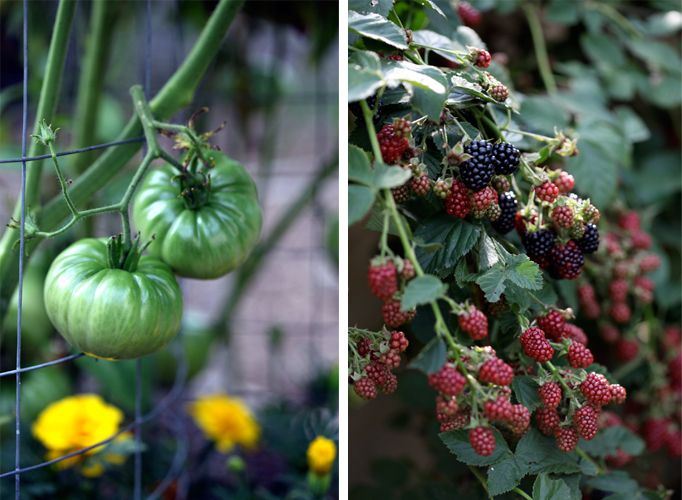 Once inside you embark on what feels like a treasure hunt, pecking through the ever-bearing strawberry patch for the tiny, sweet fruit and pulling blackberry branches aside to reveal purple berries as big as my thumb. The tomatoes are plump and just starting to ripen, moving from a deep apple green through shades of yellow, peach and pink before finally settling into deep rosy reds (romas and brandywine), golden yellows (hawaiian pineapple) or dusty purples (cherokee princess).
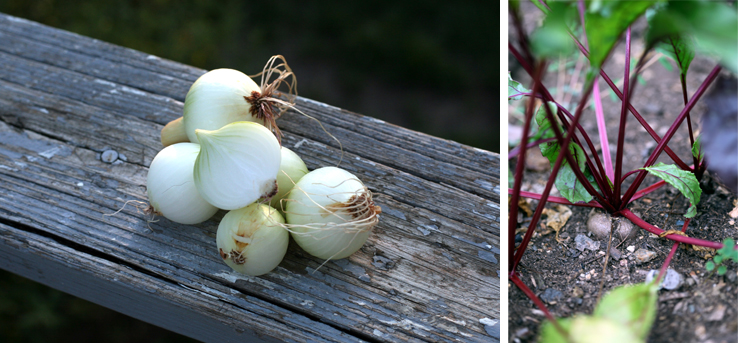 The cucumber vines have been prolific, providing us with more bounty than we’ve been able to handle, and the okra is just starting to bear its strangely-shaped pods. We’ve definitely moved from spring crops into summer, having already said our goodbyes to the
 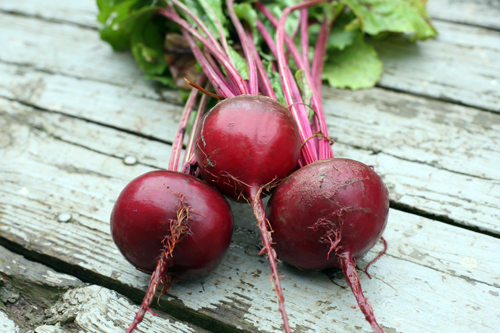 Beets are a newly acquired vegetable on my list of top ten favorites. I was introduced to them just a year or two ago, in the roasted form and mixed with a medley of potatoes, carrots, pearl onions and brussels sprouts. Having only had experience with the canned and pickled varieties in the past, I was pleasantly surprised when I took my first bite of fresh roasted beet and discovered its delightfully sweet flavor and firm texture. Ever since, beets have made it into most of our roasted veggie dishes and made select appearances in
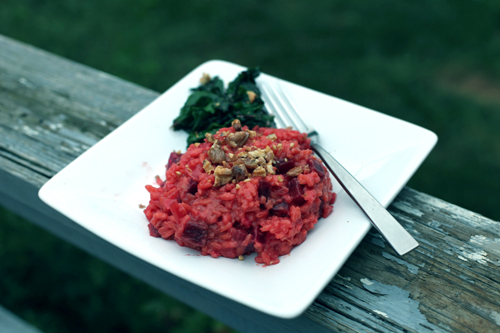
  Most recently I tried beets in a creamy risotto, and was extremely pleased with the final result. I based the recipe on a butternut squash risotto that I've been making for many years, thinking that the beets would make an easy substitute in level of sweetness and overall texture. The beets do take longer to tenderize than butternut squash, so my method resulted in a creamy risotto with bits of slightly firm beets. If you'd prefer your beets to be very soft, I suggest roasting them with a splash of olive oil for 10-20 minutes before adding them to the skillet.
Oh! And if you're lucky enough to purchase (or grow!) beets that still have their greens attached, and those greens are still crisp and brightly colored, cook them up like you would
  I think that barley would be a fantastic whole-grain substitute for the arborio rice in this recipe, we were just all out. Make sure to use pearl barley if you try it - quick-cooking barley doesn't allow for the slow release of the starches that provide the creaminess risotto is known for.
Red Beet Risotto
serves 4 as a main course
Ingredients:
 Interested in reading other posts about our garden?
 The chives are in full bloom...aren't they lovely? I clip them to put in vases around our house, not only because I love their color but also because if the flowers are left to reach full maturity in the garden we will have chives popping up in every nook and cranny next year. They are incredibly hardy and reproduce like crazy - we divide them to give to friends each year just to keep things under control. Luckily, we are big fans of cooking with chives in our household so those we keep rarely waste away in the garden.
We've also recently discovered that thyme is a very useful herb in a variety of dishes. Keep it whole in soups or as a bed for baked white fish or salmon (it will infuse the fish with a delightful flavor and scent). Or, gently pluck the leaves from the stem and stir them into a buttery barley risotto, our newest discovery and one that fast-tracked its way to the top of our favorites list.
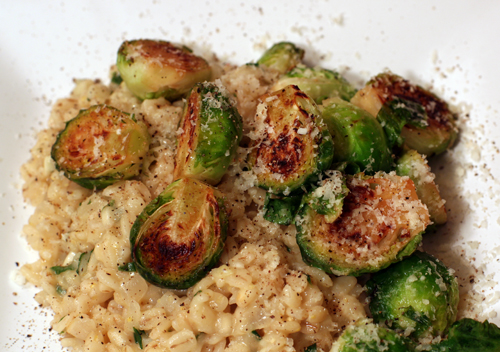
 This meal is one that I concocted while sitting at my desk in the office, waiting for the last 30 minutes of the work day to tick by. My mind tends to wander towards food often, especially when dinner is eminent. On this particular day I realized that things were getting a little sparse in our refrigerator, other than a little baggie of brussels sprouts I'd picked up at Whole Foods the weekend before that needed to be cooked as soon as possible. We always keep a variety of grains in our pantry and luckily so because on this day, thoughts of risotto topped with golden brussels sprouts danced into my head and refused to be silenced.
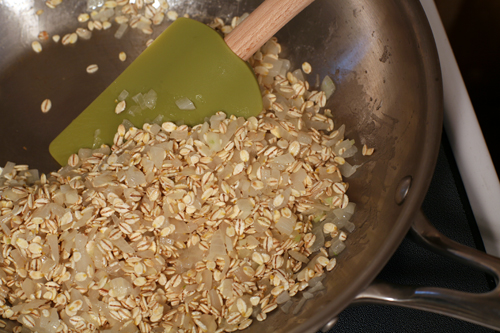 I wanted a risotto heartier than the typical white rice variety so chose to use barley instead. If you've never tried using barley in risotto I insist that you do, as soon as possible. Barley adds an earthy depth to the dish that is especially good with herbs, spinach or mushrooms. It may take a bit longer to cook than the traditional rice dish but it is more flavorful and filling*.
 Brian and I ate in complete silence this night, save the occasional "this is SO good" or "I could eat this EVERY night" comments. The thyme complements the barley and the brussels sprouts beautifully, and the high-quality butter was worth the extra splurge. I used
  Buttery Barley and Herb Risotto with Golden-Crusted Brussels Sprouts
serves 3-4
Risotto:
 *Don't get me wrong, I love a good arborio rice risotto as well, but I typically reserve it for when the risotto is a side rather than the centerpiece. Arborio rice has a milder flavor and is tasty with butternut squash or other sweeter vegetables like beets.
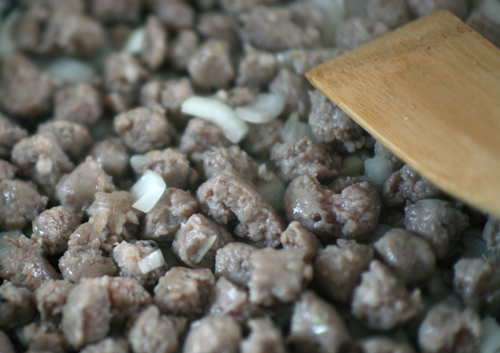 So many good, simple recipes came from the grill, oven and food processor that I had a hard time deciding which to share first. Ultimately I decided on this one because it was the most recent of my options and looking at the photographs caused my mouth to salivate at the memory they evoked. Also, I love that the simple pasta dish uses fresh ingredients purchased at the farmer’s market Saturday morning - sweet Italian sausage from one favorite farmer and tender mustard greens from another. If only I’d stopped by the
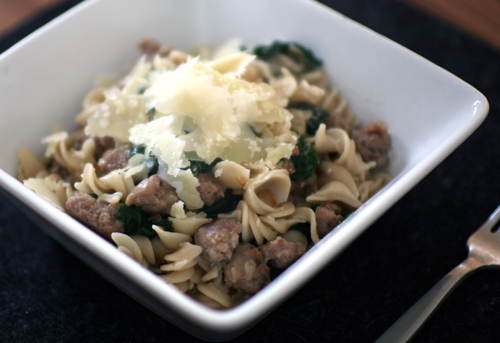 Pasta with Sausage and Spring Greens
serves 3
Ingredients:


 see how they've grown?
 Chives are one of my favorite herbs to use in the kitchen because they are so versatile. Toss them with fingerling potatoes to roast, sprinkle them raw over top of an omelet, fold them into batter to be baked in cheddar biscuits...their mild, onion-like flavor allows for endless possibilities. I’d bookmarked
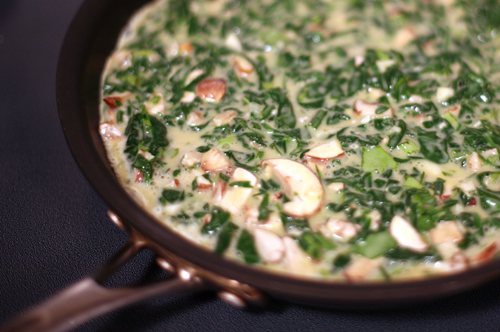
  I'd never made a frittata before. It seemed to me that it would be a difficult task and, having never read a frittata recipe before, I assumed that it would contain whole milk and cheese (similar to a quiche) and not be terribly productive to my weight-loss efforts. Boy was I wrong, on ALL assumptions. For one, the process was really easy. As long as you have a decent non-stick skillet and some patience, this dish really couldn't be easier. And I used just two dishes to make it...two! I really like a quick and simple recipe, but add "very little clean-up" to its list of attributes and I am in love.
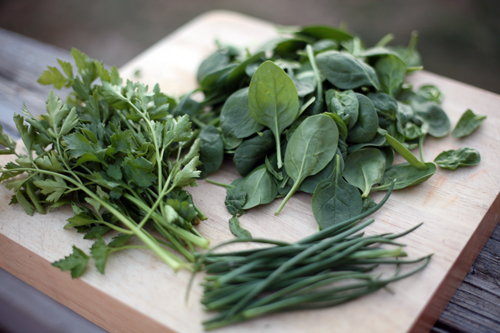 Second, the frittata is much healthier than any quiche recipe I've made. The main contributor to its healthfulness? A lack of crust. That's right...no crust. And...no cheese. The greek yogurt makes the consistency so creamy that you'll never miss it. Plus, this particular recipe is loaded with spinach and herbs, not to mention heart-healthy walnuts and yummy mushrooms.
 I was so impressed with my first frittata experience that I've already been dreaming up new combos of flavors. I can't wait until that pile of herbs and spinach pictured above is all home-grown from my garden, maybe with some bell peppers and tomatoes mixed in. Oh, what a glorious summer it will be...
 Spinach, Herb and Mushroom Frittata
258 cal, 19g fat, 6g carbs, 1g sugar, 2g fiber, 11g protein [nutritional info from thedailyplate.com]
recipe adapted from
  In the Blog World...
Tina at
  It was perfect weather for wandering around the local garden center, picking up spring-harvest seeds and dreaming about how, if only I had my own
  On Saturday I bought lettuce and spinach, beets, peas and broccoli, all seeds that can go in the ground in the next couple of weeks and provide a harvest in as few as 45 days. In May, after danger of Virginia frost, I'll be sowing green beans and okra seeds to be harvested in July. Baby tomato, cucumber, bell pepper and squash plants will go into their assigned beds and parsley, basil and dill will join the perennial chives, thyme and oregano already starting to show some green.
 I think I am most looking forward to growing our own broccoli, although each veggie has a special place in my heart and becomes my instant favorite the minute it is ripe. But broccoli...it gave us trouble last year, or at least the squash bugs that enjoyed most of the harvest gave us trouble. And I enjoy a challenge. We will persevere with broccoli this spring and when we do we will make it
  There are a few things about this recipe that I need to share, things I will do differently when I make it again. First, I used whole coriander but will definitely use ground next time. Biting into the occasional coriander seed was an intense, unpleasant experience for me. If you love coriander feel free to use whole seeds, but I think spreading the flavor more evenly by using ground would be more enjoyable.
 Second, the tofu needs to go in the oven first. I put the tofu and broccoli in at 425* together, and the broccoli was done well before the tofu. To speed things up I wound up removing the tofu from the oven and quickly pan-frying it, but I think it would be really good roasted. I've specified in the recipe below to put the tofu in first and roast it until golden brown on one side before flipping it and adding the broccoli for the last 20 minutes.
 Roasted Broccoli with Glazed Tofu
inspired by the
  A few notes:
First, my cousin Kelly (
 I haven't done much with cabbage in the past...mixed it with greens in salads, boiled it down with potatoes, carrots and ham for a New England Boiled Dinner, shredded it up to make a filling for
  I've seen a few
 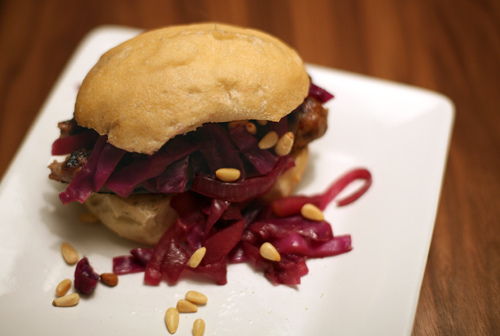 Oh sweet [and tangy] success. This sandwich was so delicious and satisfying, and the slaw was the star of the show. I suggest a ciabatta roll and butternut squash fries on the side...YUM.
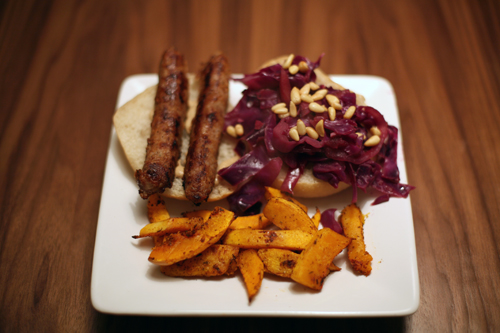 Cabernet + Apple Slaw
Ingredients:
 Tomorrow is my hubb's birthday and we're having a little party at his office. I am so excited to try the cake I baked today...my first ever from-scratch, made on my own cake. Only the best for my love. Here's a little preview...
 That's raspberry puree' oozing from between layers of decadent chocolate cake. And right after I took this picture I covered the whole thing with chocolate ganache. Oh yes I did. :)
Have a lovely Monday, everybody!