a backdrop of falling snow
Andrea
Last Saturday another ten inches of snow fell across Charlottesville, blanketing my city in delicate drifts of sparkling white. I awoke in the wee morning hours, just as soft gray light started to seep through the cracks between the blinds over the bedroom window. Aside from the soft snores of the dogs nestled at my feet, all was quiet. The typical sounds of tires meeting asphalt, wind rustling tree branches and birds chirping from their power line perch were nonexistent, lost in the insulation provided by a muffling snow.

I slid out of bed, thankful that I'd kept socks on my feet and wouldn't have to endure the cold hardwood floor against bare skin. Padding out to the kitchen I paused at a window to peek outside and was greeted with an idyllic view. Three inches of snow does wonders for an imperfect ground, provides each and every limb of surrounding trees with sugary peaks along their length, silences a high-trafficked road. I couldn't deny that I enjoyed this scene - my outside world painted white; bright and shiny and devoid of mud. I stood there, mesmerized by my transformed street and the plump flakes still spiraling down from a silver sky, and made up with Winter.

Finally, the promise of a cup of coffee and a long kitchen agenda were enough to pull me from my trance. To have an entire Saturday with no errands, no obligations, no sunshine-filled sky tempting me to leash up the dogs for a hike in the woods, seemed luxurious. Despite the snowflake-clogged air, the light pouring through our windows was clear and bright, the ground having become a natural reflector as I slept. My camera screamed at me to get started, to not waste a single, brilliant moment. I simmered and sauteed and baked and photographed all day, stopping every once in awhile to marvel at the still-falling snow that had gifted me this time.

This soup emerged with perfect timing, the kale softening just as Brian came in from shoveling our sidewalks and driveway. Hearty with potatoes and greens, flavored by bright leeks and spicy sausage, it promises to warm the coldest of bodies and satisfy the grayest of minds. You can't help but to be thankful for Winter as the thick broth slides down your throat, the heat of the sausage spreading from inside out, a sensation not necessarily welcome during the Summer months but oh so tasty against a backdrop of falling snow.

This soup is very easy to make, coming together in just 45 minutes. The hot Italian sausage is a key player, infusing the broth with wonderful flavor and heat.
Spicy Sausage, Potato and Kale Soup
serves 6 Ingredients- 2 large leeks, rinsed and sliced to 1/4-inch strips (about 3 cups total)
- 2 cups diced onion
- 3 large Russet potatoes, cut into 1-inch cubes (leave about 1/2 the skin on the potatoes)
- 4 tbsp unsalted butter
- 8 cups low-sodium chicken or vegetable broth
- 1 pound of hot Italian sausage, removed from casings
- 3 cups of chopped kale (stems removed)
- 1/2 cup heavy cream
- salt and pepper
- Melt butter in large, heavy-bottomed saucepan over medium heat. Add leeks, onions and potatoes and stir to coat with butter. Cover pot, reduce heat to low and let vegetables sweat for 15 minutes.
- Remove cover and add broth. Bring to a boil, then reduce heat to simmer. Drop sausage in small chunks into soup. Cover and let simmer for 20-25 minutes, until potatoes are fork-tender.
- Remove 2 cups of soup from pot, avoiding large chunks of sausage. Puree those 2 cups in a blender until smooth. Add back to soup pot and stir to incorporate evenly. Add kale and cover pot, allowing to simmer for an additional 5 minutes.
- Remove cover and lower heat. Add heavy cream and stir to incorporate. Heat through, but don't let the soup simmer again or the cream will curdle a bit (as in my photos).
- Salt and pepper to taste.

This recipe, and Bella Eats, made its debut on SuzySaid - Charlottesville on Monday. I have been asked to contribute a recipe each week to the site, and am so excited to be part of such a wonderful online resource for women in my city. If you're from Charlottesville or the surrounding area, check out SuzySaid - Charlottesville for information on upcoming events and local businesses. And tune in each Monday for a new recipe from Bella Eats!



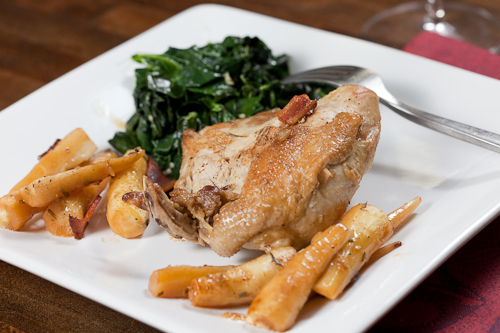


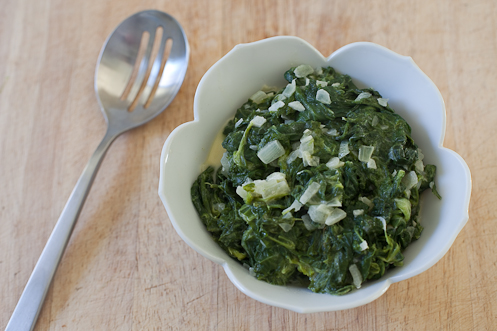






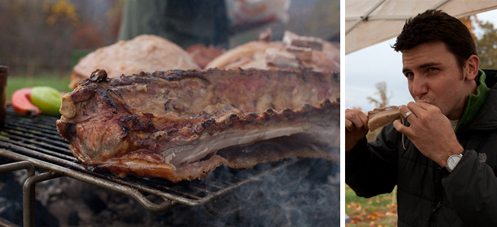

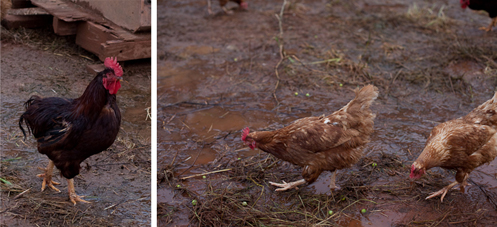



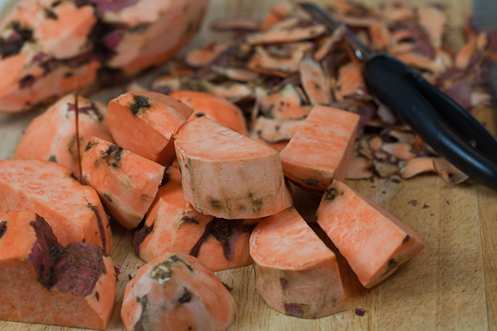
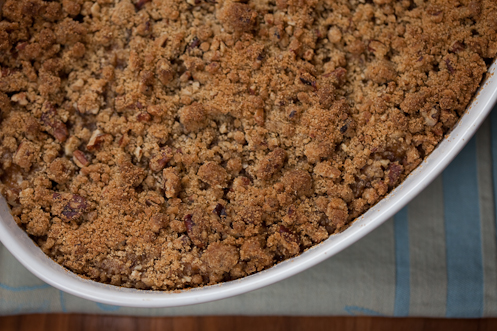

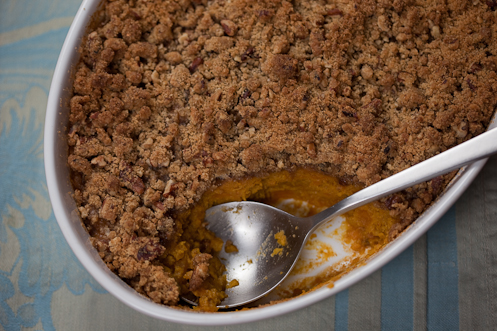
 When I stand at the buffet table and survey the offerings laid out before me on Thanksgiving Day, it is all of the other “supporting” or “side” dishes that I get really excited about. The homemade rolls, the roasted vegetables, the tart-sweet cranberry sauce, the
  For most of my life the green bean casseroles of Thanksgiving came from the
 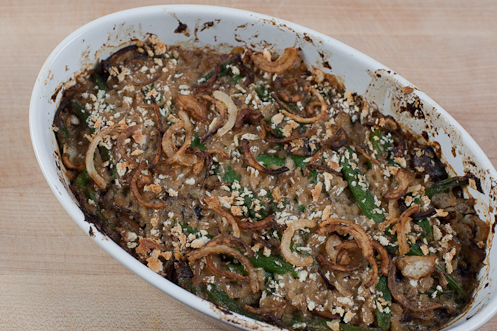 It seems tedious, I know, to make your own cream-of-mushroom soup for this casserole when you can simply whip out a can opener and have what you need in a mere 30 seconds. And maybe frying up your own crunchy onions seems like too much trouble as well when somebody has already packaged them up and made them available at grocery stores across the world. But with a little forethought (the mushroom soup can be made up to 24 hours in advance) and only 60 seconds to fry your onion rings, you'll have a dish worthy of supporting the star of the show. Just don't be surprised if the turkey gets upstaged...


 Last week we had an especially dreary few days with rain and winds sweeping through Charlottesville, dropping our temperatures into the 30’s and 40’s. It was the kind of weather that had me wearing my scarf while sitting behind my computer at the office, drinking hot tea every hour while thinking about thick stews and hearty casseroles. This dish popped into my head several times, the memory of silky pasta laced with tomato sauce prepared and frozen at the peak of summer causing my mouth to salivate and my belly to warm.
 It is the hearty, homey, comfortable meals that I crave when the air temperature transitions from brisk to downright cold. Unlike the summer months, when we'd rather be lazily sipping vino verde on the back deck while munching on a quickly assembled salad, Brian and I spend a significant portion of Winter in our kitchen, not minding the extra heat the stovetop produces in order to simmer a pot of soup for hours or the labor required to roll out thin sheets of freshly made pasta for a pan of bubbly lasagna. With chilled darkness falling well before we leave the office, our kitchen is a welcome source of warmth waiting for us at the end of each day, providing a space for us to pour energy into meals that will warm our bodies from the inside out.

 Fresh pasta is one of those luxurious-sounding meals that seems as if it should be impossible to make at home, in the amount of time allotted for dinner preparation in busy lives. It is, in fact, quite the opposite. Requiring only 30 minutes of rest in the refrigerator before being passed through a pasta machine, the dough can be made in a mere 10 minutes' time. Your sauce can be simmering with whatever additions you've chosen to enhance it with as you turn the crank and catch the golden sheets of floured dough, fold them carefully and cut them into your desired shapes. After a quick dunk in a pot full of boiling water you are ready to garnish the silky strands with whatever mixture has been simmering on your stove, filling the air with the pungent aroma of tomatoes, garlic and herbs, or perhaps the sweet smell of browned butter and sage.
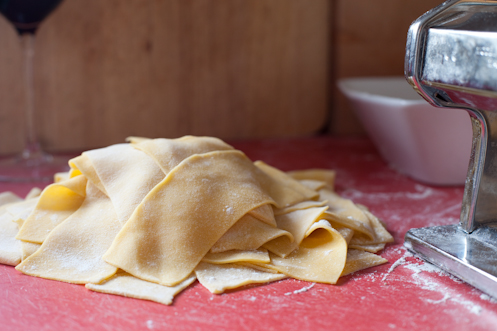 I assure you that, although fresh pasta requires more time and attention than opening a box of dried linguine to dump into boiling water, it is completely, totally, undeniably worth the effort. We'll be making it often these next few months, so I'll be referring back to this recipe in future posts, I'm sure. It can be used for any shape of pasta desired.


 Today, Brian and I will join a few friends and make a similar mess as we celebrate Halloween and Bella Eats' First Birthday! There will be pumpkin carving and
  I find it pretty hard to believe that it has been
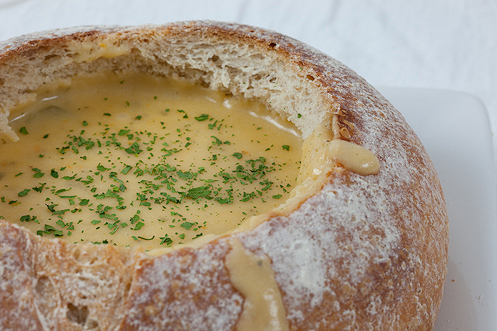
 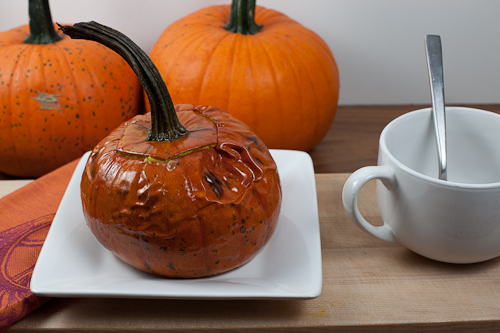 For you, dear readers, I have a recipe that you simply must make this Autumn. In fact, I hope that you will read this in time to carve out a spare pumpkin today, on Halloween, to fill with strong swiss cheese, bread and heavy cream. Its a grown-up spin on a classic favorite, warm and gooey and eye-rollingly good. It is absolutely a dish that one shares with friends - nothing this good should be kept to oneself.
Enjoy, and have a Happy Halloween!
 Don't forget to save your seeds. They are delicious toasted with a dash of cayenne pepper for a little kick.
Pumpkin Fondue
from
  Spicy Pumpkin Seeds
Ingredients:
 We were both architecture majors, and each semester arranged our schedule so that we had all of our classes together. On the first day of school we’d get to our studio early to ensure that our desks would be located next to each other in the space where we spent most hours of our days and nights. We’d put a disc-man between us, load it with mixed CDs and plug in a pair of split headphones so that we could listen to the same music as we worked all night long on projects for the next day’s review. Our friendship continued to grow as we saw each other through relationship elation and heartache, as well as the highs and lows of life as a student of architecture. But still we denied any feelings we had for each other, insisting to those around us that we were just friends, never anything more.
 The end of the second year of architecture school brings a make-it-or-break-it moment for its students - a pin-up presentation that shows your best work to a panel of your professors so that they can decide whether or not you show enough promise to proceed in the program. It is terrifying - a time when you search your soul to decide if you are truly made for architecture, and debate possibilities for what you might change your major to if you are not chosen. You are given roughly 36 hours, the time between when your last project of the semester is complete and the pin-up judgement begins, to put together a 4-foot by 8-foot board that expresses who you are as a designer.
Brian and I, of course, spent those 36 hours together, holed up in his apartment working round-the-clock with no sleep. At one point, around hour 30, I was exhausted to the point of tears and hungry for anything other than pizza or Chinese delivery. And so, Brian made me soup.
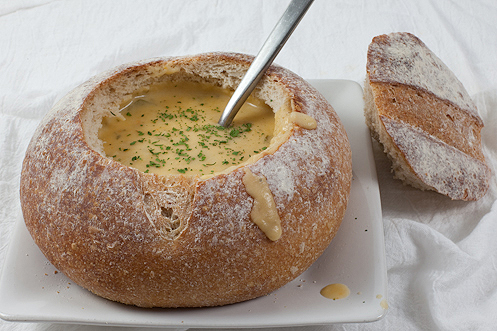
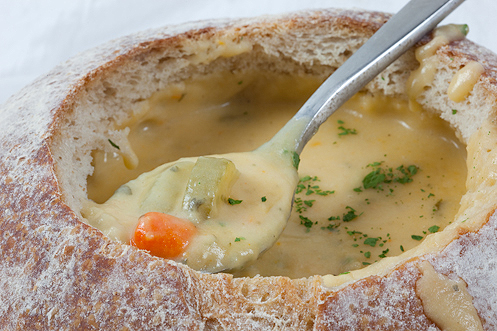 It took a few more months and the demise of our high school relationships for me to outwardly admit the feelings I had for Brian but, looking back, I believe that the moment he handed me that bowl of piping-hot potato cheese soup amidst the biggest deadline of our lives thus far was the moment I knew that there was something more between us.
This soup is still, to this day, my absolute favorite thing that he makes in our kitchen. It has morphed over the years, adjusting with our tastes and food values, but at its core is still the creamy, delicious, heart and soul-warming meal that he made me so many years ago.
Brian's Potato Cheese Soup
serves 4
Ingredients:

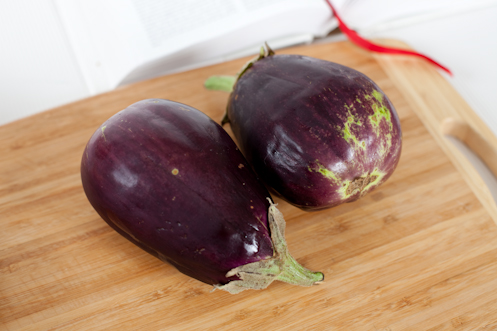 For me, it wouldn’t be the end of summer without the classic eggplant, zucchini and tomato-laden dish. It feels like a last-hurrah for the final produce of the season and the perfect start to autumn, when I start craving meals of its kind. It is homey and hearty, a melding of flavors served warm over pasta and topped with shaved parmesan cheese. I like to dunk a couple of thick slices of crusty french bread into the juices, and usually pair the meal with one of my first glasses of red wine of the season. Its tradition, and one that I cling to mightily despite a little resistance.
 For Brian, ratatouille is just a little “blah”. He doesn’t mind it so much, but would prefer that we skip straight from summer salads to creamy potato cheese soup and pans full of bubbly lasagna. Typically, after we’ve purchased our eggplant Saturday morning, it will sit on the countertop for a couple of days until finally, on the cusp of its transition from firm and fleshy to soft and dimpled, I’ll convince Brian that “tonight is rat-a-tat-touille night!” and it will be peeled, cubed, salted and tossed in a pan with a glug of olive oil, freshly diced zucchini and a generous pile of minced garlic.
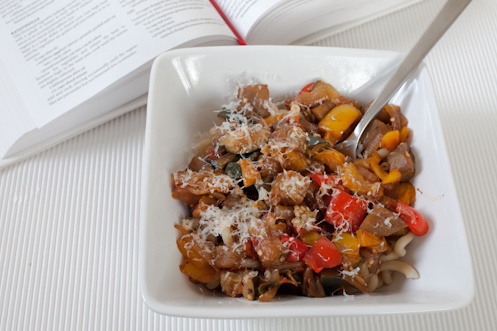 After some silly names, a few tabletop drumming performances and maybe a little ratatouille dance, it is the smell that will finally bring Brian around - his nose leads him to the kitchen and he’ll sheepishly tell me “it smells really good in here, honey”. The eggplant is set aside, and in its place onion and bell pepper start sizzling away. Tomatoes are added, and as their juice is released the eggplant is tossed back into the pan. All is covered and simmered until the eggplant is silky and the zucchini and peppers are just tender. Pasta is boiled, parmesan is shaved and bread is sliced. Dinner is served alongside glasses of red wine, in the golden light of the fading sun and suddenly, it is Fall.
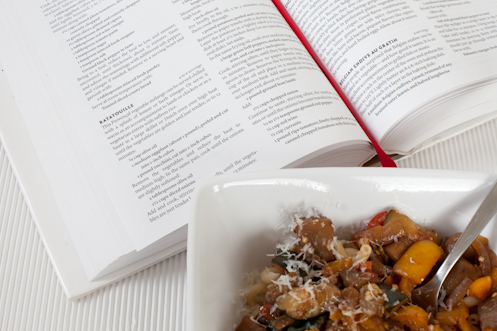
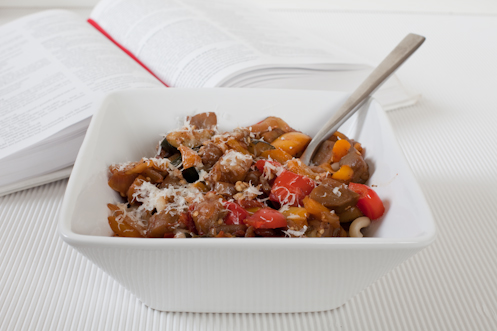 Basic Ratatouille
adapted from
 There has been a lot of stuffing happening around our house these last few weeks, and I don’t just mean boxes full of wedding invitations for a friend or images into a presentation for a big board meeting. I mean stuffed peppers. And squash. It all started with a dinner party thrown by our dear friend Amy, who hosts fabulous gatherings at which everybody cooks a dish based on a theme for the evening. Sometimes the theme is a specific ingredient such as almonds or chocolate, and other times it is based on a method of cooking or assembly. A month or so ago the theme was “stuffed!”, and we enjoyed the food so much that Brian and I have been replicating recipes ever since.
 The timing worked out perfectly, as we had just traded extra bell peppers from our garden for a friend’s over-abundance of homegrown pattypan squash. If you’ve ever grown squash, you know that two people can’t possibly consume all of the bounty from one little squash plant. Its unreal. We planted summer squash two years ago and were so over it by the end of the season that we haven’t planted any since. The same goes for eggplant. Next year we’re planning to coordinate with our friends and plan more regular produce swaps, to take advantage of the space we each have and be sure that nothing will go to waste. Our own mini version of a CSA.
 Peppers are a different story. I never get tired of them, and the only reason for sharing is when I know that we can’t possibly finish them before they start to get soft. I haven’t always felt that way as growing up, I only knew of one type of bell pepper - green. They made appearances in the stir fries, fajitas and supreme pizzas of my childhood, their distinct earthy flavor permeating whatever dish they graced. I wouldn’t have called myself a fan, but I didn’t mind them either. Like milk with breakfast and brushing my teeth before bed, the emerald bells were just an ever-present part of my life that I didn’t bother to question.
 Sometime in college I discovered that bell peppers came in colors other than green, and the rainbow beauties started making their way into my cart each week at the market. I found the sunset-hued varieties to be much more versatile than the green, and added them to my usual pepper-laden dishes as well as pastas, quiches and salads. They aren’t inexpensive, so when I found out we could grow them in Virginia I was quite excited.
Our garden has seen them all. The first summer we were a little over-zealous with our pepper patch, planting green, purple, red, yellow and orange bells, along with one lone (although incredibly productive) banana pepper plant. Our kitchen saw much pepper experimentation that season, as we learned that we really weren’t fans of green bells anymore, that the beautiful eggplant color fades from the purple bells when they are cooked (leaving you, essentially, with a green bell) and that we couldn’t possibly keep up with the harvest from one banana pepper plant (although, now that we know how to pickle, I think we’ll try again next year).
 As summer winds down we are cherishing the last red and yellow bell peppers coming out of the garden. Smaller than those we were getting a couple of weeks ago, but every bit as tasty, they’ve added a mild sweetness and lovely color to frittatas, stir fry, fajitas, homemade pizzas and summer salads. Our favorite use lately has been to sauté thinly sliced red peppers with strips of onion, minced garlic and fresh kale, then to pile the whole mixture on top of grilled spicy Italian sausage drizzled with dijon mustard and encased in a crusty bun. So delicious, so summer.
And then, of course, there is the Stuffed! pepper option. Always a winner in my book, I finally convinced Brian of their merit a few years ago when I made them using red and yellow bells instead of green. We tried the same stuffing recipe with pattypan squash, with much success. Pattypan has such a mild flavor that it lends itself well to a full-flavored filling.
 I came up with this recipe on a whim, adding ingredients to the stuffing until it looked and tasted the way I thought it should. The result was quite tasty but I encourage you to tweak to suit your own tastes.
Stuffed Peppers or Squash
serves 4
Ingredients:
 Chiles Rellenos
serves 4
This recipe is nearly identical to the one above. But, there are a couple of ingredient changes and the method for preparing the peppers is a little different.
Ingredients:
 This weekend, Brian and I are off to Brooklyn for a childhood friend's (mine) wedding. We are so excited, even though we'll only be in the city for about 48 hours. As with all of our vacations, we are planning this one entirely around food (except for the wedding of course, but the lovely bride has Baked! catering the desserts!!!). If you have any suggestions for your favorite foodie havens in Lower Manhattan and Brooklyn...send them on! And expect a full photographic review of our trip next week...!
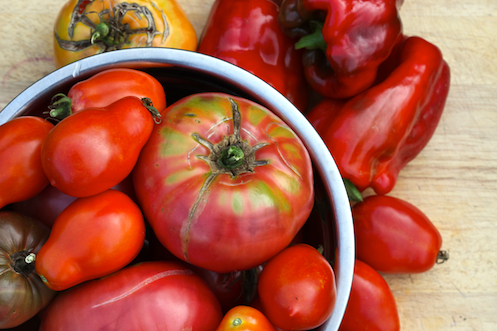 The ripening of tomatoes in our garden is a bittersweet time for me. Sweet, because we look forward to the juicy yellow, orange and red fruits from the time we plant the seedlings in mid-May, and bitter because it signals the beginning of the end - the downward slide of summer into fall. Especially this year, when our harvest season has been cut so short by the
  Despite the blight, we have had way too many tomatoes to handle all at once, just not enough for all of the canned sauces and salsas we had planned. We've had countless tomato mozzarella salads, tomato + hummus + ham sandwiches, roasted tomato pastas and just plain tomato slices sprinkled with salt and eaten while standing over the kitchen sink, juice dripping from our hands. Friends and neighbors have been lucky recipients of our extras - and in fact our guests last weekend claimed our house as the best "bed and breakfast" they'd stayed at as they loaded their car with a bag of heirloom tomatoes and a jar of homemade jam. In return, they shared a recipe for Heirloom Tomato Soup that was not only delicious, but a great way to use up large quantities of our bounty.
 We made it the next night, and I was pleased after my first taste to find that it was reminiscent of a favorite tomato basil soup I enjoyed at a local Greek restaurant while in graduate school - rich and creamy, with a nice spice that hits the back of your throat after each bite. It was wonderful with fresh heirloom tomatoes from the garden, but I also look forward to trying it with canned tomatoes in the winter when I need a little reminder of warmer days. For me, tomato soup has no particular season - I'll take it any time of the year.
 This soup is the grown-up version of a childhood favorite, and pairs perfectly with grown-up grilled cheese sandwiches. We made ours with a fresh french baguette, jarslberg cheese and salty soprassata - but feel free to use whatever soft cheese and cured meat makes you happiest.
Creamy Heirloom Tomato Soup
I adapted this recipe from a friend's adaptation of a
  We've been eating a LOT of tomatoes in our house, so stay tuned for more Bella Terra: Tomato posts...
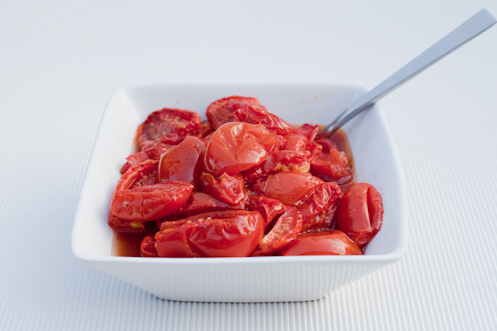 And, the
  I’m feeling very behind, watching a pile of seasonal recipes I want to share grow taller and taller and realizing that I’ve been spending a lot of time in the kitchen and behind the camera but not enough at my computer. There are simply too many wonderful foods in season right now and not enough time in the day to cook all of the recipes I’m itching to try, let alone write about them.
 I was so overwhelmed last weekend that instead of sitting down to write in order to relieve some of the pressure, I simply closed the lid of my MacBook Pro, poured a lovely glass of vino verde and started baking. It did help, my de-stress baking (or maybe it was the effervescent white wine?), and made me realize that more important than giving you long, wordy posts is sharing with you the quick, simple and healthy meals we've been having at our house.
 That is what summer is all about, right? Wonderful, fresh, delicious produce cooked simply and paired with other whole, healthy (hopefully local!) ingredients? If you're on board with that thinking then I have a nice little recipe to share with you. This one was a collaboration between Brian and I, thought up shortly after visiting our farmer's market and coming home with a basket full of local produce and even some locally made chevre. We happened to have a bottle of
  Now, as much as I appreciate
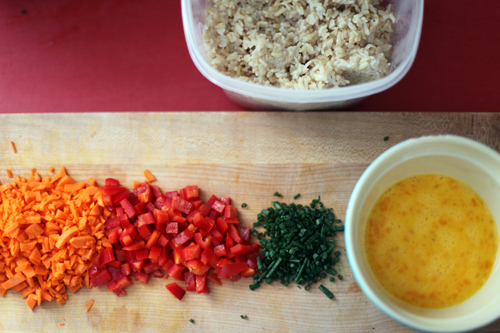 But recently, we discovered how easy it is to make fried rice. And that really, when you make it at home, its not that bad for you. Yes, you throw a couple of tablespoons of peanut oil in your pan, but we all know that the right oils in moderation are actually good for you, and when you divide this dish up into four hearty servings you've got nothing to worry about. Add the fact that we used brown rice instead of white and threw in some colorful veggies loaded with vitamins and you've got yourself a healthy alternative to take-out. And I guarantee that you can make it faster than the delivery boy can get the bad stuff to you.
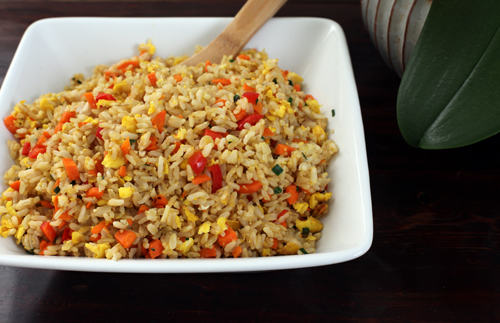 It does help to have some forethought - you want to have rice already made in order to enhance the texture of the dish and cut down on preparation time.
Several Saturdays ago we picked up a couple of beautiful pork chops at the
 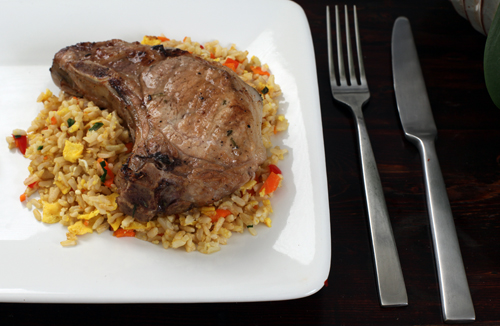 The flavor of the pork was very good, I'm just not a big pork chop fan. I ate a few bites and then passed my chop over to Brian, whom I knew would enjoy it far more than I would. For me, the vegetable fried rice was the star of the show.
Vegetable Fried Rice
adapted from Gourmet Magazine, via
  We also whipped together a cucumber salad, to help with our
  We enjoyed an abundance of cukes this year, many more than we've been able to handle gracefully. I've shamelessly offered them to anybody who will take them, and am usually met with a pleased-yet-baffled look as I hand over an armload of huge cucumbers and am asked "any suggestions"? Salads, of course. Lots and lots of salads.
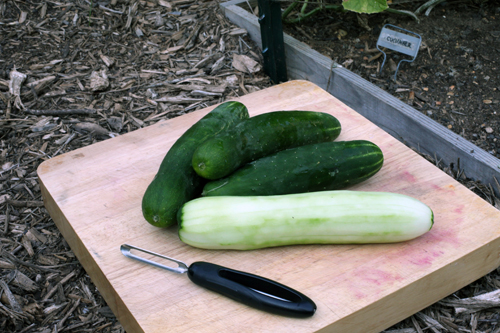 Maybe
Maybe 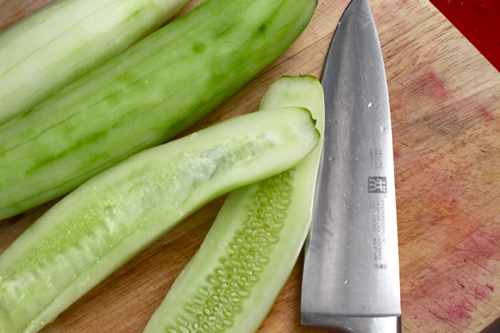 It screams summer, with its refreshing bites of cucumber and juicy tomato. The red onion adds just the right amount of bite that is tempered slightly by the creamy avocado. Take it to a picnic, a backyard fiesta or an evening dinner on a friend's front porch. Margarita not required, but definitely recommended.
 Mid-Summer Cucumber Salad with Champagne Vinaigrette
vinaigrette from emeril via
  Want to read more about our garden?
 We planted kale our first year with the garden but had very little luck with it. We were late getting the seeds in the ground that spring and wound up having very hot weather very early in the season so the poor little shoots never really had a chance. The next year we tried collard greens, having heard that they were a bit heartier than kale. Wow. Heartier was right. We had more collards than Brian and I plus the handful of friends that also like greens could handle. They were enjoyed immensely through most of the summer, but at the end of the season Brian not-so-subtly hinted that he’d had enough collards to last him for quite some time, and could we maybe try kale again next year?
 We chose lacinato kale this spring, also known as black or dinosaur kale, because we love its deep earthy flavor and feel that it is a tad less bitter than other kale varieties. The seeds went into the ground in mid-march, and because we’ve had a relatively cool and wet summer we've been enjoying a steady harvest of fresh garden kale for the last two months. The weather is getting warmer now though, and the greens are fading fast. I’m suddenly feeling the pressure to increase our intake before they all wilt away and we have to wait for the cooler fall air for our next crop.
 Luckily, this increase in consumption corresponded with a couple of key events that led to the creation of a new favorite salad. The first was an email I received a few weeks ago asking if I would like to participate in a
  It is best to use young kale leaves, just 4 to 6 inches long and 2 to 3 inches wide. They will be more tender, and less bitter, than their older siblings. I also tossed in some beet greens, which have a wonderful spicy bite to them and are best if used within one day of being pulled from the ground.
For the dressing I used
 It is undoubtably our favorite part of the week, and we make sure to leave ourselves with plenty of time to talk to Richard about the problems we are having with our own tomato plants and to gush to Jean about the magic of her hens’ eggs. We have a direct connection to the people who supply the food on our table, something that I think the majority of the world population doesn’t have and may not understand.
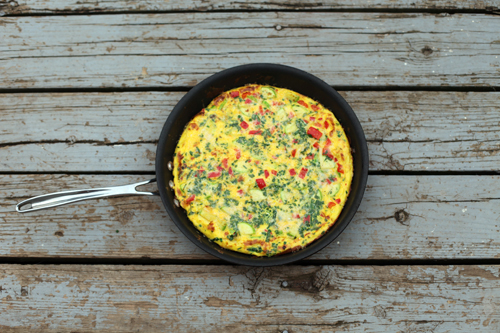 I know that we're very fortunate, and was reminded of it again last week when I made this vegetable frittata. As we sat down to eat I realized that every single ingredient, except for the parmesan cheese and olive oil, was locally grown. The eggs, milk, bell pepper, leeks and zucchini all came from the farmers' market, and the herbs were grown in our own garden. How cool is that?!? I'm not trying to rub it in, I'm really not, I just had to share with you all the amazing feeling that I had knowing that our dinner was not only delicious, but also supporting our local farmers.
 With
With  I challenge you all to make this frittata and try to include at least one local ingredient, even if it is just herbs from pots on your porch. Every little bit counts!
Feel free to switch up the veggies, the recipe is very versatile. And delicious too, I might add.
Farmers' Market Frittata
Ingredients:

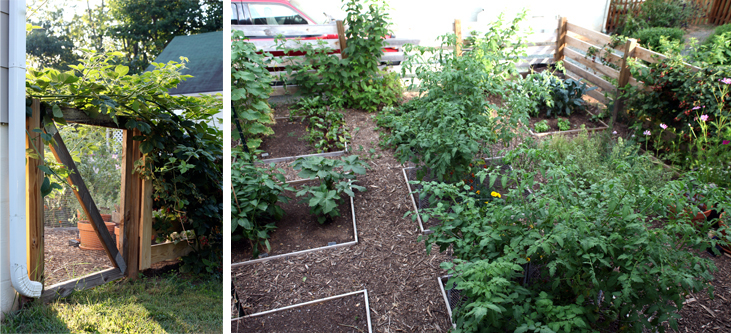 Would you look at that? The garden has gone wild! To enter one must blindly reach through the blackberries to the latch on the gate and, once the latch is found and opened, duck underneath the new growth that won’t bear fruit until next summer. Tomatoes have broken free of their cages, the strawberries are taking over our pathway,
 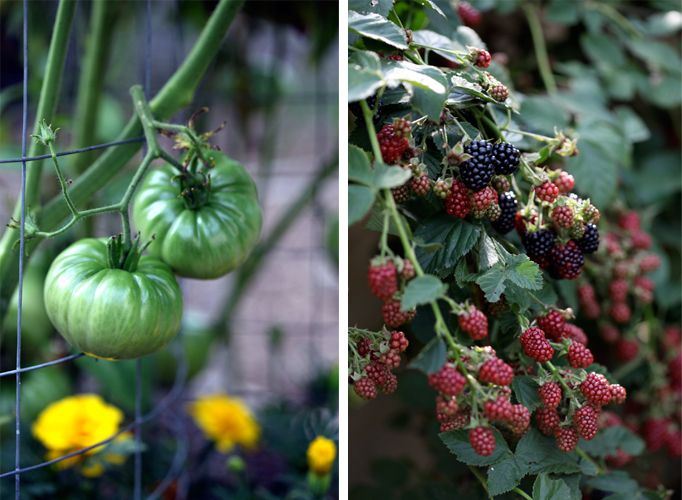 Once inside you embark on what feels like a treasure hunt, pecking through the ever-bearing strawberry patch for the tiny, sweet fruit and pulling blackberry branches aside to reveal purple berries as big as my thumb. The tomatoes are plump and just starting to ripen, moving from a deep apple green through shades of yellow, peach and pink before finally settling into deep rosy reds (romas and brandywine), golden yellows (hawaiian pineapple) or dusty purples (cherokee princess).
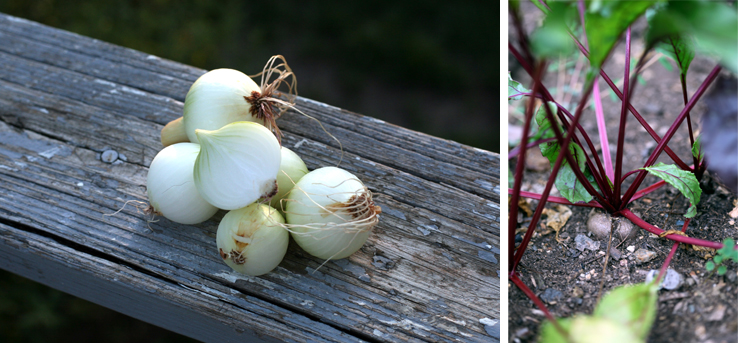 The cucumber vines have been prolific, providing us with more bounty than we’ve been able to handle, and the okra is just starting to bear its strangely-shaped pods. We’ve definitely moved from spring crops into summer, having already said our goodbyes to the
 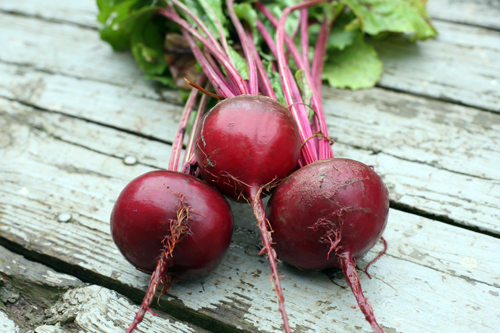 Beets are a newly acquired vegetable on my list of top ten favorites. I was introduced to them just a year or two ago, in the roasted form and mixed with a medley of potatoes, carrots, pearl onions and brussels sprouts. Having only had experience with the canned and pickled varieties in the past, I was pleasantly surprised when I took my first bite of fresh roasted beet and discovered its delightfully sweet flavor and firm texture. Ever since, beets have made it into most of our roasted veggie dishes and made select appearances in
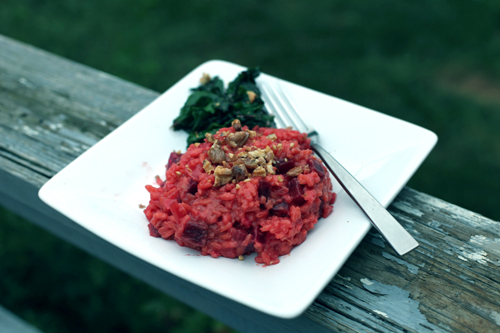
  Most recently I tried beets in a creamy risotto, and was extremely pleased with the final result. I based the recipe on a butternut squash risotto that I've been making for many years, thinking that the beets would make an easy substitute in level of sweetness and overall texture. The beets do take longer to tenderize than butternut squash, so my method resulted in a creamy risotto with bits of slightly firm beets. If you'd prefer your beets to be very soft, I suggest roasting them with a splash of olive oil for 10-20 minutes before adding them to the skillet.
Oh! And if you're lucky enough to purchase (or grow!) beets that still have their greens attached, and those greens are still crisp and brightly colored, cook them up like you would
  I think that barley would be a fantastic whole-grain substitute for the arborio rice in this recipe, we were just all out. Make sure to use pearl barley if you try it - quick-cooking barley doesn't allow for the slow release of the starches that provide the creaminess risotto is known for.
Red Beet Risotto
serves 4 as a main course
Ingredients:
 Interested in reading other posts about our garden?